This is the full developer documentation for Aspire
# Aspire
> Your stack, streamlined.
Orchestrate frontends, APIs, containers, and databases effortlessly—no rewrites, no limits. Extend Aspire to power any project. Free, open-source, and agent ready.
## Why developers choose Aspire
[Section titled “Why developers choose Aspire”](#why-developers-choose-aspire)
### [Code-centric control](#define-your-stack-in-code)
Define your stack in code—type-safe and readable. Run locally, deploy anywhere without architectural changes.
### [Modular and extensible](#explore-integrations)
Orchestrate frontends, APIs, containers, and databases with zero rewrites. Extend Aspire to fit your stack—deploy anywhere.
### [Observability from the start](#opentelemetry-developer-dashboard)
Built-in OpenTelemetry delivers logs, traces, and health checks automatically—debug faster with zero setup.
### [Flexible deployments](#local-first-production-ready)
Deploy anywhere—Kubernetes, cloud, or on-prem. Aspire adapts to your environment for consistent deployments without rewrites.
### [Your coding agents, supercharged](/get-started/ai-coding-agents/)
Aspire is the control plane for agentic dev. AI agents use your app model to understand, build, and operate your entire stack.
### [Get started quickly](/get-started/install-cli/)
Install the Aspire CLI, run `aspire init` in your repo, and fuel your agents with `aspire agent init`.
## Define your stack in code
[Section titled “Define your stack in code”](#define-your-stack-in-code)
Aspire is modular, composable, and extensible. Configure relationships, deployment options, and dev-time flags in one place. [Learn more about the `AppHost`](/get-started/app-host/).
### Build your AppHost
Toggle different features on/off to see how Aspire defines different parts of your stack.
C#TypeScript
Front endDatabaseAPI serviceContainerDeployment options
AppHost.cs
```cs
var builder = DistributedApplication.CreateBuilder(args);
// This would be a rather boring AppHost ☹️...
// Toggle the options above to see what an AppHost might look like.
// For example, select "Front end" to add a frontend service.
builder.Build().Run();
```
AppHost.cs
```cs
var builder = DistributedApplication.CreateBuilder(args);
// Add frontend service
var frontend = builder.AddViteApp("frontend", "../frontend")
.WithHttpEndpoint(env: "PORT");
builder.Build().Run();
```
AppHost.cs
```cs
var builder = DistributedApplication.CreateBuilder(args);
// Add frontend service
var frontend = builder.AddViteApp("frontend", "../frontend")
.WithHttpEndpoint(env: "PORT");
// Add custom container
var customContainer = builder.AddContainer("mycustomcontainer", "myregistry/myapp", "latest")
.WithHttpEndpoint(targetPort: 8080);
builder.Build().Run();
```
AppHost.cs
```cs
var builder = DistributedApplication.CreateBuilder(args);
// Add database
var postgres = builder.AddPostgres("db")
.AddDatabase("appdata");
// Add frontend service
var frontend = builder.AddViteApp("frontend", "../frontend")
.WithHttpEndpoint(env: "PORT");
// Add custom container
var customContainer = builder.AddContainer("mycustomcontainer", "myregistry/myapp", "latest")
.WithHttpEndpoint(targetPort: 8080);
builder.Build().Run();
```
AppHost.cs
```cs
var builder = DistributedApplication.CreateBuilder(args);
// Add API service
var api = builder.AddProject("api", "../api/ApiService.csproj");
// Add frontend service and reference the API
var frontend = builder.AddViteApp("frontend", "../frontend")
.WithHttpEndpoint(env: "PORT")
.WithReference(api);
// Add custom container
var customContainer = builder.AddContainer("mycustomcontainer", "myregistry/myapp", "latest")
.WithHttpEndpoint(targetPort: 8080);
builder.Build().Run();
```
AppHost.cs
```cs
var builder = DistributedApplication.CreateBuilder(args);
// Add database
var postgres = builder.AddPostgres("db")
.AddDatabase("appdata");
// Add API service and reference the database
var api = builder.AddProject("api", "../api/ApiService.csproj")
.WithReference(postgres);
// Add frontend service and reference the API
var frontend = builder.AddViteApp("frontend", "../frontend")
.WithHttpEndpoint(env: "PORT")
.WithReference(api);
// Add custom container
var customContainer = builder.AddContainer("mycustomcontainer", "myregistry/myapp", "latest")
.WithHttpEndpoint(targetPort: 8080);
builder.Build().Run();
```
AppHost.cs
```cs
var builder = DistributedApplication.CreateBuilder(args);
// Add database
var postgres = builder.AddPostgres("db")
.AddDatabase("appdata");
builder.Build().Run();
```
AppHost.cs
```cs
var builder = DistributedApplication.CreateBuilder(args);
// Add database
var postgres = builder.AddPostgres("db")
.AddDatabase("appdata");
// Add custom container
var customContainer = builder.AddContainer("mycustomcontainer", "myregistry/myapp", "latest")
.WithHttpEndpoint(targetPort: 8080);
builder.Build().Run();
```
AppHost.cs
```cs
var builder = DistributedApplication.CreateBuilder(args);
// Add API service
var api = builder.AddProject("api", "../api/ApiService.csproj");
builder.Build().Run();
```
AppHost.cs
```cs
var builder = DistributedApplication.CreateBuilder(args);
// Add API service
var api = builder.AddProject("api", "../api/ApiService.csproj");
// Add custom container
var customContainer = builder.AddContainer("mycustomcontainer", "myregistry/myapp", "latest")
.WithHttpEndpoint(targetPort: 8080);
builder.Build().Run();
```
AppHost.cs
```cs
var builder = DistributedApplication.CreateBuilder(args);
// Add database
var postgres = builder.AddPostgres("db")
.AddDatabase("appdata");
// Add API service and reference the database
var api = builder.AddProject("api", "../api/ApiService.csproj")
.WithReference(postgres);
// Add custom container
var customContainer = builder.AddContainer("mycustomcontainer", "myregistry/myapp", "latest")
.WithHttpEndpoint(targetPort: 8080);
builder.Build().Run();
```
AppHost.cs
```cs
var builder = DistributedApplication.CreateBuilder(args);
// Add custom container
var customContainer = builder.AddContainer("mycustomcontainer", "myregistry/myapp", "latest")
.WithHttpEndpoint(targetPort: 8080);
builder.Build().Run();
```
AppHost.cs
```cs
var builder = DistributedApplication.CreateBuilder(args);
// Add frontend service
var frontend = builder.AddViteApp("frontend", "../frontend")
.WithHttpEndpoint(env: "PORT")
.WithNpmPackageInstallation()
.PublishAsDockerFile();
builder.Build().Run();
```
AppHost.cs
```cs
var builder = DistributedApplication.CreateBuilder(args);
// Add frontend service
var frontend = builder.AddViteApp("frontend", "../frontend")
.WithHttpEndpoint(env: "PORT")
.WithNpmPackageInstallation()
.PublishAsDockerFile();
// Add custom container
var customContainer = builder.AddContainer("mycustomcontainer", "myregistry/myapp", "latest")
.WithHttpEndpoint(targetPort: 8080)
.PublishAsKubernetes();
builder.Build().Run();
```
AppHost.cs
```cs
var builder = DistributedApplication.CreateBuilder(args);
// Add database
var postgres = builder.AddAzurePostgresFlexibleServer("db")
.AddDatabase("appdata")
.WithDataVolume()
.RunAsContainer();
// Add frontend service
var frontend = builder.AddViteApp("frontend", "../frontend")
.WithHttpEndpoint(env: "PORT")
.WithNpmPackageInstallation()
.PublishAsDockerFile();
// Add custom container
var customContainer = builder.AddContainer("mycustomcontainer", "myregistry/myapp", "latest")
.WithHttpEndpoint(targetPort: 8080)
.PublishAsKubernetes();
builder.Build().Run();
```
AppHost.cs
```cs
var builder = DistributedApplication.CreateBuilder(args);
// Add API service
var api = builder.AddProject("api", "../api/ApiService.csproj")
.PublishAsAzureContainerApp();
// Add frontend service and reference the API
var frontend = builder.AddViteApp("frontend", "../frontend")
.WithHttpEndpoint(env: "PORT")
.WithReference(api)
.WithNpmPackageInstallation()
.PublishAsDockerFile();
// Add custom container
var customContainer = builder.AddContainer("mycustomcontainer", "myregistry/myapp", "latest")
.WithHttpEndpoint(targetPort: 8080)
.PublishAsKubernetes();
builder.Build().Run();
```
AppHost.cs
```cs
var builder = DistributedApplication.CreateBuilder(args);
// Add database
var postgres = builder.AddAzurePostgresFlexibleServer("db")
.AddDatabase("appdata")
.WithDataVolume()
.RunAsContainer();
// Add API service and reference the database
var api = builder.AddProject("api", "../api/ApiService.csproj")
.WithReference(postgres)
.WaitFor(postgres)
.PublishAsAzureContainerApp();
// Add frontend service and reference the API
var frontend = builder.AddViteApp("frontend", "../frontend")
.WithHttpEndpoint(env: "PORT")
.WithReference(api)
.WithNpmPackageInstallation()
.PublishAsDockerFile();
// Add custom container
var customContainer = builder.AddContainer("mycustomcontainer", "myregistry/myapp", "latest")
.WithHttpEndpoint(targetPort: 8080)
.PublishAsKubernetes();
builder.Build().Run();
```
AppHost.cs
```cs
var builder = DistributedApplication.CreateBuilder(args);
// Add database
var postgres = builder.AddAzurePostgresFlexibleServer("db")
.AddDatabase("appdata")
.WithDataVolume()
.RunAsContainer();
builder.Build().Run();
```
AppHost.cs
```cs
var builder = DistributedApplication.CreateBuilder(args);
// Add database
var postgres = builder.AddAzurePostgresFlexibleServer("db")
.AddDatabase("appdata")
.WithDataVolume()
.RunAsContainer();
// Add custom container
var customContainer = builder.AddContainer("mycustomcontainer", "myregistry/myapp", "latest")
.WithHttpEndpoint(targetPort: 8080)
.PublishAsKubernetes();
builder.Build().Run();
```
AppHost.cs
```cs
var builder = DistributedApplication.CreateBuilder(args);
// Add API service
var api = builder.AddProject("api", "../api/ApiService.csproj")
.PublishAsAzureContainerApp();
builder.Build().Run();
```
AppHost.cs
```cs
var builder = DistributedApplication.CreateBuilder(args);
// Add API service
var api = builder.AddProject("api", "../api/ApiService.csproj")
.PublishAsAzureContainerApp();
// Add custom container
var customContainer = builder.AddContainer("mycustomcontainer", "myregistry/myapp", "latest")
.WithHttpEndpoint(targetPort: 8080)
.PublishAsKubernetes();
builder.Build().Run();
```
AppHost.cs
```cs
var builder = DistributedApplication.CreateBuilder(args);
// Add database
var postgres = builder.AddAzurePostgresFlexibleServer("db")
.AddDatabase("appdata")
.WithDataVolume()
.RunAsContainer();
// Add API service and reference the database
var api = builder.AddProject("api", "../api/ApiService.csproj")
.WithReference(postgres)
.WaitFor(postgres)
.PublishAsAzureContainerApp();
// Add custom container
var customContainer = builder.AddContainer("mycustomcontainer", "myregistry/myapp", "latest")
.WithHttpEndpoint(targetPort: 8080)
.PublishAsKubernetes();
builder.Build().Run();
```
AppHost.cs
```cs
var builder = DistributedApplication.CreateBuilder(args);
// Add custom container
var customContainer = builder.AddContainer("mycustomcontainer", "myregistry/myapp", "latest")
.WithHttpEndpoint(targetPort: 8080)
.PublishAsKubernetes();
builder.Build().Run();
```
apphost.mts
```ts
import { createBuilder } from './.aspire/modules/aspire.mjs';
const builder = await createBuilder();
// This would be a rather boring AppHost ☹️...
// Toggle the options above to see what an AppHost might look like.
// For example, select "Front end" to add a frontend service.
await builder.build().run();
```
apphost.mts
```ts
import { createBuilder } from './.aspire/modules/aspire.mjs';
const builder = await createBuilder();
// Add Vite frontend
const frontend = await builder
.addViteApp("frontend", "./frontend")
.withHttpEndpoint({ env: "PORT" });
await builder.build().run();
```
apphost.mts
```ts
import { createBuilder } from './.aspire/modules/aspire.mjs';
const builder = await createBuilder();
// Add Vite frontend
const frontend = await builder
.addViteApp("frontend", "./frontend")
.withHttpEndpoint({ env: "PORT" });
// Add custom container
const customContainer = await builder
.addContainer("mycustomcontainer", "myregistry/myapp", "latest")
.withHttpEndpoint({ targetPort: 8080 });
await builder.build().run();
```
apphost.mts
```ts
import { createBuilder } from './.aspire/modules/aspire.mjs';
const builder = await createBuilder();
// Add database
const postgres = await builder
.addPostgres("db")
.addDatabase("appdata");
// Add Vite frontend
const frontend = await builder
.addViteApp("frontend", "./frontend")
.withHttpEndpoint({ env: "PORT" });
// Add custom container
const customContainer = await builder
.addContainer("mycustomcontainer", "myregistry/myapp", "latest")
.withHttpEndpoint({ targetPort: 8080 });
await builder.build().run();
```
apphost.mts
```ts
import { createBuilder } from './.aspire/modules/aspire.mjs';
const builder = await createBuilder();
// Add Express API
const api = await builder
.addNodeApp("api", "./api", "src/index.ts")
.withHttpEndpoint({ env: "PORT" });
// Add Vite frontend and reference the API
const frontend = await builder
.addViteApp("frontend", "./frontend")
.withHttpEndpoint({ env: "PORT" })
.withReference(api);
// Add custom container
const customContainer = await builder
.addContainer("mycustomcontainer", "myregistry/myapp", "latest")
.withHttpEndpoint({ targetPort: 8080 });
await builder.build().run();
```
apphost.mts
```ts
import { createBuilder } from './.aspire/modules/aspire.mjs';
const builder = await createBuilder();
// Add database
const postgres = await builder
.addPostgres("db")
.addDatabase("appdata");
// Add Express API and reference the database
const api = await builder
.addNodeApp("api", "./api", "src/index.ts")
.withHttpEndpoint({ env: "PORT" })
.withReference(postgres);
// Add Vite frontend and reference the API
const frontend = await builder
.addViteApp("frontend", "./frontend")
.withHttpEndpoint({ env: "PORT" })
.withReference(api);
// Add custom container
const customContainer = await builder
.addContainer("mycustomcontainer", "myregistry/myapp", "latest")
.withHttpEndpoint({ targetPort: 8080 });
await builder.build().run();
```
apphost.mts
```ts
import { createBuilder } from './.aspire/modules/aspire.mjs';
const builder = await createBuilder();
// Add database
const postgres = await builder
.addPostgres("db")
.addDatabase("appdata");
await builder.build().run();
```
apphost.mts
```ts
import { createBuilder } from './.aspire/modules/aspire.mjs';
const builder = await createBuilder();
// Add database
const postgres = await builder
.addPostgres("db")
.addDatabase("appdata");
// Add custom container
const customContainer = await builder
.addContainer("mycustomcontainer", "myregistry/myapp", "latest")
.withHttpEndpoint({ targetPort: 8080 });
await builder.build().run();
```
apphost.mts
```ts
import { createBuilder } from './.aspire/modules/aspire.mjs';
const builder = await createBuilder();
// Add Express API
const api = await builder
.addNodeApp("api", "./api", "src/index.ts")
.withHttpEndpoint({ env: "PORT" });
await builder.build().run();
```
apphost.mts
```ts
import { createBuilder } from './.aspire/modules/aspire.mjs';
const builder = await createBuilder();
// Add Express API
const api = await builder
.addNodeApp("api", "./api", "src/index.ts")
.withHttpEndpoint({ env: "PORT" });
// Add custom container
const customContainer = await builder
.addContainer("mycustomcontainer", "myregistry/myapp", "latest")
.withHttpEndpoint({ targetPort: 8080 });
await builder.build().run();
```
apphost.mts
```ts
import { createBuilder } from './.aspire/modules/aspire.mjs';
const builder = await createBuilder();
// Add database
const postgres = await builder
.addPostgres("db")
.addDatabase("appdata");
// Add Express API and reference the database
const api = await builder
.addNodeApp("api", "./api", "src/index.ts")
.withHttpEndpoint({ env: "PORT" })
.withReference(postgres);
// Add custom container
const customContainer = await builder
.addContainer("mycustomcontainer", "myregistry/myapp", "latest")
.withHttpEndpoint({ targetPort: 8080 });
await builder.build().run();
```
apphost.mts
```ts
import { createBuilder } from './.aspire/modules/aspire.mjs';
const builder = await createBuilder();
// Add Vite frontend
const frontend = await builder
.addViteApp("frontend", "./frontend")
.withHttpEndpoint({ env: "PORT" })
.withNpmPackageInstallation()
.publishAsDockerFile();
// Add custom container
const customContainer = await builder
.addContainer("mycustomcontainer", "myregistry/myapp", "latest")
.withHttpEndpoint({ targetPort: 8080 })
.publishAsKubernetes();
await builder.build().run();
```
apphost.mts
```ts
import { createBuilder } from './.aspire/modules/aspire.mjs';
const builder = await createBuilder();
// Add database
const postgres = await builder
.addAzurePostgresFlexibleServer("db")
.addDatabase("appdata")
.withDataVolume()
.runAsContainer();
// Add Vite frontend
const frontend = await builder
.addViteApp("frontend", "./frontend")
.withHttpEndpoint({ env: "PORT" })
.withNpmPackageInstallation()
.publishAsDockerFile();
// Add custom container
const customContainer = await builder
.addContainer("mycustomcontainer", "myregistry/myapp", "latest")
.withHttpEndpoint({ targetPort: 8080 })
.publishAsKubernetes();
await builder.build().run();
```
apphost.mts
```ts
import { createBuilder } from './.aspire/modules/aspire.mjs';
const builder = await createBuilder();
// Add Express API
const api = await builder
.addNodeApp("api", "./api", "src/index.ts")
.withHttpEndpoint({ env: "PORT" })
.publishAsAzureContainerApp();
// Add Vite frontend and reference the API
const frontend = await builder
.addViteApp("frontend", "./frontend")
.withHttpEndpoint({ env: "PORT" })
.withReference(api)
.withNpmPackageInstallation()
.publishAsDockerFile();
// Add custom container
const customContainer = await builder
.addContainer("mycustomcontainer", "myregistry/myapp", "latest")
.withHttpEndpoint({ targetPort: 8080 })
.publishAsKubernetes();
await builder.build().run();
```
apphost.mts
```ts
import { createBuilder } from './.aspire/modules/aspire.mjs';
const builder = await createBuilder();
// Add database
const postgres = await builder
.addAzurePostgresFlexibleServer("db")
.addDatabase("appdata")
.withDataVolume()
.runAsContainer();
// Add Express API and reference the database
const api = await builder
.addNodeApp("api", "./api", "src/index.ts")
.withHttpEndpoint({ env: "PORT" })
.withReference(postgres)
.waitFor(postgres)
.publishAsAzureContainerApp();
// Add Vite frontend and reference the API
const frontend = await builder
.addViteApp("frontend", "./frontend")
.withHttpEndpoint({ env: "PORT" })
.withReference(api)
.withNpmPackageInstallation()
.publishAsDockerFile();
// Add custom container
const customContainer = await builder
.addContainer("mycustomcontainer", "myregistry/myapp", "latest")
.withHttpEndpoint({ targetPort: 8080 })
.publishAsKubernetes();
await builder.build().run();
```
apphost.mts
```ts
import { createBuilder } from './.aspire/modules/aspire.mjs';
const builder = await createBuilder();
// Add database
const postgres = await builder
.addAzurePostgresFlexibleServer("db")
.addDatabase("appdata")
.withDataVolume()
.runAsContainer();
await builder.build().run();
```
apphost.mts
```ts
import { createBuilder } from './.aspire/modules/aspire.mjs';
const builder = await createBuilder();
// Add database
const postgres = await builder
.addAzurePostgresFlexibleServer("db")
.addDatabase("appdata")
.withDataVolume()
.runAsContainer();
// Add custom container
const customContainer = await builder
.addContainer("mycustomcontainer", "myregistry/myapp", "latest")
.withHttpEndpoint({ targetPort: 8080 })
.publishAsKubernetes();
await builder.build().run();
```
apphost.mts
```ts
import { createBuilder } from './.aspire/modules/aspire.mjs';
const builder = await createBuilder();
// Add Express API
const api = await builder
.addNodeApp("api", "./api", "src/index.ts")
.withHttpEndpoint({ env: "PORT" })
.publishAsAzureContainerApp();
// Add custom container
const customContainer = await builder
.addContainer("mycustomcontainer", "myregistry/myapp", "latest")
.withHttpEndpoint({ targetPort: 8080 })
.publishAsKubernetes();
await builder.build().run();
```
apphost.mts
```ts
import { createBuilder } from './.aspire/modules/aspire.mjs';
const builder = await createBuilder();
// Add database
const postgres = await builder
.addAzurePostgresFlexibleServer("db")
.addDatabase("appdata")
.withDataVolume()
.runAsContainer();
// Add Express API and reference the database
const api = await builder
.addNodeApp("api", "./api", "src/index.ts")
.withHttpEndpoint({ env: "PORT" })
.withReference(postgres)
.waitFor(postgres)
.publishAsAzureContainerApp();
// Add custom container
const customContainer = await builder
.addContainer("mycustomcontainer", "myregistry/myapp", "latest")
.withHttpEndpoint({ targetPort: 8080 })
.publishAsKubernetes();
await builder.build().run();
```
apphost.mts
```ts
import { createBuilder } from './.aspire/modules/aspire.mjs';
const builder = await createBuilder();
// Add custom container
const customContainer = await builder
.addContainer("mycustomcontainer", "myregistry/myapp", "latest")
.withHttpEndpoint({ targetPort: 8080 })
.publishAsKubernetes();
await builder.build().run();
```
Free and open source
Aspire is a developer-first, always-free, open-source platform. Join a thriving community and help shape the future of modern development.
## Multi-language support
[Section titled “Multi-language support”](#multi-language-support)
**Built for your stack**, Aspire orchestrates apps in C#, Java, Python, JavaScript, TypeScript, Go, and more—use the languages you prefer. [Explore how to model your apps](/get-started/resources/).
[Go]( "Explore Go integrations")[Python](/integrations/gallery/?search=python "Explore Python integrations")[JavaScript]( "Explore JavaScript integrations")[TypeScript]( "Explore TypeScript integrations")[Java](/integrations/gallery/?search=java "Explore Java integrations")[C#](/integrations/gallery/?search= "Explore C# integrations")[And more...](/integrations/gallery/?search= "Explore all integrations")
## Local-first, production-ready
[Section titled “Local-first, production-ready”](#local-first-production-ready)
**Built for local development**, Aspire mirrors production environments on your machine, eliminating “works on my machine” issues for smooth deployments. [Learn about pipelines and app topology](/deployment/pipelines/).
LocalTestProd
Local development with containerized services
Spin up and tear down complete staging environments for testing
Production cloud services—zero code changes
```bash
aspire run
```
```bash
aspire deploy -e test
```
```bash
aspire deploy
```
Redis
AWS ElastiCache
Redis
Shortlived container
Redis
Local container
PostgreSQL
Azure Database for PostgreSQL
PostgreSQL
Staged DB
PostgreSQL
Local container
Frontend
Azure Static Web Apps
Frontend
Dev tunnel
Frontend
Local process
API
Azure Container Apps
API
Staging environment
API
Local process
## Same model, different environments
[Section titled “Same model, different environments”](#same-model-different-environments)
Use Aspire’s CLI to spin everything up locally or create deployment artifacts during your CI/CD. [Dive in, and build your first Aspire app](/get-started/first-app/).
[Local development](/reference/cli/commands/aspire-run/)
```bash
aspire run
```
[* Runs with your local container runtime* Dashboard available on `localhost`* Uses dev secrets, volumes, dev-time config](/reference/cli/commands/aspire-run/)
[Production deployment](/reference/cli/commands/aspire-deploy/)
```bash
aspire deploy
```
[* Same app structure, deployed where you want* Use managed cloud services or your own infra* Integrates with CI/CD pipelines seamlessly](/reference/cli/commands/aspire-deploy/)
## OpenTelemetry developer dashboard
[Section titled “OpenTelemetry developer dashboard”](#opentelemetry-developer-dashboard)
**Monitor logs, metrics, and traces** in real time with the ready-to-use OpenTelemetry dashboard, integrated directly into your workflow. [Dive into the dashboard](/dashboard/).
[]()Pause video
## Explore integrations
[Section titled “Explore integrations”](#explore-integrations)
**Multi-cloud, limitless integrations** — Connect Aspire to Azure, AWS, or your own infrastructure. Tap into a vast ecosystem of integrations to power any stack, anywhere. [Discover all integrations](/integrations/).
[](/integrations/gallery/?search=garnet "Explore Garnet integrations")[](/integrations/gallery/?search=seq "Explore Seq Log Server integrations")[](/integrations/gallery/?search=adminer "Explore Adminer integrations")[](/integrations/gallery/?search=flagd "Explore flagd integrations")[](/integrations/gallery/?search=python "Explore Uv integrations")[](/integrations/gallery/?search=surrealdb "Explore SurrealDB integrations")[](/integrations/gallery/?search=ngrok "Explore ngrok integrations")[](/integrations/gallery/?search=blob "Explore Azure Blob\/Page Storage integrations")[](/integrations/gallery/?search=javascript "Explore JavaScript integrations")[](/integrations/gallery/?search=kubernetes "Explore Kubernetes integrations")[](/integrations/gallery/?search=rabbitmq "Explore RabbitMQ integrations")[](/integrations/gallery/?search=foundry "Explore Microsoft Foundry integrations")[](/integrations/gallery/?search=meilisearch "Explore Meilisearch integrations")[](/integrations/gallery/?search=sqlprojects "Explore SQL Database Projects integrations")[](/integrations/gallery/?search=aws "Explore AWS integrations")[](/integrations/gallery/?search=docker "Explore Docker integrations")[](/integrations/gallery/?search=dataapibuilder "Explore Data API Builder integrations")[](/integrations/gallery/?search=elasticsearch "Explore Elasticsearch integrations")[](/integrations/gallery/?search=functions "Explore Azure Function Apps integrations")[](/integrations/gallery/?search=operationalinsights "Explore Azure Log Analytics integrations")[](/integrations/gallery/?search=appconfig "Explore Azure App Configuration integrations")[](/integrations/gallery/?search=typescript "Explore TypeScript integrations")[](/integrations/gallery/?search=ravendb "Explore RavenDB integrations")[](/integrations/gallery/?search=table "Explore Azure Table Storage integrations")[](/integrations/gallery/?search=devtunnels "Explore Dev Tunnels integrations")[](/integrations/gallery/?search=k6 "Explore k6 integrations")[](/integrations/gallery/?search=nodejs "Explore React integrations")[](/integrations/gallery/?search=garnet "Explore Garnet integrations")[](/integrations/gallery/?search=seq "Explore Seq Log Server integrations")[](/integrations/gallery/?search=adminer "Explore Adminer integrations")[](/integrations/gallery/?search=flagd "Explore flagd integrations")[](/integrations/gallery/?search=python "Explore Uv integrations")[](/integrations/gallery/?search=surrealdb "Explore SurrealDB integrations")[](/integrations/gallery/?search=ngrok "Explore ngrok integrations")[](/integrations/gallery/?search=blob "Explore Azure Blob\/Page Storage integrations")[](/integrations/gallery/?search=javascript "Explore JavaScript integrations")[](/integrations/gallery/?search=kubernetes "Explore Kubernetes integrations")[](/integrations/gallery/?search=rabbitmq "Explore RabbitMQ integrations")[](/integrations/gallery/?search=foundry "Explore Microsoft Foundry integrations")[](/integrations/gallery/?search=meilisearch "Explore Meilisearch integrations")[](/integrations/gallery/?search=sqlprojects "Explore SQL Database Projects integrations")[](/integrations/gallery/?search=aws "Explore AWS integrations")[](/integrations/gallery/?search=docker "Explore Docker integrations")[](/integrations/gallery/?search=dataapibuilder "Explore Data API Builder integrations")[](/integrations/gallery/?search=elasticsearch "Explore Elasticsearch integrations")[](/integrations/gallery/?search=functions "Explore Azure Function Apps integrations")[](/integrations/gallery/?search=operationalinsights "Explore Azure Log Analytics integrations")[](/integrations/gallery/?search=appconfig "Explore Azure App Configuration integrations")[](/integrations/gallery/?search=typescript "Explore TypeScript integrations")[](/integrations/gallery/?search=ravendb "Explore RavenDB integrations")[](/integrations/gallery/?search=table "Explore Azure Table Storage integrations")[](/integrations/gallery/?search=devtunnels "Explore Dev Tunnels integrations")[](/integrations/gallery/?search=k6 "Explore k6 integrations")[](/integrations/gallery/?search=nodejs "Explore React integrations")
[](/integrations/gallery/?search=github "Explore GitHub integrations")[](/integrations/gallery/?search=papercut "Explore Papercut integrations")[](/integrations/gallery/?search=lavinmq "Explore LavinMQ integrations")[](/integrations/gallery/?search=bun "Explore Bun integrations")[](/integrations/gallery/?search=ollama "Explore Ollama integrations")[](/integrations/gallery/?search=python "Explore FastAPI integrations")[](/integrations/gallery/?search=queue "Explore Azure Storage Queue integrations")[](/integrations/gallery/?search=python "Explore Python integrations")[](/integrations/gallery/?search=oracle "Explore Oracle integrations")[](/integrations/gallery/?search=keycloak "Explore Keycloak integrations")[](/integrations/gallery/?search=maui "Explore .NET MAUI integrations")[](/integrations/gallery/?search=openai "Explore OpenAI integrations")[](/integrations/gallery/?search=dbgate "Explore DbGate integrations")[](/integrations/gallery/?search=nodejs "Explore Node.js integrations")[](/integrations/gallery/?search=servicebus "Explore Azure Service Bus integrations")[](/integrations/gallery/?search=azure "Explore Microsoft Azure integrations")[](/integrations/gallery/?search=search "Explore Azure Cognitive Search integrations")[](/integrations/gallery/?search=pubsub "Explore Azure Web PubSub integrations")[](/integrations/gallery/?search=mongodb "Explore MongoDB integrations")[](/integrations/gallery/?search=sql "Explore Azure SQL Server integrations")[](/integrations/gallery/?search=sql "Explore SQL Database integrations")[](/integrations/gallery/?search=sqlite "Explore SQLite integrations")[](/integrations/gallery/?search=postgresql "Explore PostgreSQL integrations")[](/integrations/gallery/?search=openai "Explore Azure OpenAI integrations")[](/integrations/gallery/?search=redis "Explore Azure Cache for Redis integrations")[](/integrations/gallery/?search=java "Explore Java integrations")[](/integrations/gallery/?search=qdrant "Explore Qdrant Vector Database integrations")[](/integrations/gallery/?search=github "Explore GitHub integrations")[](/integrations/gallery/?search=papercut "Explore Papercut integrations")[](/integrations/gallery/?search=lavinmq "Explore LavinMQ integrations")[](/integrations/gallery/?search=bun "Explore Bun integrations")[](/integrations/gallery/?search=ollama "Explore Ollama integrations")[](/integrations/gallery/?search=python "Explore FastAPI integrations")[](/integrations/gallery/?search=queue "Explore Azure Storage Queue integrations")[](/integrations/gallery/?search=python "Explore Python integrations")[](/integrations/gallery/?search=oracle "Explore Oracle integrations")[](/integrations/gallery/?search=keycloak "Explore Keycloak integrations")[](/integrations/gallery/?search=maui "Explore .NET MAUI integrations")[](/integrations/gallery/?search=openai "Explore OpenAI integrations")[](/integrations/gallery/?search=dbgate "Explore DbGate integrations")[](/integrations/gallery/?search=nodejs "Explore Node.js integrations")[](/integrations/gallery/?search=servicebus "Explore Azure Service Bus integrations")[](/integrations/gallery/?search=azure "Explore Microsoft Azure integrations")[](/integrations/gallery/?search=search "Explore Azure Cognitive Search integrations")[](/integrations/gallery/?search=pubsub "Explore Azure Web PubSub integrations")[](/integrations/gallery/?search=mongodb "Explore MongoDB integrations")[](/integrations/gallery/?search=sql "Explore Azure SQL Server integrations")[](/integrations/gallery/?search=sql "Explore SQL Database integrations")[](/integrations/gallery/?search=sqlite "Explore SQLite integrations")[](/integrations/gallery/?search=postgresql "Explore PostgreSQL integrations")[](/integrations/gallery/?search=openai "Explore Azure OpenAI integrations")[](/integrations/gallery/?search=redis "Explore Azure Cache for Redis integrations")[](/integrations/gallery/?search=java "Explore Java integrations")[](/integrations/gallery/?search=qdrant "Explore Qdrant Vector Database integrations")
[](/integrations/gallery/?search=golang%20gofeature "Explore Go integrations")[](/integrations/gallery/?search=mcpinspector "Explore MCP Inspector integrations")[](/integrations/gallery/?search=appservice "Explore Azure App Services integrations")[](/integrations/gallery/?search=minio "Explore MinIO integrations")[](/integrations/gallery/?search=powershell "Explore PowerShell integrations")[](/integrations/gallery/?search=deno "Explore Deno integrations")[](/integrations/gallery/?search=postgresql "Explore Azure Database for PostgreSQL integrations")[](/integrations/gallery/?search=valkey "Explore Valkey integrations")[](/integrations/gallery/?search=mailpit "Explore Mailpit integrations")[](/integrations/gallery/?search=keyvault "Explore Azure Key Vault integrations")[](/integrations/gallery/?search=storage "Explore Azure Storage Container integrations")[](/integrations/gallery/?search=dapr "Explore Dapr integrations")[](/integrations/gallery/?search=nats "Explore NATS Messaging integrations")[](/integrations/gallery/?search=container%20apps "Explore Azure Container Apps Environments integrations")[](/integrations/gallery/?search=activemq "Explore ActiveMQ integrations")[](/integrations/gallery/?search=mysql "Explore MySQL Connector integrations")[](/integrations/gallery/?search=golang%20feature-flags "Explore GO Feature Flag integrations")[](/integrations/gallery/?search=rust "Explore Rust integrations")[](/integrations/gallery/?search=redis "Explore Redis integrations")[](/integrations/gallery/?search=kurrentdb "Explore KurrentDB integrations")[](/integrations/gallery/?search=milvus "Explore Milvus Vector Database integrations")[](/integrations/gallery/?search=eventhubs "Explore Azure Event Hubs integrations")[](/integrations/gallery/?search=signalr "Explore Azure SignalR integrations")[](/integrations/gallery/?search=cosmos "Explore Azure Cosmos DB integrations")[](/integrations/gallery/?search=applicationinsights "Explore Azure Application Insights integrations")[](/integrations/gallery/?search=golang%20gofeature "Explore Go integrations")[](/integrations/gallery/?search=mcpinspector "Explore MCP Inspector integrations")[](/integrations/gallery/?search=appservice "Explore Azure App Services integrations")[](/integrations/gallery/?search=minio "Explore MinIO integrations")[](/integrations/gallery/?search=powershell "Explore PowerShell integrations")[](/integrations/gallery/?search=deno "Explore Deno integrations")[](/integrations/gallery/?search=postgresql "Explore Azure Database for PostgreSQL integrations")[](/integrations/gallery/?search=valkey "Explore Valkey integrations")[](/integrations/gallery/?search=mailpit "Explore Mailpit integrations")[](/integrations/gallery/?search=keyvault "Explore Azure Key Vault integrations")[](/integrations/gallery/?search=storage "Explore Azure Storage Container integrations")[](/integrations/gallery/?search=dapr "Explore Dapr integrations")[](/integrations/gallery/?search=nats "Explore NATS Messaging integrations")[](/integrations/gallery/?search=container%20apps "Explore Azure Container Apps Environments integrations")[](/integrations/gallery/?search=activemq "Explore ActiveMQ integrations")[](/integrations/gallery/?search=mysql "Explore MySQL Connector integrations")[](/integrations/gallery/?search=golang%20feature-flags "Explore GO Feature Flag integrations")[](/integrations/gallery/?search=rust "Explore Rust integrations")[](/integrations/gallery/?search=redis "Explore Redis integrations")[](/integrations/gallery/?search=kurrentdb "Explore KurrentDB integrations")[](/integrations/gallery/?search=milvus "Explore Milvus Vector Database integrations")[](/integrations/gallery/?search=eventhubs "Explore Azure Event Hubs integrations")[](/integrations/gallery/?search=signalr "Explore Azure SignalR integrations")[](/integrations/gallery/?search=cosmos "Explore Azure Cosmos DB integrations")[](/integrations/gallery/?search=applicationinsights "Explore Azure Application Insights integrations")
## User testimonials
[Section titled “User testimonials”](#user-testimonials)
**Don’t just take our word for it!** From indie hackers to enterprises, developers like you are building faster and shipping with confidence using Aspire. [Join the Aspire community](/community/).
SP
")
Aspire lets developers be developers again.
[Steven Price (Software Engineering Manager, Iceland Foods)](https://www.linkedin.com/in/steve-m-price/)
RH
")
I had someone start on a Monday morning and they were contributing code by lunch.
[Russ Harding (VP Engineering, EQengineered)](https://www.linkedin.com/in/russharding1/)
MJ
")
I was surprised by how quickly Aspire got me from idea to running services.
[Milan Jovanović (Educator & Content Creator, MJ Tech)](https://www.milanjovanovic.tech)
NU
")
I've never wanted to commit to a Microsoft technology this much.
[Nk54 (Reddit User)](https://www.reddit.com/user/Nk54)
CT
")
Hit F5 to begin — skip the setup boss fight, ship code faster.
[Craig Taylor (Principal Architect, Xbox Live)](https://www.linkedin.com/in/craig-taylor-2594895/)
SK
")
Aspire was easy to integrate with our existing container orchestration.
[Sean Killeen (VP Innovation, SCT Software)](https://www.linkedin.com/in/seankilleen/)
DC
")
OpenTelemetry out-of-the-box in the Aspire dashboard is a game changer for observability!
[Dan Clarke (Developer & Podcaster, Everstack)](https://www.danclarke.com)
## Ready for liftoff?
[Section titled “Ready for liftoff?”](#ready-for-liftoff)
Get started with Aspire by installing the CLI, then dive into the Docs to learn how to model, run, and deploy your applications.
[Get Aspire](/get-started/install-cli/)Install Aspire and streamline your workflow.
[Explore docs](/docs/)Learn how to model, run, and deploy apps with Aspire.
[Use VS Code](/get-started/aspire-vscode-extension/)Install the Aspire extension and run AppHosts from the editor.
[FAQ](/get-started/faq/)Find answers to frequently asked questions.
# 404
> — This page doesn't exist—or at least, not anymore. Perhaps the route was deprecated...or maybe it never existed at all?
[Go Back](/)
[Go Home](/)
# Certificate configuration
> Configure HTTPS endpoints and certificate trust for Aspire resources to enable secure local development, container-to-container TLS, and trusted browser connections.
Aspire provides two complementary sets of certificate APIs:
1. **HTTPS endpoint APIs**: Configure the certificates that resources use for their own HTTPS endpoints (server authentication)
2. **Certificate trust APIs**: Configure which certificates resources trust when making outbound HTTPS connections (client authentication)
Both sets of APIs work together to enable secure HTTPS communication during local development. For example, a Vite frontend might use `WithHttpsDeveloperCertificate` to serve HTTPS traffic, while also using `WithDeveloperCertificateTrust` to trust the dashboard’s OTLP endpoint certificate.
Caution
Certificate customization only applies at run time. Custom certificates aren’t included in publish or deployment artifacts.
### Why HTTPS matters
[Section titled “Why HTTPS matters”](#why-https-matters)
HTTPS is essential for protecting the security and privacy of data transmitted between services. It encrypts traffic to prevent eavesdropping, tampering, and man-in-the-middle attacks. For production environments, HTTPS is a fundamental security requirement.
However, enabling HTTPS during local development to match the production configuration presents unique challenges. Development environments typically use self-signed certificates that browsers and applications don’t trust by default. Managing these certificates across multiple services, containers, and different language runtimes can be complex and time-consuming, often creating friction in the development workflow.
Aspire simplifies HTTPS configuration for local development by providing APIs to:
* Configure HTTPS endpoints with appropriate certificates for server authentication
* Manage certificate trust so resources can communicate with services using self-signed certificates
* Automatically handle the development certificate (a per-user self-signed certificate valid only for local domains) across different resource types
## Trusting the development certificate
[Section titled “Trusting the development certificate”](#trusting-the-development-certificate)
Many of the certificate features in Aspire rely on a development certificate. Before using these features, you need to ensure that a trusted development certificate is installed on your machine.
### Using the Aspire CLI (recommended)
[Section titled “Using the Aspire CLI (recommended)”](#using-the-aspire-cli-recommended)
The preferred way to manage the development certificate is to use the [Aspire CLI](/get-started/install-cli/). When you run `aspire run`, the CLI automatically ensures the development certificate is created and trusted. No additional manual steps are required.
You can also manage certificates explicitly with the Aspire CLI:
Trust the development certificate
```bash
aspire certs trust
```
Remove and re-trust (refresh)
```bash
aspire certs clean
aspire certs trust
```
Tip
If you encounter unexpected HTTPS or certificate trust errors during local development, running `aspire certs clean` followed by `aspire certs trust` is a good first troubleshooting step.
Linux certificate trust
On Linux, the development certificate is exported to `~/.aspnet/dev-certs/trust`, but applications using OpenSSL won’t discover it unless the `SSL_CERT_DIR` environment variable includes that path. You can set `SSL_CERT_DIR` in your shell profile (\~/.bashrc, \~/.zshrc, \~/.profile, etc.):
\~/.bashrc, \~/.zshrc, or \~/.profile
```bash
# Confirm /usr/lib/ssl/certs is the correct certificate directory for
# your Linux distribution. Common alternatives include:
# /etc/ssl/certs
# /etc/pki/tls/certs
if [ -z "$SSL_CERT_DIR" ]; then
export SSL_CERT_DIR="/usr/lib/ssl/certs:$HOME/.aspnet/dev-certs/trust"
else
export SSL_CERT_DIR="$SSL_CERT_DIR:$HOME/.aspnet/dev-certs/trust"
fi
```
You may need to reload your profile or start a new terminal session for the change to take effect.
### Developer certificate for DCP communication
[Section titled “Developer certificate for DCP communication”](#developer-certificate-for-dcp-communication)
By default, Aspire uses the ASP.NET Core developer certificate to secure communication with its internal Developer Control Plane (DCP) server. This replaces the ephemeral localhost certificate that DCP would otherwise generate itself, and avoids certificate trust errors caused by that certificate not being in the system trust store.
If no trusted developer certificate is found, Aspire automatically falls back to DCP’s ephemeral certificate.
To opt out and use DCP’s default ephemeral certificate instead, set `ASPIRE_DCP_USE_DEVELOPER_CERTIFICATE` to `false` in your AppHost’s `launchSettings.json` or as an environment variable:
Properties/launchSettings.json
```json
{
"profiles": {
"https": {
"commandName": "Project",
"environmentVariables": {
"ASPIRE_DCP_USE_DEVELOPER_CERTIFICATE": "false"
}
}
}
}
```
Note
Prior to Aspire 13.4, this setting defaulted to `false` and was only supported on Windows. As of 13.4, it defaults to `true` and is supported on Windows, macOS, and Linux.
## HTTPS endpoint configuration
[Section titled “HTTPS endpoint configuration”](#https-endpoint-configuration)
HTTPS endpoint configuration determines which certificate a resource presents when serving HTTPS traffic. This is server-side certificate configuration for resources that host HTTPS/TLS endpoints.
### Default behavior
[Section titled “Default behavior”](#default-behavior)
For resources that have a certificate configuration defined with `WithHttpsCertificateConfiguration`, Aspire attempts to configure it to use the development certificate if available. This automatic configuration works for many common resource types including YARP, Redis, and Keycloak containers; Vite based JavaScript apps; and Python apps using Uvicorn.
You can control this behavior using the HTTPS endpoint APIs described below.
### Use the development certificate
[Section titled “Use the development certificate”](#use-the-development-certificate)
To explicitly configure a resource to use the development certificate for its HTTPS endpoints:
* C#
AppHost.cs
```csharp
var builder = DistributedApplication.CreateBuilder(args);
// Explicitly use the developer certificate
var nodeApp = builder.AddViteApp("frontend", "../frontend")
.WithHttpsDeveloperCertificate();
// Use developer certificate with an encrypted private key
var certPassword = builder.AddParameter("cert-password", secret: true);
var pythonApp = builder.AddUvicornApp("api", "../api", "app:main")
.WithHttpsDeveloperCertificate(certPassword);
builder.Build().Run();
```
* TypeScript
apphost.mts
```typescript
import { createBuilder } from './.aspire/modules/aspire.mjs';
const builder = await createBuilder();
// Explicitly use the developer certificate
const nodeApp = await builder.addViteApp("frontend", "../frontend")
.withHttpsDeveloperCertificate();
// Use developer certificate with an encrypted private key
const certPassword = await builder.addParameter("cert-password", { secret: true });
const pythonApp = await builder.addUvicornApp("api", "../api", "app:main")
.withHttpsDeveloperCertificate({ password: certPassword });
await builder.build().run();
```
The `WithHttpsDeveloperCertificate` method:
* Configures the resource to use the development certificate
* Only applies in run mode (local development)
* Optionally accepts a password parameter for encrypted certificate private keys
* Works with containers, Node.js, Python, and other resource types
### Use a custom certificate
[Section titled “Use a custom certificate”](#use-a-custom-certificate)
To configure a resource to use a specific X.509 certificate for HTTPS endpoints:
* C#
AppHost.cs
```csharp
using System.Security.Cryptography.X509Certificates;
var builder = DistributedApplication.CreateBuilder(args);
// Load your certificate
var certificate = new X509Certificate2("path/to/certificate.pfx", "password");
// Use the certificate for HTTPS endpoints
builder.AddContainer("api", "my-api:latest")
.WithHttpsCertificate(certificate);
// Use certificate with a password parameter
var certPassword = builder.AddParameter("cert-password", secret: true);
builder.AddNpmApp("frontend", "../frontend")
.WithHttpsCertificate(certificate, certPassword);
builder.Build().Run();
```
* TypeScript
apphost.mts
```typescript
import { createBuilder, refExpr } from './.aspire/modules/aspire.mjs';
const builder = await createBuilder();
const api = await builder.addContainer("api", {
image: "my-api",
tag: "latest",
});
api.createExecutionConfiguration()
.withArgumentsConfig()
.withEnvironmentVariablesConfig()
.withHttpsCertificateConfig(async () => ({
certificatePath: refExpr`/certs/tls.crt`,
keyPath: refExpr`/certs/tls.key`,
pfxPath: refExpr`/certs/tls.pfx`,
}));
await builder.build().run();
```
The certificate must:
* Include a private key
* Be a valid X.509 certificate
* Be appropriate for server authentication
### Disable HTTPS certificate configuration
[Section titled “Disable HTTPS certificate configuration”](#disable-https-certificate-configuration)
To prevent Aspire from configuring any HTTPS certificate for a resource:
* C#
AppHost.cs
```csharp
var builder = DistributedApplication.CreateBuilder(args);
// Disable automatic HTTPS certificate configuration
var redis = builder.AddRedis("cache")
.WithoutHttpsCertificate();
builder.Build().Run();
```
* TypeScript
apphost.mts
```typescript
import { createBuilder } from './.aspire/modules/aspire.mjs';
const builder = await createBuilder();
// Disable automatic HTTPS certificate configuration
const redis = await builder.addRedis("cache")
.withoutHttpsCertificate();
await builder.build().run();
```
Use `WithoutHttpsCertificate` when:
* The resource doesn’t support HTTPS
* You want to manually configure certificates
* The resource has its own certificate management
### Customize certificate configuration
[Section titled “Customize certificate configuration”](#customize-certificate-configuration)
For resources that need custom certificate configuration logic, use `WithHttpsCertificateConfiguration` to specify how certificate files should be passed to the resource:
* C#
AppHost.cs
```csharp
var builder = DistributedApplication.CreateBuilder(args);
builder.AddContainer("api", "my-api:latest")
.WithHttpsCertificateConfiguration(ctx =>
{
// Pass certificate paths as command line arguments
ctx.Arguments.Add("--tls-cert");
ctx.Arguments.Add(ctx.CertificatePath);
ctx.Arguments.Add("--tls-key");
ctx.Arguments.Add(ctx.KeyPath);
// Or set environment variables
ctx.EnvironmentVariables["TLS_CERT_FILE"] = ctx.CertificatePath;
ctx.EnvironmentVariables["TLS_KEY_FILE"] = ctx.KeyPath;
// Use PFX format if the resource requires it
ctx.EnvironmentVariables["TLS_PFX_FILE"] = ctx.PfxPath;
// Include password if needed
if (ctx.Password is not null)
{
ctx.EnvironmentVariables["TLS_KEY_PASSWORD"] = ctx.Password;
}
return Task.CompletedTask;
});
builder.Build().Run();
```
* TypeScript
apphost.mts
```typescript
import { createBuilder, refExpr } from './.aspire/modules/aspire.mjs';
const builder = await createBuilder();
const api = await builder.addContainer("api", {
image: "myimage",
tag: "latest",
});
api.createExecutionConfiguration()
.withArgumentsConfig()
.withEnvironmentVariablesConfig()
.withCertificateTrustConfig(async () => ({
certificateBundlePath: refExpr`/certs/ca-bundle.crt`,
certificateDirectoriesPath: refExpr`/certs`,
rootCertificatesPath: "/etc/ssl/certs",
isContainer: true,
}));
await builder.build().run();
```
The callback receives an `HttpsCertificateConfigurationCallbackAnnotationContext` that provides:
* `CertificatePath`: Path to the certificate file in PEM format
* `KeyPath`: Path to the private key file in PEM format
* `PfxPath`: Path to the certificate in PFX/PKCS#12 format
* `Password`: The password for the private key, if configured
* `Arguments`: Command line arguments list to modify
* `EnvironmentVariables`: Environment variables dictionary to modify
* `ExecutionContext`: The current execution context
* `Resource`: The resource being configured
## Certificate trust configuration
[Section titled “Certificate trust configuration”](#certificate-trust-configuration)
Certificate trust configuration determines which certificates a resource trusts when making outbound HTTPS connections. This is client-side certificate configuration.
### When to use certificate trust
[Section titled “When to use certificate trust”](#when-to-use-certificate-trust)
Certificate trust customization is valuable when:
* Resources need to trust the development certificate for local HTTPS communication
* Containerized services must communicate with the dashboard over HTTPS
* Python or Node.js applications need to trust custom certificate authorities
* You’re working with services that have specific certificate trust requirements
* Resources need to establish secure telemetry connections to the Aspire dashboard
### Development certificate trust
[Section titled “Development certificate trust”](#development-certificate-trust)
By default, Aspire attempts to add trust for the development certificate to resources that wouldn’t otherwise trust it. This enables resources to communicate with the dashboard OTLP collector endpoint over HTTPS and any other HTTPS endpoints secured by the development certificate.
You can control this behavior per resource using the `WithDeveloperCertificateTrust` API or through AppHost configuration settings.
#### Configure development certificate trust per resource
[Section titled “Configure development certificate trust per resource”](#configure-development-certificate-trust-per-resource)
To explicitly enable or disable development certificate trust for a specific resource:
* C#
AppHost.cs
```csharp
var builder = DistributedApplication.CreateBuilder(args);
// Explicitly enable development certificate trust
var nodeApp = builder.AddNpmApp("frontend", "../frontend")
.WithDeveloperCertificateTrust(trust: true);
// Disable development certificate trust
var pythonApp = builder.AddPythonApp("api", "../api", "main.py")
.WithDeveloperCertificateTrust(trust: false);
builder.Build().Run();
```
* TypeScript
apphost.mts
```typescript
import { createBuilder } from './.aspire/modules/aspire.mjs';
const builder = await createBuilder();
// Explicitly enable development certificate trust
const nodeApp = await builder.addNodeApp("frontend", "../frontend", "index.js")
.withDeveloperCertificateTrust(true);
// Disable development certificate trust
const pythonApp = await builder.addPythonApp("api", "../api", "main.py")
.withDeveloperCertificateTrust(false);
await builder.build().run();
```
### Certificate authority collections
[Section titled “Certificate authority collections”](#certificate-authority-collections)
Certificate authority collections allow you to bundle custom certificates and make them available to resources. You create a collection using the `AddCertificateAuthorityCollection` method and then reference it from resources that need to trust those certificates.
#### Create and use a certificate authority collection
[Section titled “Create and use a certificate authority collection”](#create-and-use-a-certificate-authority-collection)
AppHost.cs
```csharp
using System.Security.Cryptography.X509Certificates;
var builder = DistributedApplication.CreateBuilder(args);
// Load your custom certificates
var certificates = new X509Certificate2Collection();
certificates.ImportFromPemFile("path/to/certificate.pem");
// Create a certificate authority collection
var certBundle = builder.AddCertificateAuthorityCollection("my-bundle")
.WithCertificates(certificates);
// Apply the certificate bundle to resources
builder.AddNpmApp("my-project", "../myapp")
.WithCertificateAuthorityCollection(certBundle);
builder.Build().Run();
```
Note
This API is not yet available in TypeScript AppHosts.
In the preceding example, the certificate bundle is created with custom certificates and then applied to a Node.js application, enabling it to trust those certificates.
### Certificate trust scopes
[Section titled “Certificate trust scopes”](#certificate-trust-scopes)
Certificate trust scopes control how custom certificates interact with a resource’s default trusted certificates. Different scopes provide flexibility in managing certificate trust based on your application’s requirements.
The `WithCertificateTrustScope` API accepts a `CertificateTrustScope` value to specify the trust behavior.
#### Available trust scopes
[Section titled “Available trust scopes”](#available-trust-scopes)
Aspire supports the following certificate trust scopes:
* **Append**: Appends custom certificates to the default trusted certificates
* **Override**: Replaces the default trusted certificates with only the configured certificates
* **System**: Combines custom certificates with system root certificates and uses them to override the defaults
* **None**: Disables all custom certificate trust configuration
#### Append mode
[Section titled “Append mode”](#append-mode)
Attempts to append the configured certificates to the default trusted certificates for a given resource. This mode is useful when you want to add trust for additional certificates while maintaining trust for the system’s default certificates.
This is the default scope for most resources. For Python resources, only OTEL trust configuration will be applied in this mode.
* C#
AppHost.cs
```csharp
var builder = DistributedApplication.CreateBuilder(args);
builder.AddNodeApp("api", "../api")
.WithCertificateTrustScope(CertificateTrustScope.Append);
builder.Build().Run();
```
* TypeScript
apphost.mts
```typescript
import { createBuilder, CertificateTrustScope } from './.aspire/modules/aspire.mjs';
const builder = await createBuilder();
await builder.addNodeApp("api", "../api", "index.js")
.withCertificateTrustScope(CertificateTrustScope.Append);
await builder.build().run();
```
Note
Not all languages and runtimes support Append mode. For example, Python doesn’t natively support appending certificates to the default trust store.
#### Override mode
[Section titled “Override mode”](#override-mode)
Attempts to override a resource to only trust the configured certificates, replacing the default trusted certificates entirely. This mode is useful when you need strict control over which certificates are trusted.
AppHost.cs
```csharp
var builder = DistributedApplication.CreateBuilder(args);
var certBundle = builder.AddCertificateAuthorityCollection("custom-certs")
.WithCertificates(myCertificates);
builder.AddPythonModule("api", "./api", "uvicorn")
.WithCertificateAuthorityCollection(certBundle)
.WithCertificateTrustScope(CertificateTrustScope.Override);
builder.Build().Run();
```
Note
This API is not yet available in TypeScript AppHosts.
#### System mode
[Section titled “System mode”](#system-mode)
Attempts to combine the configured certificates with the default system root certificates and use them to override the default trusted certificates for a resource. This mode is intended to support Python and similar runtimes that don’t work well with Append mode.
This is the default scope for Python projects because Python only has mechanisms to fully override certificate trust.
* C#
AppHost.cs
```csharp
var builder = DistributedApplication.CreateBuilder(args);
builder.AddPythonApp("worker", "../worker", "main.py")
.WithCertificateTrustScope(CertificateTrustScope.System);
builder.Build().Run();
```
* TypeScript
apphost.mts
```typescript
import { createBuilder, CertificateTrustScope } from './.aspire/modules/aspire.mjs';
const builder = await createBuilder();
await builder.addPythonApp("worker", "../worker", "main.py")
.withCertificateTrustScope(CertificateTrustScope.System);
await builder.build().run();
```
#### None mode
[Section titled “None mode”](#none-mode)
Disables all custom certificate trust for the resource, causing it to rely solely on its default certificate trust behavior.
This is the default scope for .NET projects on Windows, as there’s no way to automatically change the default system store source.
* C#
AppHost.cs
```csharp
var builder = DistributedApplication.CreateBuilder(args);
builder.AddContainer("service", "myimage")
.WithCertificateTrustScope(CertificateTrustScope.None);
builder.Build().Run();
```
* TypeScript
apphost.mts
```typescript
import { createBuilder, CertificateTrustScope } from './.aspire/modules/aspire.mjs';
const builder = await createBuilder();
await builder.addContainer("service", { image: "myimage", tag: "latest" })
.withCertificateTrustScope(CertificateTrustScope.None);
await builder.build().run();
```
### Custom certificate trust configuration
[Section titled “Custom certificate trust configuration”](#custom-certificate-trust-configuration)
For advanced scenarios, you can specify custom certificate trust behavior using a callback API. This callback allows you to customize the command line arguments and environment variables required to configure certificate trust for different resource types.
#### Configure certificate trust with a callback
[Section titled “Configure certificate trust with a callback”](#configure-certificate-trust-with-a-callback)
Use `WithCertificateTrustConfiguration` to customize how certificate trust is configured for a resource:
* C#
AppHost.cs
```csharp
var builder = DistributedApplication.CreateBuilder(args);
builder.AddContainer("api", "myimage")
.WithCertificateTrustConfiguration(ctx =>
{
// Add a command line argument
ctx.Arguments.Add("--use-system-ca");
// Set environment variables with certificate paths
// CertificateBundlePath resolves to the path of the custom certificate bundle file
ctx.EnvironmentVariables["MY_CUSTOM_CERT_VAR"] = ctx.CertificateBundlePath;
// CertificateDirectoriesPath resolves to paths containing individual certificates
ctx.EnvironmentVariables["CERTS_DIR"] = ctx.CertificateDirectoriesPath;
return Task.CompletedTask;
});
builder.Build().Run();
```
* TypeScript
Note
This API is not yet available in TypeScript AppHosts.
The callback receives a `CertificateTrustConfigurationCallbackAnnotationContext` that provides:
* `Scope`: The `CertificateTrustScope` for the resource.
* `Arguments`: Command line arguments for the resource. Values can be strings or path providers like `CertificateBundlePath` or `CertificateDirectoriesPath`.
* `EnvironmentVariables`: Environment variables for configuring certificate trust. The dictionary key is the environment variable name; values can be strings or path providers. By default, includes `SSL_CERT_DIR` and may include `SSL_CERT_FILE` if Override or System scope is configured.
* `CertificateBundlePath`: A value provider that resolves to the path of a custom certificate bundle file.
* `CertificateDirectoriesPath`: A value provider that resolves to paths containing individual certificates.
Default implementations are provided for Node.js, Python, and container resources. Container resources rely on standard OpenSSL configuration options, with default values that support the majority of common Linux distributions.
#### Configure container certificate paths
[Section titled “Configure container certificate paths”](#configure-container-certificate-paths)
For container resources, you can customize where certificates are stored and accessed using `WithContainerCertificatePaths`:
AppHost.cs
```csharp
var builder = DistributedApplication.CreateBuilder(args);
builder.AddContainer("api", "myimage")
.WithContainerCertificatePaths(
customCertificatesDestination: "/custom/certs/path",
defaultCertificateBundlePaths: ["/etc/ssl/certs/ca-certificates.crt"],
defaultCertificateDirectoryPaths: ["/etc/ssl/certs"]);
builder.Build().Run();
```
Note
This API is not yet available in TypeScript AppHosts.
The `WithContainerCertificatePaths` API accepts three optional parameters:
* `customCertificatesDestination`: Overrides the base path in the container where custom certificate files are placed. If not set or set to `null`, the default path of `/usr/lib/ssl/aspire` is used.
* `defaultCertificateBundlePaths`: Overrides the path(s) in the container where a default certificate authority bundle file is located. When the `CertificateTrustScope` is Override or System, the custom certificate bundle is additionally written to these paths. If not set or set to `null`, a set of default certificate paths for common Linux distributions is used.
* `defaultCertificateDirectoryPaths`: Overrides the path(s) in the container where individual trusted certificate files are found. When the `CertificateTrustScope` is Append, these paths are concatenated with the path to the uploaded certificate artifacts. If not set or set to `null`, a set of default certificate paths for common Linux distributions is used.
Note
All desired paths must be configured in a single call to `WithContainerCertificatePaths` as only the most recent call to the API is honored.
## Common scenarios
[Section titled “Common scenarios”](#common-scenarios)
This section demonstrates common patterns for configuring HTTPS endpoints and certificate trust together.
### Configure a service with HTTPS and enable dashboard telemetry
[Section titled “Configure a service with HTTPS and enable dashboard telemetry”](#configure-a-service-with-https-and-enable-dashboard-telemetry)
A typical scenario is configuring a Node.js service to serve HTTPS traffic while also enabling it to send telemetry to the dashboard:
* C#
AppHost.cs
```csharp
var builder = DistributedApplication.CreateBuilder(args);
// Configure the service to use developer certificate for HTTPS endpoints
// and trust the developer certificate for outbound connections (like dashboard telemetry)
var frontend = builder.AddNpmApp("frontend", "../frontend")
.WithHttpsDeveloperCertificate() // Server cert for HTTPS endpoints
.WithDeveloperCertificateTrust(true); // Client trust for dashboard
builder.Build().Run();
```
* TypeScript
apphost.mts
```typescript
import { createBuilder } from './.aspire/modules/aspire.mjs';
const builder = await createBuilder();
// Configure the service to use developer certificate for HTTPS endpoints
// and trust the developer certificate for outbound connections (like dashboard telemetry)
const frontend = await builder.addNodeApp("frontend", "../frontend", "index.js")
.withHttpsDeveloperCertificate() // Server cert for HTTPS endpoints
.withDeveloperCertificateTrust(true); // Client trust for dashboard
await builder.build().run();
```
### Enable HTTPS with custom certificates
[Section titled “Enable HTTPS with custom certificates”](#enable-https-with-custom-certificates)
When working with corporate or custom CA certificates, you can configure both server and client certificates:
AppHost.cs
```csharp
using System.Security.Cryptography.X509Certificates;
var builder = DistributedApplication.CreateBuilder(args);
// Load custom certificates
var serverCert = new X509Certificate2("server-cert.pfx", "password");
var customCA = new X509Certificate2Collection();
customCA.Import("corporate-ca.pem");
var caBundle = builder.AddCertificateAuthorityCollection("corporate-certs")
.WithCertificates(customCA);
// Configure service with custom server cert and CA trust
builder.AddContainer("api", "my-api:latest")
.WithHttpsCertificate(serverCert) // Server cert for HTTPS
.WithCertificateAuthorityCollection(caBundle); // Trust corporate CA
builder.Build().Run();
```
Note
This API is not yet available in TypeScript AppHosts.
### Configure Redis with TLS
[Section titled “Configure Redis with TLS”](#configure-redis-with-tls)
Redis resources can be configured to use HTTPS (TLS) for secure connections:
* C#
AppHost.cs
```csharp
var builder = DistributedApplication.CreateBuilder(args);
// Configure Redis to use the developer certificate for TLS
var redis = builder.AddRedis("cache")
.WithHttpsDeveloperCertificate();
// Or disable TLS entirely
var redisNoTls = builder.AddRedis("cache-notls")
.WithoutHttpsCertificate();
builder.Build().Run();
```
* TypeScript
apphost.mts
```typescript
import { createBuilder } from './.aspire/modules/aspire.mjs';
const builder = await createBuilder();
// Configure Redis to use the developer certificate for TLS
const redis = await builder.addRedis("cache")
.withHttpsDeveloperCertificate();
// Or disable TLS entirely
const redisNoTls = await builder.addRedis("cache-notls")
.withoutHttpsCertificate();
await builder.build().run();
```
### Disable certificate configuration for specific resources
[Section titled “Disable certificate configuration for specific resources”](#disable-certificate-configuration-for-specific-resources)
To disable both HTTPS endpoint configuration and certificate trust for a resource that manages its own certificates:
* C#
AppHost.cs
```csharp
var builder = DistributedApplication.CreateBuilder(args);
// Disable all automatic certificate configuration
builder.AddPythonModule("api", "./api", "uvicorn")
.WithoutHttpsCertificate() // No server cert config
.WithCertificateTrustScope(CertificateTrustScope.None); // No client trust config
builder.Build().Run();
```
* TypeScript
apphost.mts
```typescript
import { createBuilder, CertificateTrustScope } from './.aspire/modules/aspire.mjs';
const builder = await createBuilder();
// Disable all automatic certificate configuration
await builder.addPythonModule("api", "./api", "uvicorn")
.withoutHttpsCertificate() // No server cert config
.withCertificateTrustScope(CertificateTrustScope.None); // No client trust config
await builder.build().run();
```
## Limitations
[Section titled “Limitations”](#limitations)
Certificate configuration has the following limitations:
* Currently supported only in run mode, not in publish mode
* Not all languages and runtimes support all trust scope modes
* Python applications don’t natively support Append mode for certificate trust
* Custom certificate configuration requires appropriate runtime support within the resource
* HTTPS endpoint APIs are marked as experimental (`ASPIRECERTIFICATES001`)
# AppHost configuration
> Configure the Aspire AppHost — environment variables, launch profiles, network ports, container runtime selection, and the options that change orchestration behavior.
The AppHost project configures and starts your distributed application. Configuration includes settings for the resource service, the [Aspire dashboard](/dashboard/overview/), and internal settings used by integrations.
AppHost configuration is provided through launch profiles:
Select your programming language
C#TypeScript
In C# AppHosts, profiles live in `launchSettings.json`:
launchSettings.json
```json
{
"$schema": "https://json.schemastore.org/launchsettings.json",
"profiles": {
"https": {
"commandName": "Project",
"dotnetRunMessages": true,
"launchBrowser": true,
"applicationUrl": "https://localhost:17134;http://localhost:15170",
"environmentVariables": {
"ASPNETCORE_ENVIRONMENT": "Development",
"DOTNET_ENVIRONMENT": "Development",
"ASPIRE_DASHBOARD_OTLP_ENDPOINT_URL": "https://localhost:21030",
"ASPIRE_RESOURCE_SERVICE_ENDPOINT_URL": "https://localhost:22057"
}
}
}
}
```
In TypeScript AppHosts, profiles live in `aspire.config.json`:
aspire.config.json
```json
{
"appHost": {
"path": "apphost.mts",
"language": "typescript/nodejs"
},
"profiles": {
"https": {
"applicationUrl": "https://localhost:17134;http://localhost:15170",
"environmentVariables": {
"ASPIRE_DASHBOARD_OTLP_ENDPOINT_URL": "https://localhost:21030",
"ASPIRE_RESOURCE_SERVICE_ENDPOINT_URL": "https://localhost:22057"
}
}
}
}
```
Note
Configuration described on this page is for the Aspire AppHost project. To configure the standalone dashboard, see [dashboard configuration](/dashboard/configuration/).
## Common configuration
[Section titled “Common configuration”](#common-configuration)
| Option | Default value | Description |
| -------------------------------------- | ------------- | --------------------------------------------------------------------------------------------------------------------------------------------------------------------------------------------------------------------------------------------------------------------------------------------------------------------------------------------------------------------------------------------------------------------------------------------------------------------------------------------------------------------------------------------------------------------------------------------------------------------------------------------------------------- |
| `ASPIRE_ALLOW_UNSECURED_TRANSPORT` | `false` | Allows communication with the AppHost without https. `ASPNETCORE_URLS` (dashboard address) and `ASPIRE_RESOURCE_SERVICE_ENDPOINT_URL` (AppHost resource service address) must be secured with HTTPS unless true. |
| `ASPIRE_CONTAINER_RUNTIME` | `docker` | Allows the user of alternative container runtimes for resources backed by containers. Possible values are `docker` (default) or `podman`. |
| `ASPIRE_DCP_USE_DEVELOPER_CERTIFICATE` | `true` | When `true` (the default), Aspire uses the ASP.NET Core developer certificate to secure the internal DCP server instead of an ephemeral certificate generated by DCP. On Windows, Aspire passes the certificate thumbprint to DCP. On macOS and Linux, Aspire passes the certificate and private key file paths (plus the thumbprint) so DCP can verify the loaded certificate. Set to `false` to opt out and use DCP’s default ephemeral certificate. If no trusted developer certificate is found, Aspire automatically falls back to the ephemeral certificate. For more information, see [Certificate configuration](/app-host/certificate-configuration/). |
| `ASPIRE_ENVIRONMENT` | `null` | Configures the AppHost environment when no higher-priority environment source is set. If no environment is configured, the AppHost uses `Production`. |
| `ASPIRE_VERSION_CHECK_DISABLED` | `false` | When set to `true`, Aspire doesn’t check for newer versions on startup. |
## AppHost environment
[Section titled “AppHost environment”](#apphost-environment)
Use `ASPIRE_ENVIRONMENT` to set the environment name used by the AppHost while it evaluates the application model. Precedence is `--environment`, `DOTNET_ENVIRONMENT`, `ASPIRE_ENVIRONMENT`, then `Production`. This doesn’t configure the dashboard’s `ASPNETCORE_ENVIRONMENT` or automatically flow to child resources; set framework-specific variables on resources as needed. For details, see [Aspire environments](/deployment/environments/).
## Version update notifications
[Section titled “Version update notifications”](#version-update-notifications)
When an Aspire app starts, it checks if a newer version of Aspire is available on NuGet. If a new version is found, a notification appears in the dashboard with the latest version number, [a link to upgrade instructions](https://aka.ms/dotnet/aspire/update-latest), and button to ignore that version in the future.
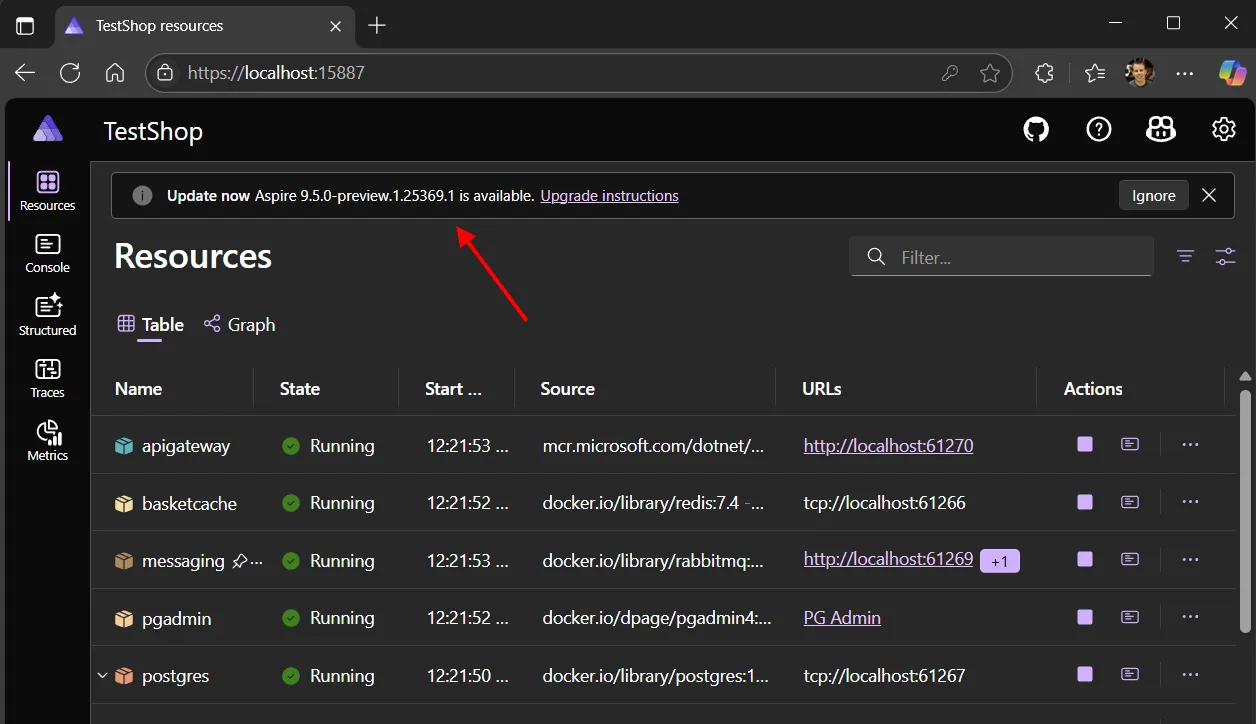
The version check runs only when:
* The dashboard is enabled (interaction service is available).
* At least 2 days have passed since the last check.
* The check hasn’t been disabled via the `ASPIRE_VERSION_CHECK_DISABLED` configuration setting.
* The app is not running in publish mode.
Updates are manual. You need to edit your project file to upgrade the Aspire SDK and package versions.
## Resource service
[Section titled “Resource service”](#resource-service)
A resource service is hosted by the AppHost. The resource service is used by the dashboard to fetch information about resources which are being orchestrated by Aspire.
| Option | Default value | Description |
| ----------------------------------------- | ---------------------------------------------- | -------------------------------------------------------------------------------------------------------------------------------------------------------------------------------------------------------------------------------------------------------------------------------------- |
| `ASPIRE_RESOURCE_SERVICE_ENDPOINT_URL` | `null` | Configures the address of the resource service hosted by the AppHost. Automatically generated with *launchSettings.json* to have a random port on localhost. For example, `https://localhost:17037`. |
| `ASPIRE_DASHBOARD_RESOURCESERVICE_APIKEY` | Automatically generated 128-bit entropy token. | The API key used to authenticate requests made to the AppHost’s resource service. The API key is required if the AppHost is in run mode, the dashboard isn’t disabled, and the dashboard isn’t configured to allow anonymous access with `ASPIRE_DASHBOARD_UNSECURED_ALLOW_ANONYMOUS`. |
## Dashboard
[Section titled “Dashboard”](#dashboard)
By default, the dashboard is automatically started by the AppHost. The dashboard supports [its own set of configuration](/dashboard/configuration/), and some settings can be configured from the AppHost.
| Option | Default value | Description |
| -------------------------------------------- | ----------------------------------------------------------- | -------------------------------------------------------------------------------------------------------------------------------------------------------------------------------------------------------------------------------------------------------------------------------------------------------------- |
| `ASPNETCORE_URLS` | `null` | Dashboard address. Must be `https` unless `ASPIRE_ALLOW_UNSECURED_TRANSPORT` or `DistributedApplicationOptions.AllowUnsecuredTransport` is true. Automatically generated with *launchSettings.json* to have a random port on localhost. The value in launch settings is set on the `applicationUrls` property. |
| `ASPNETCORE_ENVIRONMENT` | `Production` | Configures the environment the dashboard runs as. For more information, see [Use multiple environments in ASP.NET Core](https://learn.microsoft.com/aspnet/core/fundamentals/environments). |
| `ASPIRE_DASHBOARD_OTLP_ENDPOINT_URL` | `http://localhost:18889` if no gRPC endpoint is configured. | Configures the dashboard OTLP gRPC address. Used by the dashboard to receive telemetry over OTLP. Set on resources as the `OTEL_EXPORTER_OTLP_ENDPOINT` env var. The `OTEL_EXPORTER_OTLP_PROTOCOL` env var is `grpc`. Automatically generated with *launchSettings.json* to have a random port on localhost. |
| `ASPIRE_DASHBOARD_OTLP_HTTP_ENDPOINT_URL` | `null` | Configures the dashboard OTLP HTTP address. Used by the dashboard to receive telemetry over OTLP. If only `ASPIRE_DASHBOARD_OTLP_HTTP_ENDPOINT_URL` is configured then it is set on resources as the `OTEL_EXPORTER_OTLP_ENDPOINT` env var. The `OTEL_EXPORTER_OTLP_PROTOCOL` env var is `http/protobuf`. |
| `ASPIRE_DASHBOARD_CORS_ALLOWED_ORIGINS` | `null` | Overrides the CORS allowed origins configured in the dashboard. This setting replaces the default behavior of calculating allowed origins based on resource endpoints. |
| `ASPIRE_DASHBOARD_UNSECURED_ALLOW_ANONYMOUS` | `false` | Configures the dashboard to not use authentication and accept anonymous access. Sets frontend, OTLP, MCP, and API auth modes to `Unsecured`. |
| `ASPIRE_DASHBOARD_FRONTEND_BROWSERTOKEN` | Automatically generated 128-bit entropy token. | Configures the frontend browser token. This is the value that must be entered to access the dashboard when the auth mode is BrowserToken. If no browser token is specified then a new token is generated each time the AppHost is launched. |
| `ASPIRE_DASHBOARD_TELEMETRY_OPTOUT` | `false` | Configures the dashboard to never send [usage telemetry](/dashboard/microsoft-collected-dashboard-telemetry/). |
| `ASPIRE_DASHBOARD_AI_DISABLED` | `true` | Reserved for future use. The in-dashboard GitHub Copilot UI was removed in Aspire 13.3. AI coding agents can still access telemetry data via the [Aspire CLI and MCP server](/dashboard/ai-coding-agents/). |
| `ASPIRE_DASHBOARD_API_ENABLED` | `true` | Enables the dashboard [telemetry API](/dashboard/configuration/#api) (`/api/telemetry/*`) endpoints. The AppHost always sets this to `true`. |
| `ASPIRE_DASHBOARD_FORWARDEDHEADERS_ENABLED` | `false` | Enables the Forwarded headers middleware that replaces the scheme and host values on the Request context with the values coming from the `X-Forwarded-Proto` and `X-Forwarded-Host` headers. |
## Internal
[Section titled “Internal”](#internal)
Internal settings are used by the AppHost and integrations. Internal settings aren’t designed to be configured directly.
| Option | Default value | Description |
| ---------------------------------- | ----------------------------------------------------------------------------------------------------------------------- | ---------------------------------------------------------------------------------------------------------------------------------------------------------------------------------------------------------------------------------------------------------------------------------------------------------------------------------------------------------------------------------------- |
| `AppHost:Directory` | The content root if there’s no project. | Directory of the project where the AppHost is located. Accessible from the `IDistributedApplicationBuilder.AppHostDirectory`. |
| `AppHost:Path` | The directory combined with the application name. | The path to the AppHost. It combines the directory with the application name. |
| `AppHost:Sha256` | It is created from the AppHost name when the AppHost is in publish mode. Otherwise it is created from the AppHost path. | Hex encoded hash for the current application. The hash is based on the location of the app on the current machine so it is stable between launches of the AppHost. |
| `AppHost:OtlpApiKey` | Automatically generated 128-bit entropy token. | The API key used to authenticate requests sent to the dashboard OTLP service. The value is present if needed: the AppHost is in run mode, the dashboard isn’t disabled, and the dashboard isn’t configured to allow anonymous access with `ASPIRE_DASHBOARD_UNSECURED_ALLOW_ANONYMOUS`. |
| `AppHost:DashboardApiKey` | Automatically generated 128-bit entropy token. | The API key used to authenticate requests to the dashboard telemetry API. Also used as a fallback for MCP authentication if `AppHost:McpApiKey` is not set. The value is present if needed: the AppHost is in run mode, the dashboard isn’t disabled, and the dashboard isn’t configured to allow anonymous access. |
| `AppHost:BrowserToken` | Automatically generated 128-bit entropy token. | The browser token used to authenticate browsing to the dashboard when it is launched by the AppHost. The browser token can be set by `ASPIRE_DASHBOARD_FRONTEND_BROWSERTOKEN`. The value is present if needed: the AppHost is in run mode, the dashboard isn’t disabled, and the dashboard isn’t configured to allow anonymous access with `ASPIRE_DASHBOARD_UNSECURED_ALLOW_ANONYMOUS`. |
| `AppHost:ResourceService:AuthMode` | `ApiKey`. If `ASPIRE_DASHBOARD_UNSECURED_ALLOW_ANONYMOUS` is true then the value is `Unsecured`. | The authentication mode used to access the resource service. The value is present if needed: the AppHost is in run mode and the dashboard isn’t disabled. |
| `AppHost:ResourceService:ApiKey` | Automatically generated 128-bit entropy token. | The API key used to authenticate requests made to the AppHost’s resource service. The API key can be set by `ASPIRE_DASHBOARD_RESOURCESERVICE_APIKEY`. The value is present if needed: the AppHost is in run mode, the dashboard isn’t disabled, and the dashboard isn’t configured to allow anonymous access with `ASPIRE_DASHBOARD_UNSECURED_ALLOW_ANONYMOUS`. |
## Advanced orchestration properties
[Section titled “Advanced orchestration properties”](#advanced-orchestration-properties)
Caution
The following MSBuild properties and command-line arguments are intended for internal use by the Aspire SDK and tooling. You should not need to set these manually under normal circumstances. Incorrectly configuring these values can break your AppHost.
### DcpCliPath
[Section titled “DcpCliPath”](#dcpclipath)
The `DcpCliPath` property specifies the path to the **Developer Control Plane (DCP)** executable. The DCP is the core orchestration engine that Aspire uses to run and manage distributed application resources locally during development.
#### How it works
[Section titled “How it works”](#how-it-works)
When you use the [Aspire SDK](/get-started/aspire-sdk/), the build system automatically:
1. Imports the platform-specific `Aspire.Hosting.Orchestration` NuGet package (for example, `Aspire.Hosting.Orchestration.win-x64`).
2. Sets `DcpCliPath` to point to the `dcp` executable within that package.
3. Embeds this path as assembly metadata in your compiled AppHost.
At runtime, the AppHost reads this metadata to locate and start the DCP process, which then orchestrates your application’s resources.
#### Override options
[Section titled “Override options”](#override-options)
In rare cases, you may need to override the default DCP path:
| Method | Example |
| --------------------- | --------------------------------------------- |
| MSBuild property | `C:\path\to\dcp.exe` |
| Command-line argument | `--dcp-cli-path /path/to/dcp` |
| Configuration | `DcpPublisher:CliPath` |
#### When to use
[Section titled “When to use”](#when-to-use)
You might override `DcpCliPath` in these scenarios:
* **Aspire contributors**: Testing with a custom or debug build of DCP when developing Aspire itself.
* **CI/CD pipelines**: Non-standard SDK layouts where automatic discovery doesn’t work.
* **Troubleshooting**: Temporarily pointing to a specific DCP version to diagnose issues.
Tip
If your AppHost fails to start with an error about missing DCP or orchestration dependencies, ensure you have the [Aspire SDK](/get-started/aspire-sdk/) properly configured rather than manually setting `DcpCliPath`.
# Container files
> Inject files and directories into Aspire container resources at development and publish time using WithContainerFiles, with options for source paths and permissions.
Aspire provides APIs to inject files and directories into containers, enabling you to configure containerized resources with custom configuration files, scripts, certificates, and other assets. There are two complementary APIs:
* **`WithContainerFiles`**: Injects files into containers at development time when they start during `aspire run`.
* **`PublishWithContainerFiles`**: Copies files from one resource’s container into another resource’s container as build artifacts at publish time during `aspire publish`.
## Inject files at development time
[Section titled “Inject files at development time”](#inject-files-at-development-time)
The `WithContainerFiles` extension method creates or updates files and directories inside a container at a specified destination path. It supports three approaches depending on your needs: inline entries for declarative file definitions, a source path for copying from the host file system, and an async callback for dynamic file generation.
Caution
`WithContainerFiles` is primarily intended for development-time configuration and is not supported at publish time. To inject files into containers during publish, use [`PublishWithContainerFiles`](#inject-files-at-publish-time) instead.
### Inline entries
[Section titled “Inline entries”](#inline-entries)
Use the inline entries overload to declaratively define files and directories using `ContainerFileSystemItem` objects. This is useful when file contents are known at build time or can be expressed as string literals.
* C#
AppHost.cs
```csharp
var builder = DistributedApplication.CreateBuilder(args);
builder.AddContainer("myapp", "myapp:latest")
.WithContainerFiles("/app/config", [
new ContainerFile
{
Name = "appsettings.json",
Contents = """
{
"Logging": {
"LogLevel": {
"Default": "Information"
}
}
}
"""
},
new ContainerDirectory
{
Name = "scripts",
Entries = [
new ContainerFile
{
Name = "init.sh",
Contents = "#!/bin/bash\necho 'Initializing...'",
Mode = UnixFileMode.UserRead
| UnixFileMode.UserWrite
| UnixFileMode.UserExecute
}
]
}
]);
builder.Build().Run();
```
* TypeScript
Note
The `withContainerFiles` API is not yet available in the TypeScript AppHost SDK.
In the preceding example:
* A JSON configuration file is created at `/app/config/appsettings.json` with the specified contents.
* A nested `scripts` directory is created at `/app/config/scripts/` containing an executable shell script.
### Source path
[Section titled “Source path”](#source-path)
Use the source path overload to copy files from a directory on the host machine into the container. This is useful when you have existing configuration files or assets on disk.
* C#
AppHost.cs
```csharp
var builder = DistributedApplication.CreateBuilder(args);
builder.AddContainer("myapp", "myapp:latest")
.WithContainerFiles("/app/config", "./config-files");
builder.Build().Run();
```
* TypeScript
apphost.mts
```typescript
import { createBuilder } from './.aspire/modules/aspire.mjs';
const builder = await createBuilder();
const frontend = await builder.addViteApp("frontend", "../frontend");
await frontend.withContainerFilesSource("/app/dist");
const api = await builder.addProject("api", "../Api/Api.csproj");
await api.publishWithContainerFiles(frontend, "./wwwroot");
await builder.build().run();
```
Unless the source path is a rooted (absolute) path, it’s interpreted as relative to the AppHost project directory. All files in the source directory are copied to the destination path in the container at startup.
### Async callback
[Section titled “Async callback”](#async-callback)
Use the callback overload to generate files dynamically when the container starts. The callback receives a `ContainerFileSystemCallbackContext` that provides access to the `IServiceProvider` and the resource’s `IResource` model, enabling you to resolve services or inspect the app model.
* C#
AppHost.cs
```csharp
var builder = DistributedApplication.CreateBuilder(args);
builder.AddContainer("worker", "worker:latest")
.WithContainerFiles("/app/config",
async (context, cancellationToken) =>
{
var config = new
{
MachineName = Environment.MachineName,
Timestamp = DateTime.UtcNow
};
return
[
new ContainerFile
{
Name = "runtime-config.json",
Contents = JsonSerializer.Serialize(config)
}
];
});
builder.Build().Run();
```
* TypeScript
Note
The `withContainerFiles` API is not yet available in the TypeScript AppHost SDK.
The callback is invoked each time the container starts, so the generated files always reflect the current state.
## File types
[Section titled “File types”](#file-types)
The `WithContainerFiles` API uses a type hierarchy rooted at the abstract `ContainerFileSystemItem` class. Each type represents a different kind of file system entry.
### ContainerFile
[Section titled “ContainerFile”](#containerfile)
`ContainerFile` represents a standard file. Set either `Contents` (a string) or `SourcePath` (an absolute path on the host) to provide the file data — the two are mutually exclusive.
AppHost.cs
```csharp
// File with inline contents
var configYaml = new ContainerFile
{
Name = "config.yaml",
Contents = "key: value"
};
// File sourced from the host file system
var dataCsv = new ContainerFile
{
Name = "data.csv",
SourcePath = "/path/to/data.csv"
};
```
Set `ContinueOnError` to `true` to allow the container to start even if creating this particular file fails:
AppHost.cs
```csharp
var optionalJson = new ContainerFile
{
Name = "optional-config.json",
Contents = "{}",
ContinueOnError = true
};
```
### ContainerDirectory
[Section titled “ContainerDirectory”](#containerdirectory)
`ContainerDirectory` represents a directory that can contain nested `ContainerFileSystemItem` entries, allowing you to build arbitrary directory trees.
AppHost.cs
```csharp
var certsDir = new ContainerDirectory
{
Name = "certs",
Entries = [
new ContainerFile
{
Name = "ca.pem",
SourcePath = "/path/to/ca.pem"
},
new ContainerDirectory
{
Name = "private",
Entries = [
new ContainerFile
{
Name = "server.key",
SourcePath = "/path/to/server.key",
Mode = UnixFileMode.UserRead
}
]
}
]
};
```
You can also populate a `ContainerDirectory` from files on disk using the static `GetFileSystemItemsFromPath` method:
AppHost.cs
```csharp
var assetsDir = new ContainerDirectory
{
Name = "assets",
Entries = ContainerDirectory.GetFileSystemItemsFromPath(
"/path/to/assets",
searchOptions: SearchOption.AllDirectories)
};
```
### ContainerOpenSSLCertificateFile
[Section titled “ContainerOpenSSLCertificateFile”](#containeropensslcertificatefile)
`ContainerOpenSSLCertificateFile` represents a PEM-encoded public certificate. In addition to placing the certificate file in the container, Aspire automatically creates an OpenSSL-compatible symlink (`[subject hash].[n]`) in the same directory — equivalent to running `openssl rehash`. This enables containers that use OpenSSL for certificate validation to discover the certificate automatically.
* C#
AppHost.cs
```csharp
builder.AddContainer("myapp", "myapp:latest")
.WithContainerFiles("/certs", [
new ContainerOpenSSLCertificateFile
{
Name = "ca-cert.pem",
Contents = pemCertificateString
}
]);
```
* TypeScript
Note
The `withContainerFiles` API is not yet available in the TypeScript AppHost SDK.
## File permissions and ownership
[Section titled “File permissions and ownership”](#file-permissions-and-ownership)
All `WithContainerFiles` overloads accept optional parameters to control file ownership and permissions.
### Owner and group
[Section titled “Owner and group”](#owner-and-group)
The `defaultOwner` and `defaultGroup` parameters set the default UID and GID applied to all created files and directories. Both default to `0` (root) when not specified. You can override ownership on individual items using the `Owner` and `Group` properties on any `ContainerFileSystemItem`.
* C#
AppHost.cs
```csharp
builder.AddContainer("myapp", "myapp:latest")
.WithContainerFiles("/app/data",
[
new ContainerFile
{
Name = "shared.txt",
Contents = "shared data"
},
new ContainerFile
{
Name = "user-only.txt",
Contents = "private data",
Owner = 1000,
Group = 1000
}
],
defaultOwner: 33, // www-data
defaultGroup: 33);
```
* TypeScript
Note
The `withContainerFiles` API is not yet available in the TypeScript AppHost SDK.
In this example, `shared.txt` inherits the default owner/group of `33`, while `user-only.txt` overrides with UID/GID `1000`.
### Umask
[Section titled “Umask”](#umask)
The `umask` parameter controls default permissions by subtracting (masking) permission bits from the base defaults. Without an explicit `Mode` set on an item:
* **Directories** start with `0777` (read/write/execute for all) and have the umask subtracted
* **Files** start with `0666` (read/write for all) and have the umask subtracted
The default umask is `0022`, which results in:
* Directories: `0755` (owner: rwx, group: r-x, others: r-x)
* Files: `0644` (owner: rw-, group: r—, others: r—)
You can set `Mode` directly on individual items to override the umask-based default:
* C#
AppHost.cs
```csharp
builder.AddContainer("myapp", "myapp:latest")
.WithContainerFiles("/app/scripts",
[
new ContainerFile
{
Name = "run.sh",
Contents = "#!/bin/bash\necho 'Running'",
Mode = UnixFileMode.UserRead
| UnixFileMode.UserWrite
| UnixFileMode.UserExecute
}
],
umask: UnixFileMode.OtherRead
| UnixFileMode.OtherWrite
| UnixFileMode.OtherExecute);
```
* TypeScript
Note
The `withContainerFiles` API is not yet available in the TypeScript AppHost SDK.
### Persistent containers
[Section titled “Persistent containers”](#persistent-containers)
For containers with `ContainerLifetime.Persistent`, changing the contents of container file entries causes the container to be recreated. Ensure any data written through `WithContainerFiles` is idempotent for a given app model configuration to avoid unintended container restarts.
## Inject files at publish time
[Section titled “Inject files at publish time”](#inject-files-at-publish-time)
The `PublishWithContainerFiles` method copies files from one resource’s container into another resource’s container during `aspire publish`. This is the preferred approach for injecting files into containers at publish time.
A key use case is embedding single-page application (SPA) or static JavaScript frontends into a reverse proxy or web server container for production deployment. During development, frontend apps like Vite or React typically run as standalone dev servers. In production, however, the compiled static assets are often served by a backend API or a dedicated web server like Nginx. `PublishWithContainerFiles` bridges this gap by copying the built frontend output into the serving container as part of the publish process — no manual file copying or multi-stage Dockerfile required.
### Embed a frontend in a backend
[Section titled “Embed a frontend in a backend”](#embed-a-frontend-in-a-backend)
* C#
AppHost.cs
```csharp
var builder = DistributedApplication.CreateBuilder(args);
var frontend = builder.AddViteApp("frontend", "../frontend");
var api = builder.AddProject("api")
.PublishWithContainerFiles(frontend, "./wwwroot");
builder.Build().Run();
```
* TypeScript
apphost.mts
```typescript
import { createBuilder } from './.aspire/modules/aspire.mjs';
const builder = await createBuilder();
const frontend = await builder.addViteApp("frontend", "../frontend");
const api = await builder.addProject("api", "./Api/Api.csproj")
.publishWithContainerFiles(frontend, "./wwwroot");
await builder.build().run();
```
In this example:
1. The `frontend` resource builds inside its container, producing compiled JavaScript, CSS, and HTML.
2. During publish, Aspire copies those files from the `frontend` container into the `api` container at `./wwwroot`.
3. The resulting `api` container includes both the API code and the frontend static assets, ready to serve the full application.
### Serve a frontend from YARP
[Section titled “Serve a frontend from YARP”](#serve-a-frontend-from-yarp)
You can also embed frontend assets into a dedicated reverse proxy container:
* C#
AppHost.cs
```csharp
var builder = DistributedApplication.CreateBuilder(args);
var frontend = builder.AddViteApp("frontend", "../frontend");
var nginx = builder.AddYarp("gateway")
.PublishWithStaticFiles(frontend);
builder.Build().Run();
```
* TypeScript
apphost.mts
```typescript
import { createBuilder } from './.aspire/modules/aspire.mjs';
const builder = await createBuilder();
const frontend = await builder.addViteApp("frontend", "../frontend");
const nginx = await builder.addYarp("gateway")
.publishWithStaticFiles(frontend);
await builder.build().run();
```
This produces a self-contained Nginx container that serves the frontend application, with no external volume mounts or runtime file copying needed.
`PublishWithContainerFiles` only applies in publish mode — it has no effect during `aspire run`. The destination resource must implement `IContainerFilesDestinationResource` (such as `ProjectResource`), and the source resource must implement `IResourceWithContainerFiles`.
### Customize the source path
[Section titled “Customize the source path”](#customize-the-source-path)
By default, the source resource exports files from its container based on its configured output paths. Use `WithContainerFilesSource` to specify which path inside the source container to copy from:
* C#
AppHost.cs
```csharp
var frontend = builder.AddViteApp("frontend", "../frontend")
.WithContainerFilesSource("/app/dist");
var api = builder.AddProject("api")
.PublishWithContainerFiles(frontend, "./wwwroot");
```
* TypeScript
Note
The `withContainerFiles` API is not yet available in the TypeScript AppHost SDK.
Use `ClearContainerFilesSources` to remove any previously configured source paths before adding new ones.
## See also
[Section titled “See also”](#see-also)
* [Certificate configuration](/app-host/certificate-configuration/)
* [Add Dockerfiles to your app model](/app-host/withdockerfile/)
* [Resource lifetimes](/app-host/resource-lifetimes/)
# Container registry configuration
> Configure container registries for Aspire — generic registries, Docker Hub, Azure Container Registry, GitHub Container Registry, and per-resource image tagging.
Aspire 13.1 introduced explicit container registry configuration, giving developers control over where and when container images are pushed during deployment. This article explains how to configure container registries for your Aspire applications.
## Container registry configuration
[Section titled “Container registry configuration”](#container-registry-configuration)
When deploying Aspire applications to production environments, your containerized services need to be pushed to a container registry. Prior to Aspire 13.1, registry configuration was often implicit, making it difficult to control and understand the deployment process. The new `ContainerRegistryResource` provides explicit configuration for:
* **Generic container registries** — DockerHub, GitHub Container Registry (GHCR), Harbor, or any Docker-compatible registry
* **Azure Container Registry** — First-class support with automatic credential management
* **Pipeline integration** — Control when images are built and pushed using `aspire do push`
* **Authentication** — Configure registry credentials securely
## Generic container registries
[Section titled “Generic container registries”](#generic-container-registries)
Caution
This API is experimental and may change in future releases. Use diagnostic code `ASPIRECOMPUTE003` to suppress the experimental warning. For more information, see [ASPIRECOMPUTE003](/diagnostics/aspirecompute003/).
Use the `AddContainerRegistry` method to configure a generic container registry for your application. This works with any Docker-compatible registry including DockerHub, GitHub Container Registry, Harbor, and private registries.
### Basic usage
[Section titled “Basic usage”](#basic-usage)
The following example configures a container registry and associates it with a project resource:
* C#
AppHost.cs
```csharp
var builder = DistributedApplication.CreateBuilder(args);
// Add a container registry
var registry = builder.AddContainerRegistry("myregistry", "registry.example.com");
// Associate the registry with a project
var api = builder.AddProject("api")
.WithContainerRegistry(registry);
builder.Build().Run();
```
* TypeScript
apphost.mts
```typescript
import { createBuilder } from './.aspire/modules/aspire.mjs';
const builder = await createBuilder();
// Add a container registry
const registry = await builder.addContainerRegistry("myregistry", "registry.example.com");
// Associate the registry with a project
const api = await builder.addProject("api", "../Api/Api.csproj");
await api.withContainerRegistry(registry);
await builder.build().run();
```
The preceding code:
* Creates a container registry resource pointing to `registry.example.com`.
* Associates the registry with the `api` project.
* When deploying, the `api` project will be built as a container image and pushed to the specified registry.
### DockerHub example
[Section titled “DockerHub example”](#dockerhub-example)
To push images to DockerHub, specify `docker.io` as the registry endpoint:
* C#
AppHost.cs
```csharp
var builder = DistributedApplication.CreateBuilder(args);
var registry = builder.AddContainerRegistry("dockerhub", "docker.io");
var api = builder.AddProject("api")
.WithContainerRegistry(registry);
```
* TypeScript
apphost.mts
```typescript
import { createBuilder } from './.aspire/modules/aspire.mjs';
const builder = await createBuilder();
const registry = await builder.addContainerRegistry("dockerhub", "docker.io");
const api = await builder.addProject("api", "../Api/Api.csproj");
await api.withContainerRegistry(registry);
```
### GitHub Container Registry example
[Section titled “GitHub Container Registry example”](#github-container-registry-example)
To push images to GitHub Container Registry (GHCR):
* C#
AppHost.cs
```csharp
var builder = DistributedApplication.CreateBuilder(args);
var registry = builder.AddContainerRegistry("ghcr", "ghcr.io");
var api = builder.AddProject("api")
.WithContainerRegistry(registry);
```
* TypeScript
apphost.mts
```typescript
import { createBuilder } from './.aspire/modules/aspire.mjs';
const builder = await createBuilder();
const registry = await builder.addContainerRegistry("ghcr", "ghcr.io");
const api = await builder.addProject("api", "../Api/Api.csproj");
await api.withContainerRegistry(registry);
```
### Private registry example
[Section titled “Private registry example”](#private-registry-example)
For private registries, provide the full registry URL:
* C#
AppHost.cs
```csharp
var builder = DistributedApplication.CreateBuilder(args);
var registry = builder.AddContainerRegistry(
"private-registry",
"registry.mycompany.com:5000");
var api = builder.AddProject("api")
.WithContainerRegistry(registry);
```
* TypeScript
apphost.mts
```typescript
import { createBuilder } from './.aspire/modules/aspire.mjs';
const builder = await createBuilder();
const registry = await builder.addContainerRegistry(
"private-registry",
"registry.mycompany.com:5000");
const api = await builder.addProject("api", "../Api/Api.csproj");
await api.withContainerRegistry(registry);
```
## Authentication and credentials
[Section titled “Authentication and credentials”](#authentication-and-credentials)
Container registries typically require authentication for pushing images. You can configure credentials using parameters and secrets.
### Using parameters for registry credentials
[Section titled “Using parameters for registry credentials”](#using-parameters-for-registry-credentials)
Parameters allow you to provide registry configuration dynamically:
* C#
AppHost.cs
```csharp
var builder = DistributedApplication.CreateBuilder(args);
var registryEndpoint = builder.AddParameter("registry-endpoint");
var registryRepository = builder.AddParameter("registry-repository");
var registry = builder.AddContainerRegistry(
"myregistry",
registryEndpoint,
registryRepository);
var api = builder.AddProject("api")
.WithContainerRegistry(registry);
```
* TypeScript
apphost.mts
```typescript
import { createBuilder } from './.aspire/modules/aspire.mjs';
const builder = await createBuilder();
const registryEndpoint = await builder.addParameter("registry-endpoint");
const registryRepository = await builder.addParameter("registry-repository");
const registry = await builder.addContainerRegistry(
"myregistry",
registryEndpoint,
registryRepository);
const api = await builder.addProject("api", "../Api/Api.csproj");
await api.withContainerRegistry(registry);
```
For more information about parameters, see [External parameters](/fundamentals/external-parameters/).
### Configuring credentials
[Section titled “Configuring credentials”](#configuring-credentials)
Registry credentials should be configured through your deployment environment:
#### Docker login
[Section titled “Docker login”](#docker-login)
Before pushing images, ensure you’re authenticated with the registry:
Docker login
```bash
docker login registry.example.com
```
For DockerHub:
DockerHub login
```bash
docker login docker.io -u username
```
For GitHub Container Registry:
GHCR login
```bash
echo $GITHUB_TOKEN | docker login ghcr.io -u USERNAME --password-stdin
```
#### CI/CD configuration
[Section titled “CI/CD configuration”](#cicd-configuration)
In CI/CD environments (GitHub Actions, Azure Pipelines, and so on), configure credentials using secrets:
GitHub Actions example
```yaml
- name: Login to GitHub Container Registry
uses: docker/login-action@v3
with:
registry: ghcr.io
username: ${{ github.actor }}
password: ${{ secrets.GITHUB_TOKEN }}
- name: Push images
run: aspire do push
```
## Azure Container Registry
[Section titled “Azure Container Registry”](#azure-container-registry)
Azure Container Registry (ACR) provides first-class integration with Aspire, with automatic credential management and parallel provisioning.
### Explicit ACR configuration
[Section titled “Explicit ACR configuration”](#explicit-acr-configuration)
Aspire 13.1 introduces explicit container registry configuration for Azure Container Apps environments:
* C#
AppHost.cs
```csharp
var builder = DistributedApplication.CreateBuilder(args);
var environment = builder.AddAzureContainerAppEnvironment("myenv");
var api = builder.AddProject("api")
.WithContainerRegistry(environment);
builder.Build().Run();
```
* TypeScript
apphost.mts
```typescript
import { createBuilder } from './.aspire/modules/aspire.mjs';
const builder = await createBuilder();
const environment = await builder.addAzureContainerAppEnvironment("myenv");
const api = await builder.addProject("api", "../Api/Api.csproj");
await api.withContainerRegistry(environment);
await builder.build().run();
```
In the preceding example:
* The code creates an Azure Container Apps environment with an associated ACR.
* The ACR is provisioned in parallel with that environment.
* Images are pushed as soon as the registry is available.
* Credentials are automatically managed through Azure authentication.
Note
Prior to Aspire 13.1, ACR was provisioned implicitly as part of the Container Apps environment. The explicit configuration provides better control and visibility into the deployment process.
For more information, see [Azure Container Registry integration](/integrations/cloud/azure/azure-container-registry/azure-container-registry-get-started/).
### Using an existing ACR
[Section titled “Using an existing ACR”](#using-an-existing-acr)
To use an existing Azure Container Registry, call the `PublishAsExisting` method when you add the ACR:
* C#
AppHost.cs
```csharp
var builder = DistributedApplication.CreateBuilder(args);
var registryName = builder.AddParameter("registryName");
var rgName = builder.AddParameter("rgName");
var acr = builder.AddAzureContainerRegistry("my-acr")
.PublishAsExisting(registryName, rgName);
builder.AddAzureContainerAppEnvironment("env")
.WithAzureContainerRegistry(acr);
var api = builder.AddProject("api")
.WithContainerRegistry(acr);
```
* TypeScript
apphost.mts
```typescript
import { createBuilder } from './.aspire/modules/aspire.mjs';
const builder = await createBuilder();
const registryName = await builder.addParameter("registryName");
const rgName = await builder.addParameter("rgName");
const acr = await builder.addAzureContainerRegistry("my-acr");
await acr.publishAsExisting(registryName, rgName);
const environment = await builder.addAzureContainerAppEnvironment("env");
await environment.withAzureContainerRegistry(acr);
const api = await builder.addProject("api", "../Api/Api.csproj");
await api.withContainerRegistry(acr);
```
## Pipeline integration
[Section titled “Pipeline integration”](#pipeline-integration)
Aspire’s deployment pipeline includes a dedicated `push` step for pushing container images to registries.
### Using aspire do push
[Section titled “Using aspire do push”](#using-aspire-do-push)
The `aspire do push` command builds container images and pushes them to configured registries:
Aspire CLI — Push images
```bash
aspire do push
```
This command:
1. Builds all container images for compute resources
2. Tags images with the appropriate registry and repository names
3. Pushes images to their configured registries
Example output:
Output
```plaintext
16:03:38 (pipeline-execution) → Starting pipeline-execution...
16:03:38 (build-api) → Starting build-api...
16:03:43 (push-api) → Starting push-api...
16:03:43 (push-api) → Pushing api to container-registry
16:03:44 (push-api) i [INF] Docker tag for api -> docker.io/username/api:latest succeeded.
16:04:05 (push-api) i [INF] Docker push for docker.io/username/api:latest succeeded.
16:04:05 (push-api) ✓ Successfully pushed api to docker.io/username/api:latest (21.3s)
16:04:05 (push-api) ✓ push-api completed successfully
```
For more information about pipeline commands, see [`aspire do` command](/reference/cli/commands/aspire-do/).
### Pipeline step dependencies
[Section titled “Pipeline step dependencies”](#pipeline-step-dependencies)
The `push` step automatically handles dependencies:
* **`build-prereq`** — Ensures prerequisites are met before building
* **`build-`** — Builds container images for each resource
* **`push-`** — Pushes images to registries
You can execute individual steps or the entire pipeline:
Aspire CLI — Build only
```bash
aspire do build
```
Aspire CLI — Full deployment
```bash
aspire do deploy
```
The `deploy` step includes building, pushing, and deploying all resources.
## Complete examples
[Section titled “Complete examples”](#complete-examples)
### Multi-registry deployment
[Section titled “Multi-registry deployment”](#multi-registry-deployment)
You can configure different registries for different resources:
* C#
AppHost.cs
```csharp
var builder = DistributedApplication.CreateBuilder(args);
var publicRegistry = builder.AddContainerRegistry("dockerhub", "docker.io");
var privateRegistry = builder.AddContainerRegistry(
"private",
"registry.company.com");
var publicApi = builder.AddProject("public-api")
.WithContainerRegistry(publicRegistry);
var internalApi = builder.AddProject("internal-api")
.WithContainerRegistry(privateRegistry);
```
* TypeScript
apphost.mts
```typescript
import { createBuilder } from './.aspire/modules/aspire.mjs';
const builder = await createBuilder();
const publicRegistry = await builder.addContainerRegistry("dockerhub", "docker.io");
const privateRegistry = await builder.addContainerRegistry(
"private",
"registry.company.com");
const publicApi = await builder.addProject("public-api", "../PublicApi/PublicApi.csproj");
await publicApi.withContainerRegistry(publicRegistry);
const internalApi = await builder.addProject("internal-api", "../InternalApi/InternalApi.csproj");
await internalApi.withContainerRegistry(privateRegistry);
```
### Parameterized registry configuration
[Section titled “Parameterized registry configuration”](#parameterized-registry-configuration)
You can use parameters when you need flexible deployment across environments:
* C#
AppHost.cs
```csharp
var builder = DistributedApplication.CreateBuilder(args);
var registryEndpoint = builder.AddParameter("registry-endpoint");
var registryRepository = builder.AddParameter("registry-repository");
var registry = builder.AddContainerRegistry(
"container-registry",
registryEndpoint,
registryRepository);
var api = builder.AddProject("api")
.WithContainerRegistry(registry);
var worker = builder.AddProject("worker")
.WithContainerRegistry(registry);
builder.Build().Run();
```
* TypeScript
apphost.mts
```typescript
import { createBuilder } from './.aspire/modules/aspire.mjs';
const builder = await createBuilder();
const registryEndpoint = await builder.addParameter("registry-endpoint");
const registryRepository = await builder.addParameter("registry-repository");
const registry = await builder.addContainerRegistry(
"container-registry",
registryEndpoint,
registryRepository);
const api = await builder.addProject("api", "../Api/Api.csproj");
await api.withContainerRegistry(registry);
const worker = await builder.addProject("worker", "../Worker/Worker.csproj");
await worker.withContainerRegistry(registry);
await builder.build().run();
```
Configure the parameters in your AppHost configuration:
appsettings.json
```json
{
"Parameters": {
"registry-endpoint": "ghcr.io",
"registry-repository": "myorg"
}
}
```
Alternatively, use environment variables to configure them:
Environment variables
```bash
export Parameters__registry_endpoint="ghcr.io"
export Parameters__registry_repository="myorg"
```
### Azure deployment with ACR
[Section titled “Azure deployment with ACR”](#azure-deployment-with-acr)
The following code constitutes a complete AppHost example with Azure Container Apps and ACR:
* C#
AppHost.cs
```csharp
var builder = DistributedApplication.CreateBuilder(args);
// Create Azure Container Apps environment with ACR
var acaEnv = builder.AddAzureContainerAppEnvironment("production");
// Add Redis cache
var cache = builder.AddRedis("cache");
// Add API with registry configuration
var api = builder.AddProject("api")
.WithReference(cache)
.WithContainerRegistry(acaEnv);
// Add frontend with registry configuration
var web = builder.AddProject("web")
.WithReference(api)
.WithContainerRegistry(acaEnv);
builder.Build().Run();
```
* TypeScript
apphost.mts
```typescript
import { createBuilder } from './.aspire/modules/aspire.mjs';
const builder = await createBuilder();
// Create Azure Container Apps environment with ACR
const environment = await builder.addAzureContainerAppEnvironment("production");
// Add Redis cache
const cache = await builder.addRedis("cache");
// Add API with registry configuration
const api = await builder.addProject("api", "../Api/Api.csproj");
await api.withReference(cache);
await api.withContainerRegistry(environment);
// Add frontend with registry configuration
const web = await builder.addProject("web", "../Web/Web.csproj");
await web.withReference(api);
await web.withContainerRegistry(environment);
await builder.build().run();
```
## Benefits of explicit configuration
[Section titled “Benefits of explicit configuration”](#benefits-of-explicit-configuration)
The explicit container registry configuration introduced in Aspire 13.1 provides several benefits:
* **Visibility** — Clear understanding of where images are pushed
* **Control** — Explicit configuration of registry endpoints and credentials
* **Parallelization** — Registry provisioning happens in parallel with other resources
* **Early feedback** — Faster deployments with images pushing as soon as registries are ready
* **Flexibility** — Support for any Docker-compatible registry
For a deeper dive into container registry improvements, see [Safia Abdalla’s blog post on fixing Aspire’s image problem](https://blog.safia.rocks/2025/12/15/aspire-image-push/).
## See also
[Section titled “See also”](#see-also)
* [Azure Container Registry integration](/integrations/cloud/azure/azure-container-registry/azure-container-registry-get-started/)
* [Configure Azure Container Apps environments](/integrations/cloud/azure/configure-container-apps/)
* [`aspire do` command](/reference/cli/commands/aspire-do/)
* [External parameters](/fundamentals/external-parameters/)
* [Pipelines and app topology](/deployment/pipelines/)
# Docker Compose to Aspire AppHost reference
> Quick reference for converting Docker Compose YAML syntax to Aspire AppHost API calls — services, networks, volumes, environment variables, and health checks.
This reference provides systematic mappings from Docker Compose YAML syntax to equivalent Aspire AppHost API calls. Use these tables as a quick reference when converting your existing Docker Compose files to Aspire application host configurations.
## Service definitions
[Section titled “Service definitions”](#service-definitions)
| Docker Compose | Aspire | Notes |
| --------------- | ---------------------------------------------------------- | ------------------------------------------------------------------- |
| `services:` | `var builder = DistributedApplication.CreateBuilder(args)` | Root application builder used for adding and representing resources |
| `service_name:` | `builder.Add*("service_name")` | Service name becomes resource name |
Learn more about [Docker Compose services](https://docs.docker.com/compose/compose-file/05-services/).
## Images and builds
[Section titled “Images and builds”](#images-and-builds)
| Docker Compose | Aspire | Notes |
| ------------------------------------- | --------------------------------------------------------------------------- | ----------------------------------------- |
| `image: nginx:latest` | `builder.AddContainer("name", "nginx", "latest")` | Direct image reference |
| `build: .` | `builder.AddDockerfile("name", ".")` | Build from Dockerfile |
| `build: ./path` | `builder.AddDockerfile("name", "./path")` | Build from specific path |
| `build.context: ./app` | `builder.AddDockerfile("name", "./app")` | Build context |
| `build.dockerfile: Custom.dockerfile` | `builder.Add*("name").WithDockerfile("Custom.dockerfile")` | Custom Dockerfile name |
| Generated Dockerfile | `builder.AddDockerfileBuilder("name", "./app", callback, stage: "runtime")` | Generate the Dockerfile from AppHost code |
Learn more about [Docker Compose build reference](https://docs.docker.com/compose/compose-file/build/) and [WithDockerfile](/app-host/withdockerfile/).
## Pull policy
[Section titled “Pull policy”](#pull-policy)
| Docker Compose | Aspire | Notes |
| ---------------------- | ----------------------------------------------- | -------------------------------- |
| `pull_policy: always` | `.WithImagePullPolicy(ImagePullPolicy.Always)` | Always pull the image |
| `pull_policy: missing` | `.WithImagePullPolicy(ImagePullPolicy.Missing)` | Pull only if not present locally |
| `pull_policy: never` | `.WithImagePullPolicy(ImagePullPolicy.Never)` | Never pull from registry |
Learn more about [Docker Compose pull\_policy](https://docs.docker.com/reference/compose-file/services/#pull_policy) and [image pull policy](/integrations/compute/docker/#configure-image-pull-policy).
## .NET projects
[Section titled “.NET projects”](#net-projects)
| Docker Compose | Aspire | Notes |
| --------------------------- | --------------------------------------------- | ----------------------------- |
| `build: ./MyApi` (for .NET) | `builder.AddProject("myapi")` | Direct .NET project reference |
Learn more about [adding .NET projects](/get-started/app-host/).
## Port mappings
[Section titled “Port mappings”](#port-mappings)
| Docker Compose | Aspire | Notes |
| -------------------- | ------------------------------------------------ | ----------------------------------------------------------------------------- |
| `ports: ["8080:80"]` | `.WithHttpEndpoint(port: 8080, targetPort: 80)` | HTTP endpoint mapping. Ports are optional; dynamic ports are used if omitted |
| `ports: ["443:443"]` | `.WithHttpsEndpoint(port: 443, targetPort: 443)` | HTTPS endpoint mapping. Ports are optional; dynamic ports are used if omitted |
| `expose: ["8080"]` | `.WithEndpoint(port: 8080)` | Internal port exposure. Ports are optional; dynamic ports are used if omitted |
Learn more about [Docker Compose ports](https://docs.docker.com/compose/compose-file/05-services/#ports) and [endpoint configuration](/fundamentals/networking-overview/).
## Environment variables
[Section titled “Environment variables”](#environment-variables)
| Docker Compose | Aspire / Notes |
| ------------------------------ | --------------------------------------------------------------------------------------------------------------------------- |
| `environment: KEY=value` | `.WithEnvironment("KEY", "value")` Static environment variable |
| `environment: KEY=${HOST_VAR}` | `.WithEnvironment(context => context.EnvironmentVariables["KEY"] = hostVar)` Environment variable with callback context |
| `environment: KEY=${PARAM}` | `.AsEnvironmentPlaceholder(resource)` inside `.PublishAsDockerComposeService(...)` Compose environment variable placeholder |
| `env_file: .env` | `.ConfigureEnvFile(env => { ... })` Environment file customization (available in 13.1+) |
Learn more about [Docker Compose environment](https://docs.docker.com/compose/compose-file/05-services/#environment) and [external parameters](/fundamentals/external-parameters/).
## Volumes and storage
[Section titled “Volumes and storage”](#volumes-and-storage)
| Docker Compose | Aspire | Notes |
| -------------------------------- | ------------------------------------------------------ | -------------------- |
| `volumes: ["data:/app/data"]` | `.WithVolume("data", "/app/data")` | Named volume |
| `volumes: ["./host:/container"]` | `.WithBindMount("./host", "/container")` | Bind mount |
| `volumes: ["./config:/app:ro"]` | `.WithBindMount("./config", "/app", isReadOnly: true)` | Read-only bind mount |
Learn more about [Docker Compose volumes](https://docs.docker.com/compose/compose-file/05-services/#volumes) and [persist container data](/fundamentals/persist-data-volumes/).
## Dependencies and ordering
[Section titled “Dependencies and ordering”](#dependencies-and-ordering)
| Docker Compose | Aspire | Notes |
| -------------------------------------------- | ------------------------ | --------------------------------------------------- |
| `depends_on: [db]` | `.WithReference(db)` | Service dependency with connection string injection |
| `depends_on: db: condition: service_started` | `.WaitFor(db)` | Wait for service start |
| `depends_on: db: condition: service_healthy` | `.WaitForCompletion(db)` | Wait for health check to pass |
Learn more about [Docker Compose depends\_on](https://docs.docker.com/compose/compose-file/05-services/#depends_on) and [launch profiles](/integrations/dotnet/launch-profiles/).
## Networks
[Section titled “Networks”](#networks)
| Docker Compose | Aspire | Notes |
| -------------------------------------- | ---------------------------------------- | --------------------------------------------------------------------------- |
| `networks: [backend]` | Automatic | Aspire handles networking automatically |
| Service host name on a Compose network | `.GetHostAddressExpression(endpoint)` | Produces the generated Docker Compose service host name for an endpoint |
| Custom networks | `.ConfigureComposeFile(file => { ... })` | Customize the generated Compose file when automatic networking isn’t enough |
Learn more about [Docker Compose networks](https://docs.docker.com/compose/compose-file/05-services/#networks) and [service discovery](/fundamentals/service-discovery/).
## Resource limits
[Section titled “Resource limits”](#resource-limits)
| Docker Compose | Aspire | Notes |
| -------------------------------------- | ------------- | ------------------------------------------ |
| `deploy.resources.limits.memory: 512m` | Not supported | Resource limits aren’t supported in Aspire |
| `deploy.resources.limits.cpus: 0.5` | Not supported | Resource limits aren’t supported in Aspire |
Learn more about [Docker Compose deploy reference](https://docs.docker.com/compose/compose-file/deploy/).
## Health checks
[Section titled “Health checks”](#health-checks)
| Docker Compose | Aspire | Notes |
| -------------------------------------------------------------- | --------------------------- | -------------------------------------------------- |
| `healthcheck.test: ["CMD", "curl", "http://localhost/health"]` | Built-in for integrations | Aspire integrations include health checks |
| `healthcheck.interval: 30s` | Configurable in integration | Health check configuration varies by resource type |
Learn more about [Docker Compose healthcheck](https://docs.docker.com/compose/compose-file/05-services/#healthcheck) and [health checks](/fundamentals/health-checks/).
## Restart policies
[Section titled “Restart policies”](#restart-policies)
| Docker Compose | Aspire | Notes |
| ------------------------- | ------------------------------------------------------------------------------------------- | ---------------------------------------------- |
| `restart: unless-stopped` | `.PublishAsDockerComposeService((resource, service) => service.Restart = "unless-stopped")` | Customize the generated Docker Compose service |
| `restart: always` | `.PublishAsDockerComposeService((resource, service) => service.Restart = "always")` | Customize the generated Docker Compose service |
| `restart: no` | Default | No restart policy |
Learn more about [Docker Compose restart](https://docs.docker.com/compose/compose-file/05-services/#restart).
## Logging
[Section titled “Logging”](#logging)
| Docker Compose | Aspire | Notes |
| ------------------------------- | ----------------------- | ---------------------------------- |
| `logging.driver: json-file` | Built-in | Aspire provides integrated logging |
| `logging.options.max-size: 10m` | Dashboard configuration | Managed through Aspire dashboard |
Learn more about [Docker Compose logging](https://docs.docker.com/compose/compose-file/05-services/#logging) and [telemetry](/fundamentals/telemetry/).
## Database services
[Section titled “Database services”](#database-services)
| Docker Compose | Aspire | Notes |
| --------------------- | ----------------------------- | --------------------------------------- |
| `image: postgres:15` | `builder.AddPostgres("name")` | PostgreSQL with automatic configuration |
| `image: mysql:8` | `builder.AddMySql("name")` | MySQL with automatic configuration |
| `image: redis:7` | `builder.AddRedis("name")` | Redis with automatic configuration |
| `image: mongo:latest` | `builder.AddMongoDB("name")` | MongoDB with automatic configuration |
Learn more about [Docker Compose services](https://docs.docker.com/compose/compose-file/05-services/) and [database integrations](/integrations/gallery/?search=database).
## See also
[Section titled “See also”](#see-also)
* [Migrate from Docker Compose to Aspire](/app-host/migrate-from-docker-compose/)
* [AppHost overview](/get-started/app-host/)
* [WithDockerfile](/app-host/withdockerfile/)
# AppHost eventing APIs
> Use the Aspire AppHost eventing APIs for lifecycle events, custom event publishing, and reactive integrations that respond to resource state transitions at runtime.
In Aspire, eventing allows you to publish and subscribe to events during various AppHost life cycles. Eventing is more flexible than life cycle events. Both let you run arbitrary code during event callbacks, but eventing offers finer control of event timing, publishing, and provides supports for custom events.
## AppHost eventing
[Section titled “AppHost eventing”](#apphost-eventing)
The following events are available in the AppHost and occur in the following order:
1. `BeforeStartEvent`: This event is raised before the AppHost starts.
2. `ResourceEndpointsAllocatedEvent`: This event is raised per resource after its endpoints are allocated.
3. `AfterResourcesCreatedEvent`: This event is raised after resources are created.
### Subscribe to AppHost events
[Section titled “Subscribe to AppHost events”](#subscribe-to-apphost-events)
To subscribe to built-in AppHost events, use the convenience extension methods directly on the builder. These methods return the same `IDistributedApplicationBuilder` instance so calls can be chained:
* C#
AppHost.cs
```csharp
using Microsoft.Extensions.DependencyInjection;
using Microsoft.Extensions.Logging;
var builder = DistributedApplication.CreateBuilder(args);
builder.OnBeforeStart(static (@event, cancellationToken) =>
{
var logger = @event.Services.GetRequiredService>();
logger.LogInformation("BeforeStartEvent");
return Task.CompletedTask;
});
builder.OnAfterResourcesCreated(static (@event, cancellationToken) =>
{
var logger = @event.Services.GetRequiredService>();
logger.LogInformation("AfterResourcesCreatedEvent");
return Task.CompletedTask;
});
builder.Build().Run();
```
* TypeScript
apphost.mts
```typescript
import { createBuilder } from './.aspire/modules/aspire.mjs';
const builder = await createBuilder();
await builder.subscribeBeforeStart(async () => {
console.log('BeforeStartEvent');
});
await builder.subscribeAfterResourcesCreated(async () => {
console.log('AfterResourcesCreatedEvent');
});
await builder.build().run();
```
The following builder-level extension methods are available for AppHost events:
| Method | Event |
| ------------------------- | ----------------------------------------------------------------- |
| `OnBeforeStart` | `BeforeStartEvent` — raised before the AppHost starts |
| `OnAfterResourcesCreated` | `AfterResourcesCreatedEvent` — raised after resources are created |
| `OnBeforePublish` | `BeforePublishEvent` — raised before manifest publishing begins |
| `OnAfterPublish` | `AfterPublishEvent` — raised after manifest publishing completes |
If you need to subscribe via `IDistributedApplicationEventing` directly (for example, inside an `IDistributedApplicationEventingSubscriber`), you can use the lower-level `Eventing.Subscribe()` API:
AppHost.cs
```csharp
builder.Eventing.Subscribe(
static (@event, cancellationToken) =>
{
var logger = @event.Services.GetRequiredService>();
logger.LogInformation("BeforeStartEvent");
return Task.CompletedTask;
});
builder.Eventing.Subscribe(
static (@event, cancellationToken) =>
{
var logger = @event.Services.GetRequiredService>();
logger.LogInformation("AfterResourcesCreatedEvent");
return Task.CompletedTask;
});
```
Note
TypeScript AppHosts don’t expose the generic `builder.Eventing.Subscribe()` API. Use the named callback APIs generated for each supported event, such as `subscribeBeforeStart`, `subscribeAfterResourcesCreated`, `addEventingSubscriber`, and resource callbacks like `onResourceReady`.
When the AppHost is run, by the time the Aspire dashboard is displayed, you should see the following log output in the console:
```plaintext
info: Program[0]
BeforeStartEvent
info: Aspire.Hosting.DistributedApplication[0]
Aspire version: 13.1.0
info: Aspire.Hosting.DistributedApplication[0]
Distributed application starting.
info: Aspire.Hosting.DistributedApplication[0]
Application host directory is: ../AspireApp/AspireApp.AppHost
info: Aspire.Hosting.DistributedApplication[0]
Now listening on: https://localhost:17178
info: Aspire.Hosting.DistributedApplication[0]
Login to the dashboard at https://localhost:17178/login?t=
info: Program[0]
AfterResourcesCreatedEvent
info: Aspire.Hosting.DistributedApplication[0]
Distributed application started. Press Ctrl+C to shut down.
```
The log output confirms that event handlers are executed in the order of the AppHost life cycle events. The subscription order doesn’t affect execution order. The `BeforeStartEvent` is triggered before the AppHost starts, and `AfterResourcesCreatedEvent` is triggered after resources are created.
## Resource eventing
[Section titled “Resource eventing”](#resource-eventing)
In addition to the AppHost events, you can also subscribe to resource events. Resource events are raised specific to an individual resource. Resource events are defined as implementations of the `IDistributedApplicationResourceEvent` interface. The following resource events are available in the listed order:
1. `InitializeResourceEvent`: Raised by orchestrators to signal to resources that they should initialize themselves.
2. `ResourceEndpointsAllocatedEvent`: Raised when the orchestrator allocates endpoints for a resource.
3. `ConnectionStringAvailableEvent`: Raised when a connection string becomes available for a resource.
4. `BeforeResourceStartedEvent`: Raised before the orchestrator starts a new resource.
5. `ResourceReadyEvent`: Raised when a resource initially transitions to a ready state.
### Subscribe to resource events
[Section titled “Subscribe to resource events”](#subscribe-to-resource-events)
To subscribe to resource events, use the convenience-based extension methods. After you have a distributed application builder instance, and a resource builder, walk up to the instance and chain a call to the desired event API:
* C#
AppHost.cs
```csharp
using Microsoft.Extensions.DependencyInjection;
using Microsoft.Extensions.Logging;
var builder = DistributedApplication.CreateBuilder(args);
var cache = builder.AddRedis("cache");
cache.OnResourceReady(static (resource, @event, cancellationToken) =>
{
var logger = @event.Services.GetRequiredService>();
logger.LogInformation("5. OnResourceReady");
return Task.CompletedTask;
});
cache.OnInitializeResource(
static (resource, @event, cancellationToken) =>
{
var logger = @event.Services.GetRequiredService>();
logger.LogInformation("1. OnInitializeResource");
return Task.CompletedTask;
});
cache.OnBeforeResourceStarted(
static (resource, @event, cancellationToken) =>
{
var logger = @event.Services.GetRequiredService>();
logger.LogInformation("4. OnBeforeResourceStarted");
return Task.CompletedTask;
});
cache.OnResourceEndpointsAllocated(
static (resource, @event, cancellationToken) =>
{
var logger = @event.Services.GetRequiredService>();
logger.LogInformation("2. OnResourceEndpointsAllocated");
return Task.CompletedTask;
});
cache.OnConnectionStringAvailable(
static (resource, @event, cancellationToken) =>
{
var logger = @event.Services.GetRequiredService>();
logger.LogInformation("3. OnConnectionStringAvailable");
return Task.CompletedTask;
});
var apiService = builder.AddProject("apiservice");
builder.AddProject("webfrontend")
.WithExternalHttpEndpoints()
.WithReference(cache)
.WaitFor(cache)
.WithReference(apiService)
.WaitFor(apiService);
builder.Build().Run();
```
* TypeScript
apphost.mts
```typescript
import { createBuilder } from './.aspire/modules/aspire.mjs';
const builder = await createBuilder();
const cache = await builder.addRedis('cache');
await cache.onInitializeResource(async () => {
console.log('1. onInitializeResource');
});
await cache.onResourceEndpointsAllocated(async (event) => {
const resource = await event.resource();
console.log(`2. endpoints allocated for ${resource.getResourceName()}`);
});
await cache.onConnectionStringAvailable(async (event) => {
const resource = await event.resource();
console.log(
`3. connection string available for ${resource.getResourceName()}`
);
});
await cache.onBeforeResourceStarted(async () => {
console.log('4. onBeforeResourceStarted');
});
await cache.onResourceReady(async () => {
console.log('5. onResourceReady');
});
await builder.build().run();
```
The preceding code subscribes to the `InitializeResourceEvent`, `ResourceReadyEvent`, `ResourceEndpointsAllocatedEvent`, `ConnectionStringAvailableEvent`, and `BeforeResourceStartedEvent` events on the `cache` resource. Chain calls to the event methods to subscribe to multiple events on the same resource.
Note
TypeScript callbacks receive the event object. Use `await event.resource()` and `await event.services()` when you need the resource or service provider.
* `OnInitializeResource` / `onInitializeResource`: Subscribes to the `InitializeResourceEvent`.
* `OnResourceEndpointsAllocated` / `onResourceEndpointsAllocated`: Subscribes to the `ResourceEndpointsAllocatedEvent` event.
* `OnConnectionStringAvailable` / `onConnectionStringAvailable`: Subscribes to the `ConnectionStringAvailableEvent` event.
* `OnBeforeResourceStarted` / `onBeforeResourceStarted`: Subscribes to the `BeforeResourceStartedEvent` event.
* `OnResourceReady` / `onResourceReady`: Subscribes to the `ResourceReadyEvent` event.
When the AppHost is run, by the time the Aspire dashboard is displayed, you should see the following log output in the console:
```plaintext
info: Aspire.Hosting.DistributedApplication[0]
Aspire version: 13.1.0
info: Aspire.Hosting.DistributedApplication[0]
Distributed application starting.
info: Aspire.Hosting.DistributedApplication[0]
Application host directory is: ../AspireApp/AspireApp.AppHost
info: Program[0]
1. OnInitializeResource
info: Program[0]
2. OnResourceEndpointsAllocated
info: Program[0]
3. OnConnectionStringAvailable
info: Program[0]
4. OnBeforeResourceStarted
info: Aspire.Hosting.DistributedApplication[0]
Now listening on: https://localhost:17222
info: Aspire.Hosting.DistributedApplication[0]
Login to the dashboard at https://localhost:17222/login?t=
info: Program[0]
5. OnResourceReady
info: Aspire.Hosting.DistributedApplication[0]
Distributed application started. Press Ctrl+C to shut down.
```
Note
Some events block execution. For example, when the `BeforeResourceStartedEvent` is published, the resource startup blocks until all subscriptions for that event on a given resource finish executing. Whether an event blocks or not depends on how you publish it (see the following section).
## Publish events
[Section titled “Publish events”](#publish-events)
When subscribing to any of the built-in events, you don’t need to publish the event yourself as the AppHost orchestrator manages to publish built-in events on your behalf. However, you can publish custom events with the eventing API. To publish an event, you have to first define an event as an implementation of either the `IDistributedApplicationEvent` or `IDistributedApplicationResourceEvent` interface. You need to determine which interface to implement based on whether the event is a global AppHost event or a resource-specific event.
Then, you can subscribe and publish the event by calling the either of the following APIs:
* `PublishAsync(T, CancellationToken)`: Publishes an event to all subscribes of the specific event type.
* `PublishAsync(T, EventDispatchBehavior, CancellationToken)`: Publishes an event to all subscribes of the specific event type with a specified dispatch behavior.
### Provide an `EventDispatchBehavior`
[Section titled “Provide an EventDispatchBehavior”](#provide-an-eventdispatchbehavior)
When events are dispatched, you can control how the events are dispatched to subscribers. The event dispatch behavior is specified with the `EventDispatchBehavior` enum. The following behaviors are available:
* `EventDispatchBehavior.BlockingSequential`: Fires events sequentially and blocks until they’re all processed.
* `EventDispatchBehavior.BlockingConcurrent`: Fires events concurrently and blocks until they’re all processed.
* `EventDispatchBehavior.NonBlockingSequential`: Fires events sequentially but doesn’t block.
* `EventDispatchBehavior.NonBlockingConcurrent`: Fires events concurrently but doesn’t block.
The default behavior is `EventDispatchBehavior.BlockingSequential`. To override this behavior, when calling a publishing API such as `PublishAsync`, provide the desired behavior as an argument.
## Eventing subscribers
[Section titled “Eventing subscribers”](#eventing-subscribers)
In some cases, such as extension libraries, you may need to access lifecycle events from a service rather than directly from the Aspire application model. You can implement `IDistributedApplicationEventingSubscriber` and register the service with `AddEventingSubscriber` (or `TryAddEventingSubscriber` if you want to avoid duplicate registrations).
AppHost.cs
```csharp
using Aspire.Hosting.Eventing;
using Aspire.Hosting.Lifecycle;
using Microsoft.Extensions.DependencyInjection;
using Microsoft.Extensions.Logging;
var builder = DistributedApplication.CreateBuilder(args);
builder.Services.AddEventingSubscriber();
builder.Build().Run();
internal sealed class LifecycleLoggerSubscriber(ILogger logger)
: IDistributedApplicationEventingSubscriber
{
public Task SubscribeAsync(
IDistributedApplicationEventing eventing,
DistributedApplicationExecutionContext executionContext,
CancellationToken cancellationToken)
{
eventing.Subscribe((@event, ct) =>
{
logger.LogInformation("1. BeforeStartEvent");
return Task.CompletedTask;
});
eventing.Subscribe((@event, ct) =>
{
logger.LogInformation("2. {Resource} ResourceEndpointsAllocatedEvent", @event.Resource.Name);
return Task.CompletedTask;
});
eventing.Subscribe((@event, ct) =>
{
logger.LogInformation("3. AfterResourcesCreatedEvent");
return Task.CompletedTask;
});
return Task.CompletedTask;
}
}
```
Note
C# eventing subscriber service classes are specific to the C# AppHost hosting model. TypeScript AppHosts can register callback-based subscribers with `addEventingSubscriber` or `tryAddEventingSubscriber`.
apphost.mts
```typescript
import { createBuilder } from './.aspire/modules/aspire.mjs';
const builder = await createBuilder();
builder.addEventingSubscriber(async (events) => {
events.onBeforeStart(async () => {
console.log('1. BeforeStartEvent');
});
events.onAfterResourcesCreated(async () => {
console.log('3. AfterResourcesCreatedEvent');
});
});
await builder.build().run();
```
The subscriber approach keeps builder code minimal while still letting you respond to the same lifecycle moments as inline subscriptions:
* `AddEventingSubscriber()` (or `TryAddEventingSubscriber()`) ensures the subscriber participates whenever the AppHost starts.
* `SubscribeAsync` is called once per AppHost execution, giving you access to `IDistributedApplicationEventing` and the `DistributedApplicationExecutionContext` should you need model- or environment-specific data.
* You can register handlers for any built-in event (AppHost or resource) or for your own custom `IDistributedApplicationEvent` types.
Use this pattern whenever you previously relied on `IDistributedApplicationLifecycleHook`. The lifecycle hook APIs remain only for backward compatibility and will be removed in a future release.
### Migrating from lifecycle hooks
[Section titled “Migrating from lifecycle hooks”](#migrating-from-lifecycle-hooks)
If you’re migrating from the deprecated `IDistributedApplicationLifecycleHook` interface, use the following mapping:
| Old pattern (deprecated) | New pattern |
| -------------------------------- | ---------------------------------------------- |
| `BeforeStartAsync()` | Subscribe to `BeforeStartEvent` |
| `AfterEndpointsAllocatedAsync()` | Subscribe to `ResourceEndpointsAllocatedEvent` |
| `AfterResourcesCreatedAsync()` | Subscribe to `AfterResourcesCreatedEvent` |
| `TryAddLifecycleHook()` | `TryAddEventingSubscriber()` |
**Before (deprecated):**
OldLifecycleHook.cs
```csharp
public class MyHook : IDistributedApplicationLifecycleHook
{
public Task AfterResourcesCreatedAsync(
DistributedApplicationModel model,
CancellationToken cancellationToken)
{
// Handle event
return Task.CompletedTask;
}
}
// Registration
builder.Services.TryAddLifecycleHook();
```
**After (recommended):**
NewEventingSubscriber.cs
```csharp
public class MySubscriber : IDistributedApplicationEventingSubscriber
{
public Task SubscribeAsync(
IDistributedApplicationEventing eventing,
DistributedApplicationExecutionContext context,
CancellationToken cancellationToken)
{
eventing.Subscribe((@event, ct) =>
{
// Handle event using context.Model
return Task.CompletedTask;
});
return Task.CompletedTask;
}
}
// Registration
builder.Services.TryAddEventingSubscriber();
```
Caution
The `IDistributedApplicationLifecycleHook` interface is deprecated as of Aspire 9.0 and will be removed in a future release. Migrate to `IDistributedApplicationEventingSubscriber` for new code.
## Additional events
[Section titled “Additional events”](#additional-events)
Beyond the core lifecycle events, Aspire provides additional events for specific scenarios:
### Publishing events
[Section titled “Publishing events”](#publishing-events)
When publishing your application (generating deployment manifests), these events are raised:
| Event | When raised | Purpose |
| -------------------- | -------------------------- | ------------------------------------------------------- |
| `BeforePublishEvent` | Before publishing begins | Validate or modify resources before manifest generation |
| `AfterPublishEvent` | After publishing completes | Perform cleanup or post-publish actions |
* C#
AppHost.cs
```csharp
builder.OnBeforePublish((@event, ct) =>
{
// Validate resources before publishing
return Task.CompletedTask;
});
builder.OnAfterPublish((@event, ct) =>
{
// Post-publish actions
return Task.CompletedTask;
});
```
* TypeScript
apphost.mts
```typescript
import { createBuilder } from './.aspire/modules/aspire.mjs';
const builder = await createBuilder();
await builder.subscribeBeforePublish(async (event) => {
const model = await event.model();
console.log(`Publishing ${model.getResources().length} resources`);
});
await builder.subscribeAfterPublish(async (event) => {
const services = await event.services();
console.log('Publish completed', services);
});
```
For details on what happens during publishing, see [Publishing and deployment overview](/deployment/deploy-with-aspire/).
### Resource stopped event
[Section titled “Resource stopped event”](#resource-stopped-event)
The `ResourceStoppedEvent` is raised when a resource stops execution:
* C#
AppHost.cs
```csharp
builder.Eventing.Subscribe(
cache,
(@event, ct) =>
{
logger.LogInformation("Resource {Name} stopped", @event.Resource.Name);
return Task.CompletedTask;
});
```
* TypeScript
apphost.mts
```typescript
import { createBuilder } from './.aspire/modules/aspire.mjs';
const builder = await createBuilder();
const cache = await builder.addRedis('cache');
await cache.onResourceStopped(async (event) => {
const resource = await event.resource();
console.log(`Resource ${resource.getResourceName()} stopped`);
});
```
Note
Event publishing is **synchronous and blocking** — event handlers can delay further execution. Keep handlers lightweight and avoid long-running operations.
## See also
[Section titled “See also”](#see-also)
* [Custom resources](/extensibility/custom-resources/)
* [Resource annotations](/fundamentals/annotations-overview/)
# Host external executables in Aspire
> Host external executable applications in your Aspire AppHost using AddExecutable — model CLI tools, daemons, and language runtimes alongside containers and projects.
In Aspire, you can host external executable applications alongside your projects using the `AddExecutable` method. This capability is useful when you need to integrate executable applications or tools into your distributed application, such as Node.js applications, Python scripts, or specialized CLI tools.
## When to use executable resources
[Section titled “When to use executable resources”](#when-to-use-executable-resources)
Use executable resources when you need to:
* Run applications or tools directly on the host instead of in a container.
* Integrate command-line tools or utilities into your application.
* Run external processes that other resources depend on.
* Develop with tools that provide local development servers.
Common examples include:
* **Frontend development servers**: Tools like [Vercel CLI](https://vercel.com/docs/cli) or webpack dev server.
* **Language-specific applications**: Node.js apps, Python scripts, or Go applications.
* **Database tools**: Migration utilities or database seeders.
* **Build tools**: Asset processors or code generators.
## Basic usage
[Section titled “Basic usage”](#basic-usage)
The `AddExecutable` method requires a resource name, the executable path, and optionally command-line arguments and a working directory:
* C#
AppHost.cs
```csharp
var builder = DistributedApplication.CreateBuilder(args);
// Basic executable without arguments
var nodeApp = builder.AddExecutable("frontend", "node", ".", "server.js");
// Executable with command-line arguments
var pythonApp = builder.AddExecutable(
"api", "python", ".", "-m", "uvicorn", "main:app", "--reload", "--host", "0.0.0.0", "--port", "8000");
builder.Build().Run();
```
* TypeScript
apphost.mts
```typescript
import { createBuilder } from './.aspire/modules/aspire.mjs';
const builder = await createBuilder();
// Basic executable without arguments
const nodeApp = await builder.addExecutable("frontend", "node", ".", ["server.js"]);
// Executable with command-line arguments
const pythonApp = await builder.addExecutable("api", "python", ".", ["-m", "uvicorn", "main:app", "--reload", "--host", "0.0.0.0", "--port", "8000"]);
await builder.build().run();
```
This code demonstrates setting up a basic executable resource. The first example runs a Node.js server script, while the second starts a Python application using Uvicorn with specific configuration options passed as arguments directly to the `AddExecutable` method.
## Resource dependencies and environment configuration
[Section titled “Resource dependencies and environment configuration”](#resource-dependencies-and-environment-configuration)
You can provide command-line arguments directly in the `AddExecutable` call and configure environment variables for resource dependencies. Executable resources can reference other resources and access their connection information.
### Arguments in the AddExecutable call
[Section titled “Arguments in the AddExecutable call”](#arguments-in-the-addexecutable-call)
* C#
AppHost.cs
```csharp
var builder = DistributedApplication.CreateBuilder(args);
// Arguments provided directly in AddExecutable
var app = builder.AddExecutable(
"vercel-dev", "vercel", ".", "dev", "--listen", "3000");
```
* TypeScript
apphost.mts
```typescript
import { createBuilder } from './.aspire/modules/aspire.mjs';
const builder = await createBuilder();
// Arguments provided directly in addExecutable
const app = await builder.addExecutable("vercel-dev", "vercel", ".", ["dev", "--listen", "3000"]);
```
### Resource dependencies with environment variables
[Section titled “Resource dependencies with environment variables”](#resource-dependencies-with-environment-variables)
For arguments that depend on other resources, use environment variables:
* C#
AppHost.cs
```csharp
var builder = DistributedApplication.CreateBuilder(args);
var redis = builder.AddRedis("cache");
var postgres = builder.AddPostgres("postgres").AddDatabase("appdb");
var app = builder.AddExecutable("worker", "python", ".", "worker.py")
.WithReference(redis) // Provides ConnectionStrings__cache
.WithReference(postgres); // Provides ConnectionStrings__appdb
```
* TypeScript
apphost.mts
```typescript
import { createBuilder } from './.aspire/modules/aspire.mjs';
const builder = await createBuilder();
const redis = await builder.addRedis("cache");
const postgres = (await builder.addPostgres("postgres")).addDatabase("appdb");
const app = await builder.addExecutable("worker", "python", ".", ["worker.py"])
.withReference(redis) // Provides ConnectionStrings__cache
.withReference(postgres); // Provides ConnectionStrings__appdb
```
When one resource depends on another, `WithReference` passes along environment variables containing the dependent resource’s connection details. For example, the `worker` executable’s reference to `redis` and `postgres` provides it with the `ConnectionStrings__cache` and `ConnectionStrings__appdb` environment variables, which contain connection strings to these resources.
### Access specific endpoint information
[Section titled “Access specific endpoint information”](#access-specific-endpoint-information)
For more control over how connection information is passed to your executable:
* C#
AppHost.cs
```csharp
var builder = DistributedApplication.CreateBuilder(args);
var redis = builder.AddRedis("cache");
var app = builder.AddExecutable("app", "node", ".", "app.js")
.WithReference(redis)
.WithEnvironment(context =>
{
// Provide individual connection details
context.EnvironmentVariables["REDIS_HOST"] = redis.Resource.PrimaryEndpoint.Property(EndpointProperty.Host);
context.EnvironmentVariables["REDIS_PORT"] = redis.Resource.PrimaryEndpoint.Property(EndpointProperty.Port);
});
```
* TypeScript
apphost.mts
```typescript
import { createBuilder, EndpointProperty } from './.aspire/modules/aspire.mjs';
const builder = await createBuilder();
const redis = await builder.addRedis("cache");
const redisEndpoint = await redis.getEndpoint("tcp");
const redisHost = await redisEndpoint.property(EndpointProperty.Host);
const redisPort = await redisEndpoint.property(EndpointProperty.Port);
const app = await builder.addExecutable("app", "node", ".", ["app.js"])
.withReference(redis)
.withEnvironment("REDIS_HOST", redisHost)
.withEnvironment("REDIS_PORT", redisPort);
```
## Practical example: Vercel CLI
[Section titled “Practical example: Vercel CLI”](#practical-example-vercel-cli)
Here’s a complete example using the [Vercel CLI](https://vercel.com/docs/cli) to host a frontend application with a backend API:
* C#
AppHost.cs
```csharp
var builder = DistributedApplication.CreateBuilder(args);
// Backend API
var api = builder.AddProject("api")
.WithExternalHttpEndpoints();
// Frontend with Vercel CLI
var frontend = builder.AddExecutable(
"vercel-dev", "vercel", ".", "dev", "--listen", "3000")
.WithEnvironment("API_URL", api.GetEndpoint("http"))
.WithHttpEndpoint(port: 3000, name: "http");
builder.Build().Run();
```
* TypeScript
apphost.mts
```typescript
import { createBuilder } from './.aspire/modules/aspire.mjs';
const builder = await createBuilder();
// Backend API
const api = await builder.addProject("api", "./Api/Api.csproj")
.withExternalHttpEndpoints();
// Frontend with Vercel CLI
const frontend = await builder.addExecutable("vercel-dev", "vercel", ".", ["dev", "--listen", "3000"])
.withEnvironment("API_URL", api.getEndpoint("http"))
.withHttpEndpoint({ port: 3000, name: "http" });
await builder.build().run();
```
## Configure endpoints
[Section titled “Configure endpoints”](#configure-endpoints)
Executable resources can expose HTTP endpoints that other resources can reference:
* C#
AppHost.cs
```csharp
var builder = DistributedApplication.CreateBuilder(args);
var frontend = builder.AddExecutable(
"webpack-dev", "npx", ".", "webpack", "serve", "--port", "8080", "--host", "0.0.0.0")
.WithHttpEndpoint(port: 8080, name: "http");
// Another service can reference the frontend
var e2eTests = builder.AddExecutable("playwright", "npx", ".", "playwright", "test")
.WithEnvironment("BASE_URL", frontend.GetEndpoint("http"));
```
* TypeScript
apphost.mts
```typescript
import { createBuilder } from './.aspire/modules/aspire.mjs';
const builder = await createBuilder();
const frontend = await builder.addExecutable("webpack-dev", "npx", ".", ["webpack", "serve", "--port", "8080", "--host", "0.0.0.0"])
.withHttpEndpoint({ port: 8080, name: "http" });
// Another service can reference the frontend
const e2eTests = await builder.addExecutable("playwright", "npx", ".", ["playwright", "test"])
.withEnvironment("BASE_URL", frontend.getEndpoint("http"));
```
## Environment configuration
[Section titled “Environment configuration”](#environment-configuration)
Configure environment variables for your executable:
* C#
AppHost.cs
```csharp
var builder = DistributedApplication.CreateBuilder(args);
var app = builder.AddExecutable(
"api", "uvicorn", ".", "main:app", "--reload", "--host", "0.0.0.0")
.WithEnvironment("DEBUG", "true")
.WithEnvironment("LOG_LEVEL", "info")
.WithEnvironment(context =>
{
// Dynamic environment variables
context.EnvironmentVariables["START_TIME"] = DateTimeOffset.UtcNow.ToString();
});
```
* TypeScript
apphost.mts
```typescript
import { createBuilder } from './.aspire/modules/aspire.mjs';
const builder = await createBuilder();
const app = await builder.addExecutable("api", "uvicorn", ".", ["main:app", "--reload", "--host", "0.0.0.0"])
.withEnvironment("DEBUG", "true")
.withEnvironment("LOG_LEVEL", "info")
.withEnvironment("START_TIME", new Date().toISOString());
```
## Publishing with PublishAsDockerFile
[Section titled “Publishing with PublishAsDockerFile”](#publishing-with-publishasdockerfile)
For production deployment, executable resources need to be containerized. Use the `PublishAsDockerFile` method to specify how the executable should be packaged:
* C#
AppHost.cs
```csharp
var builder = DistributedApplication.CreateBuilder(args);
var app = builder.AddExecutable(
"frontend", "npm", ".", "start", "--port", "3000")
.PublishAsDockerFile();
```
* TypeScript
apphost.mts
```typescript
import { createBuilder } from './.aspire/modules/aspire.mjs';
const builder = await createBuilder();
const app = await builder.addExecutable("frontend", "npm", ".", ["start", "--port", "3000"])
.publishAsDockerFile(async () => {});
```
When you call `PublishAsDockerFile()`, Aspire generates a Dockerfile during the publish process. You can customize this by providing your own Dockerfile:
### Custom Dockerfile for publishing
[Section titled “Custom Dockerfile for publishing”](#custom-dockerfile-for-publishing)
Create a `Dockerfile` in your executable’s working directory:
Dockerfile
```dockerfile
FROM node:22-alpine
WORKDIR /app
COPY package*.json ./
RUN npm ci --only=production
COPY . .
EXPOSE 3000
CMD ["npm", "start"]
```
Then reference it in your AppHost:
* C#
AppHost.cs
```csharp
var builder = DistributedApplication.CreateBuilder(args);
var app = builder.AddExecutable("frontend", "npm", ".", "start")
.PublishAsDockerFile([new DockerfileBuildArg("NODE_ENV", "production")]);
```
* TypeScript
apphost.mts
```typescript
import { createBuilder } from './.aspire/modules/aspire.mjs';
const builder = await createBuilder();
const app = await builder.addExecutable("frontend", "npm", ".", ["start"])
.publishAsDockerFile(async () => {});
```
## Best practices
[Section titled “Best practices”](#best-practices)
When working with executable resources:
1. **Use explicit paths**: For better reliability, use full paths to executables when possible.
2. **Handle dependencies**: Use `WithReference` to establish proper dependency relationships.
3. **Configure explicit start**: Use `WithExplicitStart()` for executables that shouldn’t start automatically.
4. **Prepare for deployment**: Always use `PublishAsDockerFile()` for production scenarios.
5. **Environment isolation**: Use environment variables rather than command-line arguments for sensitive configuration.
6. **Resource naming**: Use descriptive names that clearly identify the executable’s purpose.
# Hot Reload and watch
> Learn how hot reload works in Aspire and how `aspire watch` rebuilds and restarts resources automatically when project files change during development.
Aspire has two levels of watch behavior:
1. **AppHost watch** - watches the AppHost itself so changes to the application model restart the AppHost-managed application.
2. **Resource watch and hot reload** - depend on the application or framework backing each resource.
Aspire’s CLI watch support is centered on the AppHost. Aspire supports two AppHost languages, C# and TypeScript, and `defaultWatchEnabled` applies to the AppHost-managed application regardless of which AppHost language you use.
When watch mode is enabled, Aspire owns the file-watching loop for the AppHost-managed application. File changes cause Aspire to restart the application topology so the updated AppHost model and resources are applied.
Aspire watch mode is the recommended CLI workflow when you want hot reload-like behavior for AppHost changes. It is restart-based: Aspire restarts the AppHost-managed application after changes instead of applying runtime-specific hot reload semantics inside every resource process.
## Default Aspire behavior
[Section titled “Default Aspire behavior”](#default-aspire-behavior)
By default, `aspire run` and `aspire start` start the Aspire application once. They don’t watch the AppHost or resource source files.
After you change AppHost code, restart the Aspire application manually:
* For `aspire run`, stop the process with ⌃+C`⌃+C`Control + C`CtrlC`Control + C`CtrlC`, and then run `aspire run` again.
* For `aspire start`, run `aspire start` again. The command stops the previous detached instance and starts a new one.
## Enable default watch mode
[Section titled “Enable default watch mode”](#enable-default-watch-mode)
Aspire includes an opt-in `defaultWatchEnabled` feature flag. When enabled, Aspire uses watch mode by default and automatically restarts the Aspire application after supported AppHost or resource file changes:
Aspire CLI
```bash
aspire config set features.defaultWatchEnabled true
```
To enable watch mode for every Aspire project on your machine, set the value globally:
Aspire CLI
```bash
aspire config set features.defaultWatchEnabled true --global
```
To see the current value and available feature flags, run:
Aspire CLI
```bash
aspire config list --all
```
Watch mode is useful when you want Aspire to restart the AppHost-managed application for you after AppHost changes. It supports both C# and TypeScript AppHosts and is a restart-based workflow, not the same experience as runtime-specific or IDE-specific hot reload.
## AppHost language guidance
[Section titled “AppHost language guidance”](#apphost-language-guidance)
* C#
For a C# AppHost, `defaultWatchEnabled` watches the AppHost project. When AppHost code changes, Aspire restarts the AppHost-managed application so the updated model is applied.
Today, C# project resources are also controlled by this setting. That means changes to C# project resources can trigger Aspire to restart the AppHost-managed application too.
Use this workflow when changes affect:
* The AppHost model in `AppHost.cs`.
* C# project resources that are part of the AppHost.
* Resource configuration, endpoints, parameters, or integration setup.
* Multiple services that need to be restarted together under Aspire orchestration.
Aspire CLI
```bash
aspire config set features.defaultWatchEnabled true
aspire run
```
* TypeScript
For a TypeScript AppHost, `defaultWatchEnabled` watches the AppHost. When AppHost code changes, Aspire restarts the AppHost-managed application so the updated model is applied.
TypeScript AppHost watch doesn’t automatically provide hot reload for every resource in the application. Use resource-specific watch, reload, restart, or rebuild workflows for changes inside individual resources.
Use this workflow when changes affect:
* The AppHost model in `apphost.mts`.
* Resource configuration, endpoints, parameters, or integration setup.
* Multiple services that need to be restarted together under Aspire orchestration.
Aspire CLI
```bash
aspire config set features.defaultWatchEnabled true
aspire run
```
## Hot reload for Aspire resources
[Section titled “Hot reload for Aspire resources”](#hot-reload-for-aspire-resources)
AppHost watch and resource hot reload are separate concerns. The AppHost describes and starts the application topology, but each resource is backed by a framework or runtime with its own development loop.
In general, keep the AppHost running while you work on individual resources. Don’t stop and restart the AppHost just because one resource changed. If a resource needs to be restarted or rebuilt, do that for the individual resource from the Aspire CLI or the Aspire Dashboard.
Use the `aspire resource` command to control individual resources from the CLI:
Aspire CLI
```bash
aspire resource stop
aspire resource start
```
For C# project resources, rebuild the individual resource when the project needs to be rebuilt:
Aspire CLI
```bash
aspire resource rebuild
```
* C# projects
`dotnet watch` natively supports C# Aspire AppHosts and transitively watches .NET projects in the application:
* Changes to the AppHost restart the AppHost.
* Changes to an individual .NET project, or to one of its dependencies, restart that project.
* Rude edits restart the application.
Run `dotnet watch` against the AppHost project when you want the .NET SDK’s watch loop for the AppHost and its C# projects:
.NET CLI
```bash
dotnet watch --project './src/MyApp.AppHost/MyApp.AppHost.csproj'
```
Important
This experience has some quirks today. Some changes are applied but can still require an explicit restart, and it isn’t always easy to tell when that happened. If you don’t observe an expected change, restart the resource with `aspire resource stop` and `aspire resource start`, or rebuild a C# project resource with `aspire resource rebuild`.
When you use Aspire watch mode instead, C# project resources are special today: `defaultWatchEnabled` controls both the C# AppHost and C# project resources.
* Vite resources
Vite resources use Vite’s development server behavior. Vite can provide browser refresh and Hot Module Replacement for the frontend application, but that behavior is separate from AppHost watch.
Use Aspire watch when changes affect the AppHost model. Use the Vite development loop when changes affect the frontend application and you want Vite’s browser refresh or Hot Module Replacement behavior.
If a Vite resource needs a restart, restart the Vite resource from the Aspire CLI or dashboard instead of restarting the AppHost.
* Other resources
Other Aspire resources follow the watch, reload, or restart behavior of the runtime or framework that backs the resource. For example, a container resource, executable resource, or framework-specific resource might not support hot reload at all, or it might require its own watch command.
Use Aspire watch when the AppHost model should be re-evaluated. Use the resource’s native development command when you want the tightest inner loop for that resource. If the resource needs to be restarted or rebuilt, restart or rebuild that individual resource from the Aspire CLI or dashboard.
## Recommended workflow
[Section titled “Recommended workflow”](#recommended-workflow)
Use these workflows based on what you’re editing:
| Goal | Recommended command |
| ------------------------------------------------------- | ------------------------------------------------------------------------------------------ |
| Run the whole distributed app once | `aspire run` |
| Run the whole distributed app in the background | `aspire start` |
| Watch a C# or TypeScript AppHost from the CLI | `aspire config set features.defaultWatchEnabled true`, then `aspire run` or `aspire start` |
| Watch C# project resources through Aspire | `aspire config set features.defaultWatchEnabled true`, then `aspire run` or `aspire start` |
| Restart one resource | `aspire resource stop`, then `aspire resource start` |
| Rebuild one C# project resource | `aspire resource rebuild` |
| Use a runtime-specific hot reload loop for one resource | The resource’s native watch, reload, or development-server command |
Aspire CLI doesn’t currently provide a single hot reload command that applies every runtime’s hot reload semantics across an AppHost-managed distributed application. Aspire default watch supports both AppHost languages by restarting the AppHost-managed application after AppHost changes. C# project resources are also controlled by this setting today. For other resources, keep the AppHost running and use the resource’s framework, runtime, CLI action, or dashboard action for resource-specific reloads, restarts, and rebuilds.
## IDE hot reload and debugging
[Section titled “IDE hot reload and debugging”](#ide-hot-reload-and-debugging)
Visual Studio, Visual Studio Code, and JetBrains Rider provide their own hot reload and debugging experiences. When you run the AppHost under a debugger in one of these IDEs, Aspire delegates debugging and IDE-managed hot reload behavior to that IDE. This doesn’t integrate with or overlap Aspire’s CLI restart, rebuild, or watch behavior.
Important
Use an IDE workflow when you want the IDE to manage debugging or hot reload for supported resources. Use Aspire CLI and dashboard actions when you want Aspire to restart, rebuild, or watch the AppHost-managed application and its resources.
### Visual Studio Code
[Section titled “Visual Studio Code”](#visual-studio-code)
Use the Aspire extension for Visual Studio Code when you want VS Code to start the AppHost, attach debuggers, and manage supported resource debugging experiences. VS Code hot reload or framework-specific refresh behavior still belongs to the debugger or framework backing the resource, not to Aspire restart, rebuild, or watch behavior.
### Visual Studio
[Section titled “Visual Studio”](#visual-studio)
Use Visual Studio when you want its built-in debugging and hot reload experience for supported resources. Visual Studio can run and debug Aspire apps, but IDE hot reload is still separate from Aspire restart, rebuild, and watch behavior.
### JetBrains Rider
[Section titled “JetBrains Rider”](#jetbrains-rider)
Use JetBrains Rider when you want Rider’s debugging and hot reload experience for supported resources. Rider’s IDE-managed hot reload behavior is separate from Aspire restart, rebuild, and watch behavior.
## See also
[Section titled “See also”](#see-also)
* [`aspire run`](/reference/cli/commands/aspire-run/)
* [`aspire start`](/reference/cli/commands/aspire-start/)
* [`aspire config set`](/reference/cli/commands/aspire-config-set/)
* [Aspire VS Code extension](/get-started/aspire-vscode-extension/)
# Migrate from Docker Compose to Aspire
> Migrate your Docker Compose applications to Aspire — map services, volumes, networks, and environment variables to AppHost APIs and modernize your developer workflow.
This guide helps you understand how to migrate applications from Docker Compose to Aspire, highlighting the key conceptual differences and providing accurate, practical examples for common migration scenarios.
## Understand the differences
[Section titled “Understand the differences”](#understand-the-differences)
While Docker Compose and Aspire might seem similar at first glance, they serve different purposes and operate at different levels of abstraction.
### Docker Compose vs Aspire
[Section titled “Docker Compose vs Aspire”](#docker-compose-vs-aspire)
| | Docker Compose | Aspire |
| -------------------------- | ----------------------------- | ----------------------------------------------------------- |
| **Primary purpose** | Container orchestration | Development-time orchestration and app composition |
| **Scope** | Container-focused | Multi-resource (containers, .NET projects, cloud resources) |
| **Configuration** | YAML-based | C#-based, strongly typed |
| **Target environment** | Any Docker runtime | Development and cloud deployment |
| **Service discovery** | DNS-based container discovery | Built-in service discovery with environment variables |
| **Development experience** | Manual container management | Integrated tooling, dashboard, and telemetry |
### Key conceptual shifts
[Section titled “Key conceptual shifts”](#key-conceptual-shifts)
When migrating from Docker Compose to Aspire, consider these conceptual differences:
* **From YAML to C#** — Configuration moves from declarative YAML to imperative, strongly-typed C# code
* **From containers to resources** — Aspire manages not just containers, but .NET projects, executables, parameters, and cloud resources
* **From manual networking to service discovery** — Aspire automatically configures service discovery and connection strings
* **From development gaps to integrated experience** — Aspire provides dashboard, telemetry, and debugging integration
* **Startup orchestration differs** — Docker Compose `depends_on` controls startup order, while Aspire `WithReference` only configures service discovery; use `WaitFor` for startup ordering
For detailed API mappings, see [Docker Compose to Aspire AppHost API reference](/app-host/docker-compose-to-apphost-reference/).
## Common migration patterns
[Section titled “Common migration patterns”](#common-migration-patterns)
This section demonstrates practical migration scenarios you’ll likely encounter when moving from Docker Compose to Aspire. Each pattern shows a complete Docker Compose example alongside its accurate Aspire equivalent.
### Multi-service web application
[Section titled “Multi-service web application”](#multi-service-web-application)
This example shows a typical three-tier application with a frontend, API, and database.
**Docker Compose example:**
compose.yaml
```yaml
version: '3.8'
services:
frontend:
build: ./frontend
ports:
- "3000:3000"
depends_on:
api:
condition: service_healthy
environment:
- API_URL=http://api:5000
api:
build: ./api
ports:
- "5000:5000"
depends_on:
database:
condition: service_healthy
environment:
- ConnectionStrings__DefaultConnection=Host=database;Database=myapp;Username=postgres;Password=secret
healthcheck:
test: ["CMD", "curl", "-f", "http://localhost:5000/health"]
interval: 10s
timeout: 3s
retries: 3
database:
image: postgres:15
environment:
- POSTGRES_DB=myapp
- POSTGRES_USER=postgres
- POSTGRES_PASSWORD=secret
volumes:
- postgres_data:/var/lib/postgresql/data
healthcheck:
test: ["CMD-SHELL", "pg_isready -U postgres"]
interval: 10s
timeout: 3s
retries: 3
volumes:
postgres_data:
```
**Aspire equivalent:**
* C#
AppHost.cs
```csharp
var builder = DistributedApplication.CreateBuilder(args);
// Add PostgreSQL with explicit version and persistent storage
var database = builder.AddPostgres("postgres")
.WithImageTag("15")
.WithDataVolume()
.AddDatabase("myapp");
// Add the API project with proper dependencies
var api = builder.AddProject("api")
.WithHttpEndpoint(port: 5000)
.WithHttpHealthCheck("/health")
.WithReference(database, "DefaultConnection")
.WaitFor(database);
// Add the frontend project with dependencies
var frontend = builder.AddProject("frontend")
.WithHttpEndpoint(port: 3000)
.WithReference(api)
.WithEnvironment("API_URL", api.GetEndpoint("http"))
.WaitFor(api);
builder.Build().Run();
```
* TypeScript
apphost.mts
```typescript
import { createBuilder } from './.aspire/modules/aspire.mjs';
const builder = await createBuilder();
// Add PostgreSQL with explicit version and persistent storage
const database = (await builder.addPostgres("postgres")
.withImageTag("15")
.withDataVolume())
.addDatabase("myapp");
// Add the API project with proper dependencies
const api = await builder.addProject("api", "./MyApp.Api/MyApp.Api.csproj")
.withHttpEndpoint({ port: 5000 })
.withHttpHealthCheck("/health")
.withReference(database, "DefaultConnection")
.waitFor(database);
// Add the frontend project with dependencies
const frontend = await builder.addProject("frontend", "./MyApp.Frontend/MyApp.Frontend.csproj")
.withHttpEndpoint({ port: 3000 })
.withReference(api)
.withEnvironment("API_URL", api.getEndpoint("http"))
.waitFor(api);
await builder.build().run();
```
build: services become project or Dockerfile resources
In Docker Compose, the `build:` directive creates container images from Dockerfiles. In Aspire, .NET services are added directly as project references with `AddProject()`, providing better debugging, hot reload, and telemetry integration. For services that still build from Dockerfiles, use `AddDockerfile()` for an existing Dockerfile or `AddDockerfileBuilder()` when the AppHost should generate the Dockerfile programmatically.
**Key differences explained:**
* **Build vs. project** — Docker Compose `build:` services become `AddProject()` for .NET apps, which runs them directly instead of in containers
* **Ports** — Both examples explicitly map ports (3000 and 5000)
* **Startup order** — Docker Compose uses `depends_on` with health conditions; Aspire uses `WaitFor()` for startup ordering
* **Service discovery** — `WithReference()` only configures service discovery and connection strings; it doesn’t control startup order
* **Connection strings** — By default, `WithReference(database)` provides `ConnectionStrings__myapp` using the resource name from `AddDatabase()`. To match a different name like `DefaultConnection`, use a named reference: `.WithReference(database, "DefaultConnection")`
* **Volumes** — `WithDataVolume()` must be called explicitly to add persistent storage; it’s not automatic
* **Image versions** — `WithImageTag("15")` pins PostgreSQL to version 15
### Container-based services
[Section titled “Container-based services”](#container-based-services)
This example shows a mix of existing container images and a Dockerfile-built service being orchestrated.
**Docker Compose example:**
compose.yaml
```yaml
version: '3.8'
services:
web:
build: .
ports:
- "8080:8080"
depends_on:
redis:
condition: service_started
postgres:
condition: service_healthy
environment:
- REDIS_URL=redis://redis:6379
- DATABASE_URL=postgresql://postgres:secret@postgres:5432/main
redis:
image: redis:7
ports:
- "6379:6379"
postgres:
image: postgres:15
environment:
POSTGRES_PASSWORD: secret
volumes:
- postgres_data:/var/lib/postgresql/data
healthcheck:
test: ["CMD-SHELL", "pg_isready"]
interval: 10s
volumes:
postgres_data:
```
**Aspire equivalent:**
* C#
AppHost.cs
```csharp
var builder = DistributedApplication.CreateBuilder(args);
// Add backing services with explicit versions
var redis = builder.AddRedis("redis")
.WithImageTag("7")
.WithHostPort(6379);
var postgres = builder.AddPostgres("postgres")
.WithImageTag("15")
.WithDataVolume()
.AddDatabase("main");
// Build the web app from a Dockerfile (matches Docker Compose "build: .")
var web = builder.AddDockerfile("web", ".")
.WithHttpEndpoint(port: 8080, targetPort: 8080)
.WithReference(redis)
.WithReference(postgres)
.WaitFor(redis)
.WaitFor(postgres);
builder.Build().Run();
```
* TypeScript
apphost.mts
```typescript
import { createBuilder } from './.aspire/modules/aspire.mjs';
const builder = await createBuilder();
// Add backing services with explicit versions
const redis = await builder.addRedis("redis")
.withImageTag("7")
.withHostPort(6379);
const postgres = (await builder.addPostgres("postgres")
.withImageTag("15")
.withDataVolume())
.addDatabase("main");
// Build the web app from a Dockerfile (matches Docker Compose "build: .")
const web = await builder.addDockerfile("web", ".")
.withHttpEndpoint({ port: 8080, targetPort: 8080 })
.withReference(redis)
.withReference(postgres)
.waitFor(redis)
.waitFor(postgres);
await builder.build().run();
```
Connection string format differences
Aspire generates .NET-format connection strings, which differ from Docker Compose URL formats:
* Docker Compose: `REDIS_URL=redis://redis:6379`
* Aspire: `ConnectionStrings__redis=localhost:54321`
* Docker Compose: `DATABASE_URL=postgresql://postgres:secret@postgres:5432/main`
* Aspire: `ConnectionStrings__main=Host=localhost;Port=12345;Username=postgres;Password=;Database=main`
If your application expects URL-format environment variables, construct them manually with `WithEnvironment()`. See [Environment variables and configuration](#environment-variables-and-configuration) for details.
**Key differences explained:**
* **Image versions** — Explicitly specified with `WithImageTag()` to match Docker Compose
* **Dockerfile builds** — Docker Compose `build: .` maps to `AddDockerfile("web", ".")`, which builds a container image from a Dockerfile. Use `AddContainer()` for pre-built images that use `image:` in Docker Compose
* **Ports** — `WithHostPort()` maps to a static host port; without it, Aspire assigns a random port
* **Volumes** — `WithDataVolume()` must be called explicitly to add persistent storage
* **Startup ordering** — `WaitFor()` controls startup order, similar to Docker Compose `depends_on` with conditions
* **Connection strings** — `WithReference()` provides Aspire-format connection strings (`ConnectionStrings__*`), not URL-format variables
### Environment variables and configuration
[Section titled “Environment variables and configuration”](#environment-variables-and-configuration)
This example shows different approaches to configuration management.
**Docker Compose approach:**
compose.yaml
```yaml
services:
app:
image: myapp:latest
environment:
- DATABASE_URL=postgresql://user:pass@db:5432/myapp
- REDIS_URL=redis://cache:6379
- API_KEY=${API_KEY}
- LOG_LEVEL=info
```
**Aspire approach:**
* C#
AppHost.cs
```csharp
var builder = DistributedApplication.CreateBuilder(args);
// Add external parameter for secrets
var apiKey = builder.AddParameter("apiKey", secret: true);
var database = builder.AddPostgres("db")
.AddDatabase("myapp");
var cache = builder.AddRedis("cache");
var app = builder.AddContainer("app", "myapp", "latest")
.WithReference(database)
.WithReference(cache)
.WithEnvironment("API_KEY", apiKey)
.WithEnvironment("LOG_LEVEL", "info");
builder.Build().Run();
```
* TypeScript
apphost.mts
```typescript
import { createBuilder } from './.aspire/modules/aspire.mjs';
const builder = await createBuilder();
// Add external parameter for secrets
const apiKey = builder.addParameter("apiKey", { secret: true });
const database = (await builder.addPostgres("db"))
.addDatabase("myapp");
const cache = await builder.addRedis("cache");
const app = await builder.addContainer("app", { image: "myapp", tag: "latest" })
.withReference(database)
.withReference(cache)
.withEnvironment("API_KEY", apiKey)
.withEnvironment("LOG_LEVEL", "info");
await builder.build().run();
```
Aspire connection strings differ from Docker Compose URLs
`WithReference()` provides connection strings in .NET format, not URL format:
* `ConnectionStrings__myapp=Host=localhost;Port=12345;Username=postgres;Password=;Database=myapp`
* `ConnectionStrings__cache=localhost:54321`
If your application expects URL-format variables like `DATABASE_URL` or `REDIS_URL`, construct them manually using the `WithEnvironment` callback:
* C#
AppHost.cs
```csharp
var dbPassword = builder.AddParameter("dbPassword", secret: true);
var db = builder.AddPostgres("db", password: dbPassword)
.AddDatabase("myapp");
var app = builder.AddContainer("app", "myapp", "latest")
.WithReference(db)
.WithEnvironment(context =>
{
context.EnvironmentVariables["DATABASE_URL"] =
ReferenceExpression.Create(
$"postgresql://postgres:{dbPassword}@db:5432/myapp");
context.EnvironmentVariables["REDIS_URL"] = "redis://cache:6379";
});
```
* TypeScript
apphost.mts
```typescript
const dbPassword = builder.addParameter("dbPassword", { secret: true });
const db = (await builder.addPostgres("db", { password: dbPassword }))
.addDatabase("myapp");
const app = await builder.addContainer("app", "myapp:latest")
.withReference(db)
.withEnvironment("DATABASE_URL",
builder.createReferenceExpression`postgresql://postgres:${dbPassword}@db:5432/myapp`)
.withEnvironment("REDIS_URL", "redis://cache:6379");
```
### Custom volumes and bind mounts
[Section titled “Custom volumes and bind mounts”](#custom-volumes-and-bind-mounts)
**Docker Compose example:**
compose.yaml
```yaml
version: '3.8'
services:
app:
image: myapp:latest
volumes:
- app_data:/data
- ./config:/app/config:ro
worker:
image: myworker:latest
volumes:
- app_data:/shared
volumes:
app_data:
```
**Aspire equivalent:**
* C#
AppHost.cs
```csharp
var builder = DistributedApplication.CreateBuilder(args);
// Create a named volume for sharing data
var appData = builder.AddVolume("app-data");
var app = builder.AddContainer("app", "myapp", "latest")
.WithVolume(appData, "/data")
.WithBindMount("./config", "/app/config", isReadOnly: true);
var worker = builder.AddContainer("worker", "myworker", "latest")
.WithVolume(appData, "/shared");
builder.Build().Run();
```
* TypeScript
apphost.mts
```typescript
import { createBuilder } from './.aspire/modules/aspire.mjs';
const builder = await createBuilder();
const app = await builder.addContainer("app", { image: "myapp", tag: "latest" })
.withVolume("/data", { name: "app-data", isReadOnly: true })
.withBindMount("./config", "/app/config", { isReadOnly: true });
const worker = await builder.addContainer("worker", { image: "myworker", tag: "latest" })
.withVolume("/shared", { name: "app-data" });
await builder.build().run();
```
**Key differences:**
* **Named volumes** — Created with `AddVolume()` and shared between containers
* **Bind mounts** — Use `WithBindMount()` for host directory access
### Networking
[Section titled “Networking”](#networking)
Docker Compose supports custom networks to isolate groups of services from each other:
compose.yaml
```yaml
services:
proxy:
build: ./proxy
networks:
- frontend
app:
build: ./app
networks:
- frontend
- backend
db:
image: postgres
networks:
- backend
networks:
frontend:
backend:
```
Aspire doesn’t have an equivalent for custom network isolation. Instead, Aspire automatically creates a shared container network for all container resources and uses service discovery to manage inter-service communication. All containers in an Aspire AppHost can reach each other by resource name. .NET projects and executables run on the host and access containers through injected host/port endpoints.
Note
If your Docker Compose setup relies on network isolation (for example, preventing a frontend service from directly accessing the database), Aspire doesn’t provide a direct equivalent. Consider using application-level access controls or firewall rules in your deployment environment instead.
## Migration strategy
[Section titled “Migration strategy”](#migration-strategy)
Successfully migrating from Docker Compose to Aspire requires a systematic approach.
1. ### Assess your current setup
[Section titled “Assess your current setup”](#assess-your-current-setup)
Before migrating, inventory your Docker Compose setup:
* **Services** — Identify all services including databases, caches, APIs, and web applications
* **Dependencies** — Map out service dependencies from `depends_on` declarations
* **Data persistence** — Catalog all volumes and bind mounts used for data storage
* **Environment variables** — List all configuration variables and secrets
* **Health checks** — Document any custom health check commands
* **Image versions** — Note specific versions used in production
2. ### Create the Aspire AppHost
[Section titled “Create the Aspire AppHost”](#create-the-aspire-apphost)
Start by creating a new Aspire project:
```bash
aspire new aspire-starter -o MyApp
```
3. ### Migrate services incrementally
[Section titled “Migrate services incrementally”](#migrate-services-incrementally)
Migrate services one by one, starting with backing services:
* **Add backing services** like PostgreSQL, Redis with specific versions using `WithImageTag()`
* **Add persistent storage** using `WithDataVolume()` where needed
* **Convert .NET applications** to project references with `AddProject()` for better integration
* **Convert Dockerfile-built containers** using `AddDockerfile()` to match `build:` directives
* **Convert pre-built images** using `AddContainer()` to match `image:` directives
* **Configure dependencies** with `WithReference()` for service discovery
* **Add startup ordering** with `WaitFor()` to match `depends_on` behavior
* **Set up environment variables** — Note that connection string formats will differ
* **Migrate health checks** — Use `WithHttpHealthCheck()` or `WithHealthCheck()` for custom checks
4. ### Handle data migration
[Section titled “Handle data migration”](#handle-data-migration)
For persistent data:
* Use `WithDataVolume()` for automatic volume management with integrations
* Use `WithVolume()` for named volumes that need to persist data
* Use `WithBindMount()` for host directory mounts when you need direct access to host files
5. ### Test and validate
[Section titled “Test and validate”](#test-and-validate)
* Start the Aspire AppHost and verify all services start correctly
* Check the dashboard to confirm service health and connectivity status
* Validate that inter-service communication works as expected
* **Verify connection strings** — If your app expects specific URL formats, you may need to adjust environment variables
## Migration troubleshooting
[Section titled “Migration troubleshooting”](#migration-troubleshooting)
### Common issues and solutions
[Section titled “Common issues and solutions”](#common-issues-and-solutions)
#### Connection string format mismatch
[Section titled “Connection string format mismatch”](#connection-string-format-mismatch)
Aspire generates .NET-style connection strings (`ConnectionStrings__*`) rather than URL formats like `postgresql://` or `redis://`.
**Solution**: If your application expects specific URL formats, construct them manually using `WithEnvironment()`:
* C#
AppHost.cs
```csharp
var dbPassword = builder.AddParameter("dbPassword", secret: true);
var postgres = builder.AddPostgres("db", password: dbPassword)
.AddDatabase("myapp");
var app = builder.AddContainer("app", "myapp", "latest")
.WithReference(postgres)
.WithEnvironment(context =>
{
context.EnvironmentVariables["DATABASE_URL"] =
ReferenceExpression.Create(
$"postgresql://postgres:{dbPassword}@db:5432/myapp");
});
```
* TypeScript
apphost.mts
```typescript
const dbPassword = builder.addParameter("dbPassword", { secret: true });
const postgres = (await builder.addPostgres("db", { password: dbPassword }))
.addDatabase("myapp");
const app = await builder.addContainer("app", "myapp:latest")
.withReference(postgres)
.withEnvironment("DATABASE_URL",
builder.createReferenceExpression`postgresql://postgres:${dbPassword}@db:5432/myapp`);
```
#### Service startup order issues
[Section titled “Service startup order issues”](#service-startup-order-issues)
`WithReference()` only configures service discovery, not startup ordering.
**Solution**: Use `WaitFor()` to ensure dependencies are ready:
* C#
AppHost.cs
```csharp
var api = builder.AddProject("api")
.WithReference(database) // Service discovery
.WaitFor(database); // Startup ordering
```
* TypeScript
apphost.mts
```typescript
const api = await builder.addProject("api", "./Api/Api.csproj", "https")
.withReference(database) // Service discovery
.waitFor(database); // Startup ordering
```
#### Volume mounting issues
[Section titled “Volume mounting issues”](#volume-mounting-issues)
* Use absolute paths for bind mounts to avoid path resolution issues
* Ensure the host directory exists and has proper permissions
* Use `WithDataVolume()` for database integrations — this must be called explicitly
#### Port conflicts
[Section titled “Port conflicts”](#port-conflicts)
Aspire automatically assigns random ports by default.
**Solution**: Use `WithHostPort()` or `WithHttpEndpoint(port:)` for static port mapping:
* C#
AppHost.cs
```csharp
var redis = builder.AddRedis("cache")
.WithHostPort(6379);
```
* TypeScript
apphost.mts
```typescript
const redis = await builder.addRedis("cache")
.withHostPort(6379);
```
#### Health check migration
[Section titled “Health check migration”](#health-check-migration)
Docker Compose health checks use shell commands. Aspire integrations (like PostgreSQL and Redis) include built-in health checks automatically. For custom health checks, Aspire offers different approaches depending on the resource type.
**Solution**: For resources with HTTP endpoints, use `WithHttpHealthCheck()`:
* C#
AppHost.cs
```csharp
var api = builder.AddProject("api")
.WithHttpHealthCheck("/health");
```
* TypeScript
apphost.mts
```typescript
const api = await builder.addProject("api", "./Api/Api.csproj", "https")
.withHttpHealthCheck("/health");
```
For custom container health checks that need shell commands (like RabbitMQ), register a custom health check and associate it with the resource:
* C#
AppHost.cs
```csharp
builder.Services.AddHealthChecks()
.AddCheck("rabbitmq-health", () =>
{
// Implement your custom health check logic here,
// for example, attempting a TCP connection to the service
return HealthCheckResult.Healthy();
});
var rabbit = builder.AddContainer("rabbitmq", "rabbitmq", "4.1.4-management-alpine")
.WithHealthCheck("rabbitmq-health");
// WaitFor uses the registered health check to determine readiness
var app = builder.AddProject("app")
.WaitFor(rabbit);
```
* TypeScript
apphost.mts
```typescript
const rabbit = await builder.addContainer("rabbitmq", "rabbitmq", "4.1.4-management-alpine")
.withHealthCheck("rabbitmq-health");
// WaitFor uses the registered health check to determine readiness
const app = await builder.addProject("app", "./App/App.csproj", "https")
.waitFor(rabbit);
```
Note
Aspire integration packages (like `Aspire.Hosting.PostgreSQL` or `Aspire.Hosting.Redis`) include built-in health checks. You don’t need to define custom health checks for these services — `WaitFor()` automatically waits for the built-in health check to pass.
## Next steps
[Section titled “Next steps”](#next-steps)
After migrating to Aspire:
* Explore [Aspire integrations](/integrations/overview/) to replace custom container configurations
* Set up [health checks](/fundamentals/health-checks/) for better monitoring
* Learn about [deployment options](/deployment/deploy-with-aspire/) for production environments
* Consider [testing](/testing/overview/) your distributed application
* Review [telemetry configuration](/fundamentals/telemetry/) for observability
# Configure resource lifetimes in Aspire
> Learn how session, persistent, resource-scoped, and parent-process lifetimes control Aspire containers, executables, and projects.
Aspire resources support a number of different lifetime modes. For example, the default **session lifetime** starts a resource when the AppHost starts and shuts it down when the AppHost exits. A **persistent lifetime** leaves a resource running when the AppHost exits and can reuse the same instance on the next run.
Resource lifetimes apply to containers, executables, and projects. Persistent executable and project lifetimes are experimental in Aspire 13.4. You can use different lifetimes for resources that take time to initialize, need stable local endpoints, should remain available while you restart or rebuild the AppHost, or need to match another resource’s lifetime.
Experimental shared lifetime APIs
The shared lifetime APIs are experimental and emit diagnostic `ASPIREPERSISTENCE001`. The existing container-specific `WithLifetime(ContainerLifetime.Persistent)` and `WithLifetime(ContainerLifetime.Session)` APIs remain supported for container resources.
## Lifetime modes
[Section titled “Lifetime modes”](#lifetime-modes)
Use the shared lifetime APIs for new code. They support container, executable, and project resources.
### Session lifetime
[Section titled “Session lifetime”](#session-lifetime)
A session lifetime creates the resource when the AppHost starts and disposes of it when the AppHost stops. This is the default lifetime for resources, so you usually don’t need to configure it explicitly.
Use session lifetime for resources that should only exist while the AppHost is running, such as local test dependencies, temporary containers, or processes that don’t need stable state across runs. Session resources also default to proxied endpoints, which are available while the AppHost is running.
If you previously configured another lifetime and want to return a resource to the default behavior, call `WithSessionLifetime()`. For container resources, `WithLifetime(ContainerLifetime.Session)` is still supported.
### Persistent lifetime
[Section titled “Persistent lifetime”](#persistent-lifetime)
A persistent lifetime reuses a previously created resource when possible and doesn’t dispose of it when the AppHost stops. Configure this behavior with `WithPersistentLifetime()`, or with the existing container-specific `WithLifetime(ContainerLifetime.Persistent)` API for container resources.
Use persistent lifetime for resources that are expensive to initialize, need stable local endpoints, or should remain available while you restart or rebuild the AppHost. Common examples include databases, message brokers, emulators, long-running executables, and project resources that should continue running after the AppHost exits.
Configuration changes can recreate persistent resources
Persistent resources are automatically recreated when the AppHost detects meaningful configuration changes. If the configuration differs, the resource is recreated with the new settings.
Persistent resources default to proxyless endpoints so a stable local endpoint can remain reachable after the AppHost stops. You can still configure endpoint proxy behavior explicitly. For example, set `isProxied: true` or `IsProxied = true` when you need Aspire’s proxy for a specific endpoint, or disable endpoint proxy support when you intentionally want every endpoint on a resource to be proxyless. Persistent executable endpoints must have a concrete `port` or `targetPort`; automatically persisted random executable ports aren’t supported.
Persistent container ≠ persistent data
Persistent container lifetime doesn’t guarantee data durability. For details, see [Container lifetime vs. data durability](#container-lifetime-vs-data-durability).
Persistent resources and replicas
Persistent resources don’t support replicas because they depend on a single unique resource identifier to be resolved across AppHost runs.
Persistent resources aren’t compatible with Aspire IDE debugging sessions. If you need to debug a persistent executable or project, use your debugger’s attach mode if one is available.
### Parent-process lifetime
[Section titled “Parent-process lifetime”](#parent-process-lifetime)
A parent-process lifetime keeps a resource available across AppHost restarts, but scopes cleanup to a parent process. Configure this behavior with `WithParentProcessLifetime(processId)`.
Use parent-process lifetime for resources that should outlive an individual AppHost run but still be cleaned up when a broader development tool, IDE, or other owning process exits.
Parent-process lifetime resources share persistent resource behavior across AppHost runs. If Aspire detects meaningful configuration changes on a subsequent run, the resource is recreated with the new settings.
The parent process ID must be the valid ID of a running process. Aspire records both the process ID and the process identity timestamp so cleanup follows the specific process instance instead of accidentally matching a reused process ID.
### Resource-scoped lifetime
[Section titled “Resource-scoped lifetime”](#resource-scoped-lifetime)
A resource-scoped lifetime configures one resource to use another resource’s effective lifetime. Configure this behavior with `WithLifetimeOf(resource)`.
Use resource-scoped lifetime when a companion resource should follow the lifetime choice of another resource. This is useful for sidecars, helper executables, or child resources that should become persistent only when the resource they support is persistent.
Aspire evaluates the source resource’s lifetime when it prepares the application model, so later lifetime changes to the source resource are reflected by the dependent resource. The source and dependent resources must both support lifetime configuration.
## Configure a persistent container
[Section titled “Configure a persistent container”](#configure-a-persistent-container)
For new code, configure a persistent container with `WithPersistentLifetime()`:
* C#
AppHost.cs
```csharp
var builder = DistributedApplication.CreateBuilder(args);
var postgres = builder.AddPostgres("postgres")
.WithPersistentLifetime()
.WithDataVolume();
var db = postgres.AddDatabase("inventorydb");
builder.AddProject("inventory")
.WithReference(db);
builder.Build().Run();
```
* TypeScript
apphost.mts
```typescript
import { createBuilder } from './.aspire/modules/aspire.mjs';
const builder = await createBuilder();
const postgres = await builder.addPostgres('postgres');
await postgres.withPersistentLifetime();
await postgres.withDataVolume();
const db = postgres.addDatabase('inventorydb');
const inventory = await builder.addProject(
'inventory',
'./InventoryService/InventoryService.csproj'
);
await inventory.withReference(db);
await builder.build().run();
```
In the preceding example, the PostgreSQL container persists between AppHost runs, and `WithDataVolume()` stores database data in a named volume that survives container recreation. The `inventory` project references the database as normal.
## Configure a persistent executable
[Section titled “Configure a persistent executable”](#configure-a-persistent-executable)
Executable resources can also use persistent lifetimes. Persistent executables are useful for local services that have expensive startup, need stable process identity, or should remain reachable while the AppHost restarts.
* C#
AppHost.cs
```csharp
var builder = DistributedApplication.CreateBuilder(args);
var worker = builder.AddExecutable("worker", "node", "../worker", "server.js")
.WithHttpEndpoint(port: 5050, targetPort: 5050)
.WithPersistentLifetime();
builder.Build().Run();
```
* TypeScript
apphost.mts
```typescript
import { createBuilder } from './.aspire/modules/aspire.mjs';
const builder = await createBuilder();
const worker = await builder.addExecutable('worker', 'node', '../worker', [
'server.js',
]);
await worker.withHttpEndpoint({ port: 5050, targetPort: 5050 });
await worker.withPersistentLifetime();
await builder.build().run();
```
Configure a concrete `port` or `targetPort` for persistent executable endpoints; automatically persisted random executable ports aren’t supported.
## Configure a persistent project
[Section titled “Configure a persistent project”](#configure-a-persistent-project)
Project resources can use persistent lifetimes when you want the project process to continue running after the AppHost exits.
* C#
AppHost.cs
```csharp
var builder = DistributedApplication.CreateBuilder(args);
var api = builder.AddProject("api")
.WithPersistentLifetime();
builder.Build().Run();
```
* TypeScript
apphost.mts
```typescript
import { createBuilder } from './.aspire/modules/aspire.mjs';
const builder = await createBuilder();
const api = await builder.addProject('api', '../ApiService/ApiService.csproj');
await api.withPersistentLifetime();
await builder.build().run();
```
Persistent project and executable resources are run by Aspire’s orchestrator so it can manage their lifecycle consistently. Persistent project and executable resources don’t support replicas.
## Match another resource’s lifetime
[Section titled “Match another resource’s lifetime”](#match-another-resources-lifetime)
Use `WithLifetimeOf` when a companion resource should follow another resource’s lifetime. This is useful when a sidecar, helper process, or supporting service should become persistent only when its source resource is persistent.
* C#
AppHost.cs
```csharp
var builder = DistributedApplication.CreateBuilder(args);
var database = builder.AddPostgres("postgres")
.WithPersistentLifetime()
.WithDataVolume();
var companion = builder.AddExecutable("companion", "dotnet", "../Companion", "Companion.dll")
.WithLifetimeOf(database);
builder.Build().Run();
```
* TypeScript
apphost.mts
```typescript
import { createBuilder } from './.aspire/modules/aspire.mjs';
const builder = await createBuilder();
const database = await builder.addPostgres('postgres');
await database.withPersistentLifetime();
await database.withDataVolume();
const companion = await builder.addExecutable(
'companion',
'dotnet',
'../Companion',
['Companion.dll']
);
await companion.withLifetimeOf(database);
await builder.build().run();
```
The dependent resource’s lifetime is evaluated when Aspire prepares the application model, so later changes to the source resource’s lifetime are reflected by the dependent resource.
## Scope cleanup to a parent process
[Section titled “Scope cleanup to a parent process”](#scope-cleanup-to-a-parent-process)
Use `WithParentProcessLifetime` when a resource should survive AppHost restarts but be cleaned up when another process exits. Aspire records the parent process identity instead of retaining a live process handle, so the cleanup scope follows the specific process instance instead of a reused process ID.
* C#
AppHost.cs
```csharp
var builder = DistributedApplication.CreateBuilder(args);
var parentProcessId = int.Parse(builder.Configuration["RESOURCE_PARENT_PROCESS_ID"]!);
var worker = builder.AddExecutable("scoped-worker", "node", "../worker", "server.js")
.WithParentProcessLifetime(parentProcessId);
builder.Build().Run();
```
* TypeScript
apphost.mts
```typescript
import { createBuilder } from './.aspire/modules/aspire.mjs';
const builder = await createBuilder();
const parentProcessId = 1234;
const worker = await builder.addExecutable(
'scoped-worker',
'node',
'../worker',
['server.js']
);
await worker.withParentProcessLifetime(parentProcessId);
await builder.build().run();
```
The parent process ID must be greater than zero and identify a running process.
## Use the container-specific lifetime API
[Section titled “Use the container-specific lifetime API”](#use-the-container-specific-lifetime-api)
The older container-specific lifetime API is still supported. Use `WithLifetime(ContainerLifetime.Persistent)` to keep a container running across AppHost restarts, or `WithLifetime(ContainerLifetime.Session)` to explicitly use the default session behavior.
For new code, prefer the shared `WithPersistentLifetime()` and `WithSessionLifetime()` APIs because they work consistently across containers, executables, and projects.
* C#
AppHost.cs
```csharp
var builder = DistributedApplication.CreateBuilder(args);
var postgres = builder.AddPostgres("postgres")
.WithLifetime(ContainerLifetime.Persistent)
.WithDataVolume();
builder.Build().Run();
```
* TypeScript
apphost.mts
```typescript
import { ContainerLifetime, createBuilder } from './.aspire/modules/aspire.mjs';
const builder = await createBuilder();
const postgres = await builder.addPostgres('postgres');
await postgres.withLifetime(ContainerLifetime.Persistent);
await postgres.withDataVolume();
await builder.build().run();
```
## Dashboard visualization
[Section titled “Dashboard visualization”](#dashboard-visualization)
The Aspire dashboard shows persistent resources with a distinctive pin icon to help you identify them:
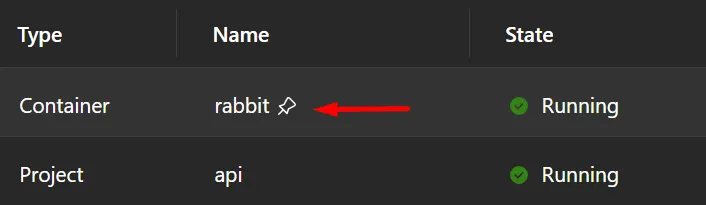
After the AppHost stops, persistent containers continue running and can be seen in your container runtime (such as Docker Desktop):

## Container naming and uniqueness
[Section titled “Container naming and uniqueness”](#container-naming-and-uniqueness)
By default, persistent containers use a naming pattern that combines:
* The service name you specify in your AppHost.
* A postfix based on a hash of the AppHost project path.
This naming scheme ensures that persistent containers are unique to each AppHost project, preventing conflicts when multiple Aspire projects use the same service names.
For example, if you have a service named `"postgres"` in an AppHost project located at `/path/to/MyApp.AppHost`, the container name might be `postgres-abc123def` where `abc123def` is derived from the project path hash.
### Custom container names
[Section titled “Custom container names”](#custom-container-names)
For advanced scenarios, you can set a custom container name using the `WithContainerName` method:
* C#
AppHost.cs
```csharp
var builder = DistributedApplication.CreateBuilder(args);
var postgres = builder.AddPostgres("postgres")
.WithPersistentLifetime()
.WithContainerName("my-shared-postgres");
builder.Build().Run();
```
* TypeScript
apphost.mts
```typescript
import { createBuilder } from './.aspire/modules/aspire.mjs';
const builder = await createBuilder();
const postgres = await builder.addPostgres('postgres');
await postgres.withPersistentLifetime();
await postgres.withContainerName('my-shared-postgres');
await builder.build().run();
```
When you specify a custom container name, Aspire first checks if a container with that name already exists. If a container with that name exists and was previously created by Aspire, it follows the normal persistent container behavior and can be automatically recreated if the configuration changes. If a container with that name exists but wasn’t created by Aspire, it won’t be managed or recreated by the AppHost. If no container with the custom name exists, Aspire creates a new one.
## Executable and project naming and uniqueness
[Section titled “Executable and project naming and uniqueness”](#executable-and-project-naming-and-uniqueness)
Persistent executable and project resources are scoped to a specific AppHost instance and uniquely identified by their resource name within that scope. Two executable or project resources with the same name in different AppHosts don’t collide with each other; they result in separate process instances.
## Manual cleanup
[Section titled “Manual cleanup”](#manual-cleanup)
Caution
Persistent resources aren’t automatically removed when you stop the AppHost. To delete them, stop and remove the underlying container or process with the resource’s runtime or operating system tools.
For persistent containers, use Docker CLI commands, Docker Desktop, or your preferred container management tool to stop and remove the container:
Stop and remove a persistent container
```bash
# Stop the container
docker stop my-container-name
# Remove the container
docker rm my-container-name
```
For persistent executable and project resources, stop the running process with your operating system process manager or terminal tools. You can also stop a persistent resource from the Aspire dashboard if the runtime-specific cleanup option isn’t straightforward.
## Container lifetime vs. data durability
[Section titled “Container lifetime vs. data durability”](#container-lifetime-vs-data-durability)
`WithPersistentLifetime()` and `WithDataVolume()` serve different purposes and are often used together. The following table summarizes the behavior of each combination for container resources:
| Configuration | Container behavior | Data behavior |
| -------------------------------- | ----------------------------------- | ------------------------------------------------------------------------------------------------------------ |
| Neither (default) | Created on start, destroyed on stop | Lost every time the AppHost stops |
| `WithPersistentLifetime()` only | Stays running between AppHost runs | Survives AppHost restarts, but **lost if the container is recreated** (config change, pruning, image update) |
| `WithDataVolume()` only | Created on start, destroyed on stop | Persists in a named volume—**survives container recreation** |
| Both (recommended for databases) | Stays running between AppHost runs | Persists in a named volume—survives container recreation |
For **databases and other stateful services**, use both APIs together so you get fast startup (the container stays running) *and* data safety (a volume protects data even if the container is recreated):
* C#
AppHost.cs
```csharp
var postgres = builder.AddPostgres("postgres")
.WithPersistentLifetime()
.WithDataVolume();
```
* TypeScript
apphost.mts
```typescript
import { createBuilder } from './.aspire/modules/aspire.mjs';
const builder = await createBuilder();
const postgres = await builder.addPostgres('postgres');
await postgres.withPersistentLifetime();
await postgres.withDataVolume();
```
For **caches or other ephemeral state**, `WithPersistentLifetime()` alone may be sufficient because losing data on container recreation is acceptable.
Tip
For more details on volumes and bind mounts, see [Persist data using volumes](/fundamentals/persist-data-volumes/).
# TypeScript AppHost project structure
> Learn the files and configuration that make up a TypeScript AppHost project — entry point, package manifest, dependencies, and how the AppHost runs Aspire resources.
When you create a TypeScript AppHost with `aspire new`, the CLI scaffolds a project with the following structure:
* my-apphost/
* .aspire/modules/ Generated TypeScript SDK (do not edit)
* aspire.mts
* base.mts
* transport.mts
* apphost.mts Your AppHost entry point
* aspire.config.json Aspire configuration
* package.json
* tsconfig.apphost.json
When you run `aspire init --language typescript` in an existing JavaScript or TypeScript app that already has a root `package.json`, Aspire creates the AppHost in a nested `aspire-apphost/` package. The root `aspire.config.json` points to `aspire-apphost/apphost.mts`, and the root `package.json` gets Aspire delegate scripts so the existing app package keeps its own module and toolchain settings:
* my-existing-app/
* aspire-apphost/
* .aspire/modules/ Generated TypeScript SDK (do not edit)
* aspire.mts
* base.mts
* transport.mts
* apphost.mts Your AppHost entry point
* package.json
* tsconfig.apphost.json
* aspire.config.json Aspire configuration
* package.json Existing app package with Aspire delegate scripts
## aspire.config.json
[Section titled “aspire.config.json”](#aspireconfigjson)
The `aspire.config.json` file is the central configuration for your AppHost. It replaces the older `.aspire/settings.json` and `apphost.run.json` files.
aspire.config.json
```json
{
"appHost": {
"path": "apphost.mts",
"language": "typescript/nodejs"
},
"packages": {
"Aspire.Hosting.JavaScript": "13.3.0"
},
"profiles": {
"https": {
"applicationUrl": "https://localhost:17127;http://localhost:15118",
"environmentVariables": {
"ASPIRE_DASHBOARD_OTLP_ENDPOINT_URL": "https://localhost:21169",
"ASPIRE_RESOURCE_SERVICE_ENDPOINT_URL": "https://localhost:22260"
}
}
}
}
```
### Key sections
[Section titled “Key sections”](#key-sections)
| Section | Description |
| ------------------ | ------------------------------------------------------------------------------------- |
| `appHost.path` | Path to your AppHost entry point (`apphost.mts`) |
| `appHost.language` | Language runtime (`typescript/nodejs`) |
| `packages` | Hosting integration packages and their versions. Added automatically by `aspire add`. |
| `profiles` | Launch profiles with dashboard URLs and environment variables |
### Add and restore integrations
[Section titled “Add and restore integrations”](#add-and-restore-integrations)
Use `aspire add` from the AppHost root to add hosting integrations. The CLI adds the package to the `packages` section, restores AppHost dependencies, and regenerates the TypeScript SDK in `.aspire/modules/`:
Add an integration
```bash
aspire add redis
```
This updates `aspire.config.json` so the package is restored the next time the AppHost runs:
aspire.config.json
```diff
{
"packages": {
"Aspire.Hosting.JavaScript": "13.3.0",
"Aspire.Hosting.Redis": "13.3.0"
}
}
```
Run `aspire restore` when you want to regenerate `.aspire/modules/` without starting the AppHost, such as after switching branches, updating package versions, or preparing a CI job:
Restore a TypeScript AppHost
```bash
aspire restore
```
### Project references for local development
[Section titled “Project references for local development”](#project-references-for-local-development)
You can reference a local hosting integration project by using a `.csproj` path instead of a version:
aspire.config.json
```json
{
"packages": {
"MyIntegration": "../src/MyIntegration/MyIntegration.csproj"
}
}
```
See [Multi-language integrations](/extensibility/multi-language-integration-authoring/) for details on building hosting integrations that work with TypeScript AppHosts.
## .aspire/modules/ directory
[Section titled “.aspire/modules/ directory”](#aspiremodules-directory)
The `.aspire/modules/` directory under the AppHost root contains the generated TypeScript SDK. It’s created and updated automatically by the Aspire CLI — **do not edit these files**.
| File | Purpose |
| --------------- | ------------------------------------------------------- |
| `aspire.mts` | Generated typed API for all your installed integrations |
| `base.mts` | Base types and handle infrastructure |
| `transport.mts` | JSON-RPC transport layer |
The SDK regenerates when:
* You run `aspire add` to add or update an integration
* You run `aspire run` or `aspire start` and the package list has changed
* You run `aspire restore` to manually regenerate
Your `apphost.mts` imports from this SDK:
apphost.mts
```typescript
import { createBuilder } from './.aspire/modules/aspire.mjs';
```
Tip
Add `.aspire/` to your `.gitignore` — it contains generated artifacts that can be recreated from `aspire.config.json` at any time.
## apphost.mts
[Section titled “apphost.mts”](#apphostmts)
The entry point for your AppHost. This is where you define your application’s resources and their relationships:
apphost.mts
```typescript
import { createBuilder } from './.aspire/modules/aspire.mjs';
const builder = await createBuilder();
const cache = await builder.addRedis("cache");
const api = await builder
.addNodeApp("api", "./api", "src/index.ts")
.withHttpEndpoint({ env: "PORT" })
.withReference(cache);
await builder.build().run();
```
Note
Projects created with Aspire CLI versions earlier than 13.4 used `apphost.ts` and `./.modules/`. They continue to work on Aspire 13.4. For compatibility details and optional migration steps, see [Legacy `apphost.ts` projects in the Aspire 13.4 release notes](/whats-new/aspire-13-4/#legacy-apphostts-projects-pre-134).
## Package managers
[Section titled “Package managers”](#package-managers)
The Aspire CLI supports the following package managers at the **AppHost root** — the directory that contains your `apphost.mts` and `aspire.config.json`. The CLI selects between them by inspecting package manager signals, including the `packageManager` field in `package.json`, lock files, and package manager configuration in the AppHost root.
| Package manager | Detection signals | Version expectation |
| ----------------- | ------------------------------------------------------------------------- | ----------------------------------- |
| npm | `packageManager`, `package-lock.json`, or no other signal | npm 10 or later; npm is the default |
| pnpm | `packageManager` or `pnpm-lock.yaml` | pnpm 10 or later |
| Yarn | `packageManager`, `yarn.lock`, `.yarnrc.yml`, or `.yarn/` | Yarn 4 or later (Berry) |
| Bun | `packageManager`, `bun.lock`, or `bun.lockb` | Bun 1.2 or later |
| Yarn Classic (v1) | `yarn.lock` with `# yarn lockfile v1` or `packageManager` with `yarn@1.x` | Not supported |
This policy governs the **AppHost root only**. Apps the AppHost orchestrates — for example, a Node.js service added with `addNodeApp`, a Bun guest app, or a workspace package — can use any package manager their own tooling requires; they are independent of the AppHost-root toolchain.
Aspire end-to-end tests cover TypeScript AppHosts with representative `packageManager` pins such as `npm@10.0.0`, `pnpm@10.0.0`, `yarn@4.14.1`, and `bun@1.2.0`. These tested versions are representative points within the supported ranges, not the only versions you can use.
Caution
**Yarn Classic (v1) is not supported.** If the Aspire CLI detects a Yarn Classic lock file (`# yarn lockfile v1`) or a `packageManager` field such as `"yarn@1.x"` in `package.json`, it throws an error and stops. Upgrade to Yarn 4 or later, or switch to npm, pnpm, or Bun.
To upgrade to Yarn 4, run:
Upgrade to Yarn 4
```bash
corepack enable yarn
corepack use yarn@stable
```
## package.json
[Section titled “package.json”](#packagejson)
The scaffolded `package.json` includes convenience scripts and the required Node.js version:
package.json
```json
{
"name": "my-apphost",
"private": true,
"type": "module",
"scripts": {
"aspire:lint": "eslint apphost.mts",
"aspire:start": "aspire run",
"aspire:build": "tsc -p tsconfig.apphost.json",
"aspire:dev": "tsc --watch -p tsconfig.apphost.json",
"lint": "npm run aspire:lint",
"dev": "npm run aspire:start",
"build": "npm run aspire:build",
"watch": "npm run aspire:dev"
},
"engines": {
"node": "^20.19.0 || ^22.13.0 || >=24"
}
}
```
The `dev` script means you can also start your AppHost with `npm run dev` (or the equivalent for your toolchain, for example `bun run dev` or `pnpm run dev`).
### Supported Node.js engine
[Section titled “Supported Node.js engine”](#supported-nodejs-engine)
TypeScript AppHosts target the Node.js engine range that `aspire init` writes into the scaffolded AppHost `package.json`:
package.json — supported engines.node
```json
{
"engines": {
"node": "^20.19.0 || ^22.13.0 || >=24"
}
}
```
The supported ranges are:
* **Node.js 20.19+** — supported.
* **Node.js 22.13+** (22.x LTS) — supported.
* **Node.js 24.x and later** — supported by the scaffolded `engines.node` constraint.
Older Node.js versions are not supported. Package managers may enforce `engines.node` on install (for example, pnpm does by default, while npm only does when `engine-strict` is configured), so unsupported runtimes are best treated as blocked even when a given toolchain only warns.
Note
If you widen `engines.node` beyond the scaffolded constraint, you take on responsibility for compatibility. Aspire CLI behavior, TypeScript SDK generation, and the `tsc --noEmit` startup validation are tested against the ranges listed above.
## Package manager toolchain
[Section titled “Package manager toolchain”](#package-manager-toolchain)
The Aspire CLI automatically detects which Node-compatible package manager your project uses and adjusts install and run commands accordingly. The following toolchains are supported: **npm** (default), **Bun**, **Yarn**, and **pnpm**.
### Toolchain detection
[Section titled “Toolchain detection”](#toolchain-detection)
Detection follows the [supported AppHost-root package managers](#package-managers) policy. The CLI resolves the toolchain by inspecting the AppHost directory and its parent directories (up to eight levels). It checks, in order:
1. The `packageManager` field in `package.json` — for example, `"packageManager": "pnpm@10.0.0"`.
2. Lockfiles: `bun.lock` or `bun.lockb` → Bun; `pnpm-lock.yaml` → pnpm; `yarn.lock`, `.yarnrc.yml`, or a `.yarn/` directory → Yarn.
3. If nothing is found, npm is used as the default.
The search walks up parent directories, so a workspace-level `packageManager` setting or lockfile is picked up automatically by nested AppHosts.
### Declaring your toolchain
[Section titled “Declaring your toolchain”](#declaring-your-toolchain)
The recommended way to pin the toolchain is with the `packageManager` field in `package.json`, which Aspire uses for toolchain detection. This field is also used by [Node.js Corepack](https://nodejs.org/api/corepack.html) for package managers such as Yarn and pnpm:
* npm (default)
No extra configuration is required — npm is the default. If you want to pin npm explicitly, set the `packageManager` field:
package.json
```diff
{
"packageManager": "npm@10.0.0",
"name": "my-apphost",
"private": true,
"type": "module"
}
```
* pnpm
package.json
```diff
{
"packageManager": "pnpm@10.0.0",
"name": "my-apphost",
"private": true,
"type": "module"
}
```
* Yarn
package.json
```diff
{
"packageManager": "yarn@4.14.1",
"name": "my-apphost",
"private": true,
"type": "module"
}
```
* Bun
package.json
```diff
{
"packageManager": "bun@1.2.0",
"name": "my-apphost",
"private": true,
"type": "module"
}
```
Alternatively, committing a toolchain-specific lockfile (`pnpm-lock.yaml`, `yarn.lock`, `bun.lock`, etc.) is sufficient for detection.
### Install and run commands by toolchain
[Section titled “Install and run commands by toolchain”](#install-and-run-commands-by-toolchain)
When a non-npm toolchain is detected, the CLI substitutes the matching commands:
| Toolchain | Install command | Execute command | Watch command |
| --------- | --------------- | ----------------------- | ------------------------------- |
| npm | `npm install` | `npx tsx ...` | `npx nodemon ...` |
| pnpm | `pnpm install` | `pnpm exec tsx ...` | `pnpm exec nodemon ...` |
| Yarn | `yarn install` | `yarn exec tsx ...` | `yarn exec nodemon ...` |
| Bun | `bun install` | `bun run {appHostFile}` | `bun --watch run {appHostFile}` |
Note
Bun has built-in TypeScript support, so it runs `apphost.mts` directly without `tsx`.
### aspire doctor checks
[Section titled “aspire doctor checks”](#aspire-doctor-checks)
The `aspire doctor` command checks that the required JavaScript toolchain executable is available. If Bun, Yarn, or pnpm is detected but not installed, the command reports an error with install guidance.
Aspire CLI
```bash
aspire doctor
```
## Async chaining
[Section titled “Async chaining”](#async-chaining)
TypeScript AppHosts support fluent chaining for builder methods — for example, `builder.addContainer(...).withReference(...)` — so you can build resource graphs in a compact, readable style. Starting with Aspire 13.4, the generated SDK extends this to **all** generated async methods that return a chainable wrapper type: environment helpers, execution-context queries, and endpoint property accessors.
Previously, using these methods required splitting the chain or using a double `await`:
apphost.ts (before)
```typescript
// Two separate awaits were needed when chaining through async wrapper-returning methods
const envContext = await builder.environment();
const isDevelopment = await envContext.isDevelopment();
```
Now you can chain through them with a **single `await`**:
apphost.ts (after)
```typescript
const isDevelopment = await builder.environment().isDevelopment();
const isRunMode = await context.executionContext().isRunMode();
const endpointHost = await container.getEndpoint("http").property(EndpointProperty.Host);
```
This works because the code generator now emits a thenable wrapper for every generated async method whose return type is itself a chainable wrapper.
Note
The thenable wrappers are generated automatically — you do not need to change `aspire.config.json` or run any extra commands. Re-running `aspire run` or `aspire restore` after upgrading your `Aspire.Hosting.JavaScript` package version regenerates the `.aspire/modules/` SDK with the updated types.
## TypeScript validation before startup
[Section titled “TypeScript validation before startup”](#typescript-validation-before-startup)
Before starting a TypeScript AppHost, the Aspire CLI runs `tsc --noEmit` to check for type errors to prevent the dashboard and resources from starting in a partially broken state. If your AppHost has TypeScript compile errors, `aspire run` and `aspire publish` stop before the AppHost launches and display the diagnostic output:
```text
apphost.mts(22,7): error TS2322: Type 'string' is not assignable to type 'number'.
```
### Watch mode behavior
[Section titled “Watch mode behavior”](#watch-mode-behavior)
When you use `aspire run` in watch mode, the TypeScript validation is embedded in the nodemon restart command. The watcher **can still start** even if there are initial type errors — it will recover automatically as you edit and save files that fix the errors.
## HTTPS development certificates
[Section titled “HTTPS development certificates”](#https-development-certificates)
When you run a TypeScript AppHost with an HTTPS launch profile, the Aspire CLI needs a trusted HTTPS development certificate to be present on your machine. Unlike .NET AppHost users who typically have the .NET SDK on their `PATH`, TypeScript AppHost users may not have `dotnet` available, so the Aspire CLI provides its own certificate management commands.
If you see an error similar to the following when running `aspire run`:
```text
Unable to configure HTTPS endpoint. No server certificate was specified, and the default
developer certificate could not be found or is out of date. To generate and trust a
developer certificate run 'aspire certs trust'. For more information on configuring
HTTPS see https://aspire.dev/docs/.
```
Run the following command to create and trust the development certificate:
Aspire CLI
```bash
aspire certs trust
```
Tip
If you continue to see certificate errors after running `aspire certs trust`, try cleaning existing certificates first:
Aspire CLI
```bash
aspire certs clean
aspire certs trust
```
See [Certificate configuration](/app-host/certificate-configuration/) for details on HTTPS certificate management in Aspire, including Linux-specific setup.
## Troubleshooting codegen failures
[Section titled “Troubleshooting codegen failures”](#troubleshooting-codegen-failures)
When the Aspire CLI runs a TypeScript (Node.js) AppHost, it contacts a managed server to generate the TypeScript SDK. That server loads NuGet-restored packages (`Aspire.Hosting.JavaScript`, `Aspire.TypeSystem`, and related assemblies). If the CLI version and the SDK version in `aspire.config.json` differ in major, minor, patch, or prerelease identifiers (excluding build metadata), code generation can fail.
### CLI/SDK version mismatch warning
[Section titled “CLI/SDK version mismatch warning”](#clisdk-version-mismatch-warning)
Before starting the AppHost, the CLI compares its built-in SDK version against the `sdk.version` value in `aspire.config.json`. When the two differ, the CLI prints a warning:
```text
⚠ The installed Aspire CLI version () differs from the configured
Aspire SDK version (). If you run into errors, run 'aspire update'
to align them.
```
The AppHost still starts after the warning. If codegen succeeds, no further action is required. If codegen fails, run `aspire update` to realign the CLI and SDK to the same version.
### Codegen failure output
[Section titled “Codegen failure output”](#codegen-failure-output)
When code generation fails, the CLI exits immediately and prints:
```text
❌ TypeScript (Node.js) SDK code generation failed because the installed Aspire CLI appears
to be incompatible with the configured Aspire SDK. Run 'aspire update' to align the CLI
and SDK and try again.
ℹ Run 'aspire update' to align the installed Aspire CLI with the configured SDK version,
then retry.
ℹ Run with '--debug' for full diagnostic details.
```
Tip
Prior to this improvement, a CLI/SDK version mismatch produced an empty `System.TypeLoadException` message followed by a 60-second timeout. If you saw that behaviour, update the CLI with `aspire update`.
### Getting full diagnostic details
[Section titled “Getting full diagnostic details”](#getting-full-diagnostic-details)
Pass `--debug` to `aspire run` for detailed diagnostic output:
Aspire CLI
```bash
aspire run --debug
```
In addition to the standard failure message, the CLI prints a diagnostic block:
```text
🔬 Diagnostic details:
Exception: System.TypeLoadException
Type: Aspire.Hosting.SomeType
Runtime Aspire.Hosting: +
• Aspire.Hosting.CodeGeneration.TypeScript +
• Aspire.TypeSystem +
```
The same information is always written to the CLI log file at `~/.aspire/logs/cli_*.log`, even when `--debug` is not passed.
### Resolving the mismatch
[Section titled “Resolving the mismatch”](#resolving-the-mismatch)
Run `aspire update` to update the packages in `aspire.config.json` to match the installed CLI version, or reinstall the CLI to match the SDK version already in use:
Aspire CLI
```bash
aspire update
```
## See also
[Section titled “See also”](#see-also)
* [Build your first app](/get-started/first-app/?lang=typescript)
* [AppHost overview](/get-started/app-host/)
* [Multi-language architecture](/architecture/multi-language-architecture/)
* [aspire doctor command](/reference/cli/commands/aspire-doctor/)
* [aspire update command](/reference/cli/commands/aspire-update/)
* [aspire certs trust command](/reference/cli/commands/aspire-certs-trust/)
* [Certificate configuration](/app-host/certificate-configuration/)
# Add Dockerfiles to your app model
> Add Dockerfiles to your Aspire app model with WithDockerfile — build local container images, layer arguments, and pin context paths for project and executable resources.
With Aspire it’s possible to specify a *Dockerfile* to build when the [AppHost](/get-started/app-host/) is started using either the `AddDockerfile` or `WithDockerfile` extension methods.
These two methods serve different purposes:
* **`AddDockerfile`**: Creates a new container resource from an existing Dockerfile. Use this when you want to add a custom containerized service to your app model.
* **`WithDockerfile`**: Customizes an existing container resource (like a database or cache) to use a different Dockerfile. Use this when you want to modify the default container image for an Aspire component.
Both methods expect an existing Dockerfile in the specified context path—neither method creates a Dockerfile for you. To generate a Dockerfile from AppHost code instead, use the [Dockerfile builder APIs](#generate-a-dockerfile-programmatically) or the [Dockerfile factory APIs](#generate-a-dockerfile-with-a-factory-function).
## When to use AddDockerfile vs WithDockerfile
[Section titled “When to use AddDockerfile vs WithDockerfile”](#when-to-use-adddockerfile-vs-withdockerfile)
Choose the appropriate method based on your scenario:
**Use `AddDockerfile` when:**
* You want to add a custom containerized service to your app model.
* You have an existing Dockerfile for a custom application or service.
* You need to create a new container resource that isn’t provided by Aspire components.
**Use `WithDockerfile` when:**
* You want to customize an existing Aspire component (like PostgreSQL, Redis, etc.).
* You need to replace the default container image with a custom one.
* You want to maintain the strongly typed resource builder and its extension methods.
* You have specific requirements that the default container image doesn’t meet.
## Add a Dockerfile to the app model
[Section titled “Add a Dockerfile to the app model”](#add-a-dockerfile-to-the-app-model)
In the following example the `AddDockerfile` extension method is used to specify a container by referencing the context path for the container build.
* C#
AppHost.cs
```csharp
var builder = DistributedApplication.CreateBuilder(args);
var container = builder.AddDockerfile(
"mycontainer", "relative/context/path");
```
* TypeScript
apphost.mts
```typescript
import { createBuilder } from './.aspire/modules/aspire.mjs';
const builder = await createBuilder();
const container = await builder.addDockerfile(
"mycontainer", "relative/context/path");
```
Unless the context path argument is a rooted path the context path is interpreted as being relative to the AppHost project directory.
By default the name of the *Dockerfile* which is used is `Dockerfile` and is expected to be within the context path directory. It’s possible to explicitly specify the *Dockerfile* name either as an absolute path or a relative path to the context path.
This is useful if you wish to modify the specific *Dockerfile* being used when running locally or when the AppHost is deploying.
* C#
AppHost.cs
```csharp
var builder = DistributedApplication.CreateBuilder(args);
var container = builder.ExecutionContext.IsRunMode
? builder.AddDockerfile(
"mycontainer", "relative/context/path", "Dockerfile.debug")
: builder.AddDockerfile(
"mycontainer", "relative/context/path", "Dockerfile.release");
```
* TypeScript
apphost.mts
```typescript
import { createBuilder } from './.aspire/modules/aspire.mjs';
const builder = await createBuilder();
const container = (await builder.executionContext.isRunMode())
? await builder.addDockerfile(
"mycontainer", "relative/context/path", "Dockerfile.debug")
: await builder.addDockerfile(
"mycontainer", "relative/context/path", "Dockerfile.release");
```
## Customize existing container resources
[Section titled “Customize existing container resources”](#customize-existing-container-resources)
When using `AddDockerfile` the return value is an `IResourceBuilder`. Aspire includes many custom resource types that are derived from `ContainerResource`.
Using the `WithDockerfile` extension method it’s possible to take an existing Aspire component (like PostgreSQL, Redis, or SQL Server) and replace its default container image with a custom one built from your own Dockerfile. This allows you to continue using the strongly typed resource types and their specific extension methods while customizing the underlying container.
* C#
AppHost.cs
```csharp
var builder = DistributedApplication.CreateBuilder(args);
// This replaces the default PostgreSQL container image with a custom one
// built from your Dockerfile, while keeping PostgreSQL-specific functionality
var pgsql = builder.AddPostgres("pgsql")
.WithDockerfile("path/to/context")
.WithPgAdmin(); // Still works because it's still a PostgreSQL resource
```
* TypeScript
apphost.mts
```typescript
import { createBuilder } from './.aspire/modules/aspire.mjs';
const builder = await createBuilder();
const pgsql = await builder.addPostgres("pgsql");
// This replaces the default PostgreSQL container image with a custom one
// built from your Dockerfile, while keeping PostgreSQL-specific functionality.
await pgsql.withDockerfile("path/to/context");
await pgsql.withPgAdmin(); // Still works because it's still a PostgreSQL resource.
```
## Generate a Dockerfile programmatically
[Section titled “Generate a Dockerfile programmatically”](#generate-a-dockerfile-programmatically)
Use `AddDockerfileBuilder` or `WithDockerfileBuilder` when you need Aspire to generate a Dockerfile from AppHost code. These APIs are useful when the Dockerfile depends on AppHost configuration, when you want to compose Dockerfile fragments, or when you want to keep multi-stage image build logic near the resource definition.
Caution
The Dockerfile builder APIs are experimental and may change in future releases. In C# AppHosts, suppress diagnostic [`ASPIREDOCKERFILEBUILDER001`](/diagnostics/aspiredockerfilebuilder001/) when you choose to use them.
`AddDockerfileBuilder` creates a new container resource and configures the generated Dockerfile in one step:
* C#
AppHost.cs
```csharp
using Aspire.Hosting.ApplicationModel.Docker;
var builder = DistributedApplication.CreateBuilder(args);
#pragma warning disable ASPIREDOCKERFILEBUILDER001
builder.AddDockerfileBuilder("frontend", "../frontend", context =>
{
var build = context.Builder.From("node:22-alpine", "build");
build.WorkDir("/app")
.Copy("package*.json", "./")
.Run("npm ci")
.Copy(".", ".")
.Run("npm run build");
var runtime = context.Builder.From("nginx:alpine", "runtime");
runtime.CopyFrom("build", "/app/dist", "/usr/share/nginx/html")
.Expose(80);
return Task.CompletedTask;
}, stage: "runtime");
#pragma warning restore ASPIREDOCKERFILEBUILDER001
builder.Build().Run();
```
* TypeScript
apphost.mts
```typescript
import { createBuilder } from './.aspire/modules/aspire.mjs';
import type { DockerfileBuilderCallbackContext } from './.aspire/modules/aspire.mjs';
const builder = await createBuilder();
const configureDockerfile = async (context: DockerfileBuilderCallbackContext) => {
const dockerfile = await context.builder();
await dockerfile
.from("node:22-alpine", { stageName: "build" })
.workDir("/app")
.copy("package*.json", "./")
.run("npm ci")
.copy(".", ".")
.run("npm run build");
await dockerfile
.from("nginx:alpine", { stageName: "runtime" })
.copyFrom("build", "/app/dist", "/usr/share/nginx/html")
.expose(80);
};
await builder.addDockerfileBuilder("frontend", "../frontend", configureDockerfile, {
stage: "runtime",
});
await builder.build().run();
```
`WithDockerfileBuilder` applies a generated Dockerfile to an existing container resource. The image name provided when the resource is created is replaced by the generated Dockerfile build during publish:
* C#
AppHost.cs
```csharp
using Aspire.Hosting.ApplicationModel.Docker;
var builder = DistributedApplication.CreateBuilder(args);
#pragma warning disable ASPIREDOCKERFILEBUILDER001
builder.AddContainer("frontend", "nginx:alpine")
.WithDockerfileBuilder("../frontend", context =>
{
var stage = context.Builder.From("nginx:alpine", "runtime");
stage.Copy(".", "/usr/share/nginx/html")
.Expose(80);
return Task.CompletedTask;
}, stage: "runtime");
#pragma warning restore ASPIREDOCKERFILEBUILDER001
builder.Build().Run();
```
* TypeScript
apphost.mts
```typescript
import { createBuilder } from './.aspire/modules/aspire.mjs';
import type { DockerfileBuilderCallbackContext } from './.aspire/modules/aspire.mjs';
const builder = await createBuilder();
const configureDockerfile = async (context: DockerfileBuilderCallbackContext) => {
const dockerfile = await context.builder();
await dockerfile
.from("nginx:alpine", { stageName: "runtime" })
.copy(".", "/usr/share/nginx/html")
.expose(80);
};
await builder
.addContainer("frontend", "nginx:alpine")
.withDockerfileBuilder("../frontend", configureDockerfile, {
stage: "runtime",
});
await builder.build().run();
```
## Generate a Dockerfile with a factory function
[Section titled “Generate a Dockerfile with a factory function”](#generate-a-dockerfile-with-a-factory-function)
Use `AddDockerfileFactory` or `WithDockerfileFactory` when you need to generate a Dockerfile as a string from AppHost code. Unlike the [Dockerfile builder APIs](#generate-a-dockerfile-programmatically) that use a fluent API to compose Dockerfile instructions, the factory APIs let you return Dockerfile content directly as a string — useful when you already have string-based Dockerfile generation logic or want to construct content conditionally.
The factory callback receives a `DockerfileFactoryContext` parameter that provides access to the resource and DI services when needed.
`AddDockerfileFactory` creates a new container resource and configures the generated Dockerfile in one step:
* C#
AppHost.cs
```csharp
var builder = DistributedApplication.CreateBuilder(args);
var container = builder.AddDockerfileFactory("myapp", "../myapp", async context =>
{
// Return Dockerfile content as a string.
return """
FROM node:22-alpine
WORKDIR /app
COPY . .
RUN npm ci
EXPOSE 3000
CMD ["node", "server.js"]
""";
});
builder.Build().Run();
```
* TypeScript
apphost.mts
```typescript
import { createBuilder } from './.aspire/modules/aspire.mjs';
const builder = await createBuilder();
const container = await builder.addDockerfileFactory("myapp", "../myapp", async () => `
FROM node:22-alpine
WORKDIR /app
COPY . .
RUN npm ci
EXPOSE 3000
CMD ["node", "server.js"]
`);
await builder.build().run();
```
`WithDockerfileFactory` applies a factory-generated Dockerfile to an existing container resource:
* C#
AppHost.cs
```csharp
var builder = DistributedApplication.CreateBuilder(args);
builder.AddContainer("myapp", "placeholder")
.WithDockerfileFactory("../myapp", async context =>
{
return """
FROM nginx:alpine
COPY dist/ /usr/share/nginx/html
EXPOSE 80
""";
});
builder.Build().Run();
```
* TypeScript
apphost.mts
```typescript
import { createBuilder } from './.aspire/modules/aspire.mjs';
const builder = await createBuilder();
await builder.addContainer("myapp", { image: "placeholder", tag: "latest" })
.withDockerfileFactory("../myapp", async () => `
FROM nginx:alpine
COPY dist/ /usr/share/nginx/html
EXPOSE 80
`);
await builder.build().run();
```
## Pass build arguments
[Section titled “Pass build arguments”](#pass-build-arguments)
The `WithBuildArg` method can be used to pass arguments into the container image build.
* C#
AppHost.cs
```csharp
var builder = DistributedApplication.CreateBuilder(args);
var container = builder.AddDockerfile("mygoapp", "relative/context/path")
.WithBuildArg("GO_VERSION", "1.22");
```
* TypeScript
apphost.mts
```typescript
import { createBuilder } from './.aspire/modules/aspire.mjs';
const builder = await createBuilder();
const container = await builder.addDockerfile("mygoapp", "relative/context/path");
await container.withBuildArg("GO_VERSION", "1.22");
```
The value parameter on the `WithBuildArg` method can be a literal value (`boolean`, `string`, `int`) or it can be a resource builder for a [parameter resource](/fundamentals/external-parameters/). The following code replaces the `GO_VERSION` with a parameter value that can be specified at deployment time.
* C#
AppHost.cs
```csharp
var builder = DistributedApplication.CreateBuilder(args);
var goVersion = builder.AddParameter("goversion");
var container = builder.AddDockerfile("mygoapp", "relative/context/path")
.WithBuildArg("GO_VERSION", goVersion);
```
* TypeScript
apphost.mts
```typescript
import { createBuilder } from './.aspire/modules/aspire.mjs';
const builder = await createBuilder();
const goVersion = await builder.addParameter("goversion");
const container = await builder.addDockerfile("mygoapp", "relative/context/path");
await container.withBuildArg("GO_VERSION", goVersion);
```
Build arguments correspond to the [`ARG` command](https://docs.docker.com/build/guide/build-args/) in *Dockerfiles*. Expanding the preceding example, this is a multi-stage *Dockerfile* which specifies specific container image version to use as a parameter.
Dockerfile
```dockerfile
# Stage 1: Build the Go program
ARG GO_VERSION=1.22
FROM golang:${GO_VERSION} AS builder
WORKDIR /build
COPY . .
RUN go build mygoapp.go
# Stage 2: Run the Go program
FROM mcr.microsoft.com/cbl-mariner/base/core:2.0
WORKDIR /app
COPY --from=builder /build/mygoapp .
CMD ["./mygoapp"]
```
Note
Instead of hardcoding values into the container image, it’s recommended to use environment variables for values that frequently change. This avoids the need to rebuild the container image whenever a change is required.
## Pass build secrets
[Section titled “Pass build secrets”](#pass-build-secrets)
In addition to build arguments it’s possible to specify build secrets using `WithBuildSecret` which are made selectively available to individual commands in the *Dockerfile* using the `--mount=type=secret` syntax on `RUN` commands.
* C#
AppHost.cs
```csharp
var builder = DistributedApplication.CreateBuilder(args);
var accessToken = builder.AddParameter("accesstoken", secret: true);
var container = builder.AddDockerfile("myapp", "relative/context/path")
.WithBuildSecret("ACCESS_TOKEN", accessToken);
```
* TypeScript
apphost.mts
```typescript
import { createBuilder } from './.aspire/modules/aspire.mjs';
const builder = await createBuilder();
const accessToken = await builder.addParameter("accesstoken", { secret: true });
const container = await builder.addDockerfile("myapp", "relative/context/path");
await container.withBuildSecret("ACCESS_TOKEN", accessToken);
```
For example, consider the `RUN` command in a *Dockerfile* which exposes the specified secret to the specific command:
Dockerfile
```dockerfile
# The helloworld command can read the secret from /run/secrets/ACCESS_TOKEN
RUN --mount=type=secret,id=ACCESS_TOKEN helloworld
```
Caution
Caution should be exercised when passing secrets in build environments. This is often done when using a token to retrieve dependencies from private repositories or feeds before a build. It is important to ensure that the injected secrets are not copied into the final or intermediate images.
# Multi-language architecture
> Understand how Aspire uses a guest/host architecture, ATS, SDK generation, and local token-based auth to support TypeScript AppHosts.
Aspire supports writing AppHosts in multiple languages. While the orchestration engine is built on .NET, a guest/host architecture allows AppHosts written in TypeScript today, and additional languages in the future, to access Aspire integrations, service discovery, and the dashboard.
## Why a shared backend
[Section titled “Why a shared backend”](#why-a-shared-backend)
Aspire’s hosting integrations and deployment publishers are written in .NET and have already accumulated the runtime behavior needed for local orchestration, diagnostics, and publishing. Rewriting those integrations for every guest language would duplicate a large amount of behavior and significantly increase maintenance cost.
Instead, guest languages only declare resources such as `addRedis`, `addPostgres`, and `withReference`, while the .NET host handles orchestration concerns such as starting containers, wiring service discovery, running health checks, and generating deployment artifacts. The trade-off is a local IPC hop, which is much cheaper than maintaining the same integration surface independently in multiple languages.
## Guest/host model
[Section titled “Guest/host model”](#guesthost-model)
When you run a TypeScript AppHost, the Aspire CLI orchestrates two processes:
* **Guest**: your `apphost.mts` process, running in Node.js
* **Host**: the Aspire orchestration server, running on .NET
The guest communicates with the host via JSON-RPC over a local transport: Unix sockets on macOS and Linux, and named pipes on Windows. Your code calls methods such as `addRedis()` or `withReference()`, and the generated SDK translates those calls into RPC requests.
```
flowchart TB
subgraph Guest["Guest Process (Node.js)"]
TS["apphost.mts"]
SDK["Generated SDK (.aspire/modules/)"]
Client["JSON-RPC Client"]
TS --> SDK --> Client
end
subgraph Host["Host Process (Aspire Server)"]
RPC["JSON-RPC Server"]
Dispatcher["Capability Dispatcher"]
Integrations["Hosting Integrations"]
RPC --> Dispatcher --> Integrations
end
subgraph Managed["Managed Resources"]
Dashboard["Dashboard"]
Containers["Containers"]
Discovery["Service Discovery"]
end
Client <-->|"Local transport"| RPC
Integrations --> Dashboard & Containers & Discovery
```
## Startup sequence
[Section titled “Startup sequence”](#startup-sequence)
1. The CLI prepares the host process with the required hosting packages.
2. The ATS scanner inspects assemblies for exports and generates the TypeScript SDK into `.aspire/modules/`.
3. The CLI starts the host process and creates the local socket or pipe endpoint.
4. The CLI starts the guest process and passes connection details through environment variables.
5. The guest connects and invokes capabilities such as `createBuilder`, `addRedis`, `build`, and `run`.
6. The host orchestrates resources, starts the dashboard, and manages the application lifecycle.
## Token-based authentication
[Section titled “Token-based authentication”](#token-based-authentication)
The guest process authenticates to the host with a one-time token generated for that session and passed through environment variables at startup. The local transport is also protected by operating system file permissions, so only processes running as the same user can connect. There are no public network ports involved in guest-to-host communication.
## Aspire Type System
[Section titled “Aspire Type System”](#aspire-type-system)
The Aspire Type System, or ATS, is the contract that bridges .NET and guest languages. Every exported type that crosses the boundary gets a portable type identity derived from its assembly and type name.
### Type categories
[Section titled “Type categories”](#type-categories)
| Category | Description | Serialization |
| --------------------- | ----------------------------------------------------------- | ------------------------------------------- |
| **Primitive** | `string`, `int`, `bool`, `double`, and similar scalar types | JSON native values |
| **Enum** | .NET enum types | String member names |
| **Handle** | Opaque references to host-side objects | JSON handle envelopes |
| **DTO** | Data transfer objects marked for export | JSON objects |
| **Callback** | Guest-provided delegate functions | Callback identifiers |
| **Array** | Immutable collections | JSON arrays |
| **List / dictionary** | Mutable collections | Handles for properties, JSON for parameters |
### How ATS maps to TypeScript
[Section titled “How ATS maps to TypeScript”](#how-ats-maps-to-typescript)
| .NET type | TypeScript representation |
| -------------- | ---------------------------------------- |
| Primitives | Native TypeScript primitives |
| Enums | String literal unions |
| Resource types | Typed handle objects with fluent methods |
| DTOs | Interfaces serialized as JSON |
| Collections | Arrays and `Record` |
| Delegates | Async callback functions |
Resource types are passed by handle. The actual instance remains in the host process, while the TypeScript SDK keeps a reference and dispatches method calls as JSON-RPC requests.
## Polymorphism flattening
[Section titled “Polymorphism flattening”](#polymorphism-flattening)
.NET APIs rely on inheritance, interfaces, and generics. Guest SDKs do not need to expose that full shape directly. During scanning, ATS flattens the exported type system so the generated guest API is easier to consume:
* Concrete types receive the full set of applicable capabilities.
* Interface relationships are expanded into directly callable members.
* Generic constraints are resolved into exportable concrete surfaces.
That flattening means a resource such as `RedisResource` can expose fluent methods from shared interfaces alongside Redis-specific APIs without requiring guest languages to model the original inheritance tree.
## SDK generation
[Section titled “SDK generation”](#sdk-generation)
The TypeScript SDK is generated from hosting integration assemblies. When you add an integration with `aspire add`, the CLI:
1. Loads the integration assembly.
2. Scans exported methods and types.
3. Applies ATS rules, including polymorphism flattening.
4. Emits typed TypeScript wrappers into `.aspire/modules/`.
This keeps the SDK in sync with the .NET implementation. Integration authors do not hand-write TypeScript bindings; they export their .NET APIs and the CLI generates the guest surface automatically.
If you’re building a hosting integration and want it to work with TypeScript AppHosts, see [Multi-language integrations](/extensibility/multi-language-integration-authoring/).
## Same model, different syntax
[Section titled “Same model, different syntax”](#same-model-different-syntax)
The AppHost model is the same regardless of language. A TypeScript AppHost defines the same resources, references, and dependency graph as a C# AppHost. The difference is the authoring syntax.
| Concept | C# | TypeScript |
| -------------- | -------------------------------------------- | --------------------------------- |
| Create builder | `DistributedApplication.CreateBuilder(args)` | `await createBuilder()` |
| Add resource | `builder.AddRedis("cache")` | `await builder.addRedis("cache")` |
| Reference | `.WithReference(db)` | `.withReference(db)` |
| Wait for | `.WaitFor(api)` | `.waitFor(api)` |
| Build and run | `builder.Build().Run()` | `await builder.build().run()` |
The resulting dashboard, service discovery behavior, health checks, and deployment artifacts come from the same host-side orchestration engine.
## See also
[Section titled “See also”](#see-also)
* [Build your first app](/get-started/first-app/?lang=typescript) — get started with a TypeScript AppHost
* [Resource model](/architecture/resource-model/) — understand how Aspire models resources and relationships
* [Multi-language integrations](/extensibility/multi-language-integration-authoring/) — make your integration work with TypeScript AppHosts
# Aspire architecture overview
> Learn the overall architecture of Aspire — the AppHost, resource model, orchestration, networking, dashboard, and how multi-language integrations fit together.
Aspire brings together a powerful suite of tools and libraries, designed to deliver a seamless and intuitive experience for developers. Its modular and extensible architecture empowers you to define your application model with precision, orchestrating intricate systems composed of services, containers, and executables. Whether your components span different programming languages, platforms, stacks, or operating systems, Aspire ensures they work harmoniously, simplifying the complexity of modern cloud-native app development.
## App model architecture
[Section titled “App model architecture”](#app-model-architecture)
Resources are the building blocks of your app model. They’re used to represent abstract concepts like services, containers, executables, and external integrations. Specific resources enable developers to define dependencies on concrete implementations of these concepts. For example, a `Redis` resource can be used to represent a Redis cache, while a `Postgres` resource can represent a PostgreSQL database.
While the app model is often synonymous with a collection of resources, it’s also a high level representation of your entire application topology. This is important, as it’s architected for lowering. In this way, Aspire can be thought of as a compiler for application topology.
### Lowering the model
[Section titled “Lowering the model”](#lowering-the-model)
In a traditional compiler, the process of “lowering” involves translating a high-level programming language into progressively simpler representations:
* **Intermediate Representation (IR):** The first step abstracts away language-specific features, creating a platform-neutral representation.
* **Machine Code:** The IR is then transformed into machine-specific instructions tailored to a specific CPU architecture.
Similarly, Aspire applies this concept to applications, treating the app model as the high-level language:
* **Intermediate constructs:** The app model is first lowered into intermediate constructs, such as cloud development kit (CDK)-style object graphs. These constructs might be platform-agnostic or partially tailored to specific targets.
* **Target runtime representation:** Finally, a publisher generates the deployment-ready artifacts—YAML, HCL, JSON, or other formats—required by the target platform.
This layered approach unlocks several key benefits:
* **Validation and enrichment:** Models can be validated and enriched during the transformation process, ensuring correctness and completeness.
* **Multi-target support:** Aspire supports multiple deployment targets, enabling flexibility across diverse environments.
* **Customizable workflow:** Developers can hook into each phase of the process to customize behavior, tailoring the output to specific needs.
* **Clean and portable models:** The high-level app model remains expressive, portable, and free from platform-specific concerns.
Most importantly, the translation process itself is highly extensible. You can define custom transformations, enrichments, and output formats, allowing Aspire to seamlessly adapt to your unique infrastructure and deployment requirements. This extensibility ensures that Aspire remains a powerful and versatile tool, capable of evolving alongside your application’s needs.
### Modality and extensibility
[Section titled “Modality and extensibility”](#modality-and-extensibility)
Aspire operates in two primary modes, each tailored to streamline your specific needs—detailed in the following section. Both modes use a robust set of familiar APIs and a rich ecosystem of [integrations](/integrations/gallery/). Each integration simplifies working with a common service, framework, or platform, such as Redis, PostgreSQL, Azure services, or Orleans, for example. These integrations work together like puzzle pieces, enabling you to define resources, express dependencies, and configure behavior effortlessly—whether you’re running locally or deploying to production.
Why is modality important when it comes to the AppHost’s execution context? This is because it allows you to define your app model once and with the appropriate APIs, specify how resources operate in each mode. Consider the following collection of resources:
* Database: PostgreSQL
* Cache: Redis
* AI service: Ollama or OpenAI
* Backend: ASP.NET Core minimal API
* Frontend: React app
Depending on the mode, the AppHost might treat these resources differently. For example, in run mode, the AppHost might use a local PostgreSQL database and Redis cache—using containers, while in publish mode, it might generate deployment artifacts for Azure PostgreSQL and Redis Cache.
#### Run mode
[Section titled “Run mode”](#run-mode)
The default mode is run mode, which is ideal for local development and testing. In this mode, the Aspire AppHost orchestrates your application model, including processes, containers, and cloud emulators, to facilitate fast and iterative development. Resources behave like real runtime entities with lifecycles that mirror production. With a simple F5`F5`F5`F5`F5`F5`, the AppHost launches everything in your app model—storage, databases, caches, messaging, jobs, APIs, frontends—all fully configured and ready to debug locally. Let’s consider the app model from the previous section—where AppHost would orchestrate the following resources locally:

For more information on how run mode works, see [Dev-time orchestration](#dev-time-orchestration).
#### Publish mode
[Section titled “Publish mode”](#publish-mode)
The publish mode generates deployment-ready artifacts tailored to your target environment. The Aspire AppHost compiles your app model into outputs like Kubernetes manifests, Terraform configs, Bicep/ARM templates, Docker Compose files, or CDK constructs—ready for integration into any deployment pipeline. The output format depends on the chosen publisher, giving you flexibility across deployment scenarios. When you consider the app model from the previous section, the AppHost doesn’t orchestrate anything—instead, it emits publish artifacts that can be used to deploy your application to a cloud provider. For example, let’s assume you want to deploy to Azure—the AppHost would emit Bicep templates that define the following resources:

## Dev-time orchestration
[Section titled “Dev-time orchestration”](#dev-time-orchestration)
In run mode, [the AppHost orchestrates](/get-started/app-host/) all resources defined in your app model. But how does it achieve this?
Caution
The AppHost isn’t a production runtime. It’s a development-time orchestration tool that simplifies the process of running and debugging your application locally.
In this section, several key questions are answered to help you understand how the AppHost orchestrates your app model:
* **What powers the orchestration?**
Orchestration is delegated to the [Microsoft Developer Control Plane](#developer-control-plane) (DCP), which manages resource lifecycles, startup order, dependencies, and network configurations across your app topology.
* **How is the app model used?**
The app model defines all resources via implementations of `IResource`, including containers, processes, databases, and external services—forming the blueprint for orchestration.
* **What role does the AppHost play?**
The AppHost provides a high-level declaration of the desired application state. It delegates execution to DCP, which interprets the app model and performs orchestration accordingly.
* **What resources are monitored?**
All declared resources—including containers, executables, and integrations—are monitored to ensure correct behavior and to support a fast and reliable development workflow.
* **How are containers and executables managed?**
Containers and processes are initialized with their configurations and launched concurrently, respecting the dependency graph defined in the app model. DCP ensures their readiness and connectivity during orchestration, starting resources as quickly as possible while maintaining the correct order dictated by their dependencies.
* **How are resource dependencies handled?**
Dependencies are defined in the app model and evaluated by DCP to determine correct startup sequencing, ensuring resources are available before dependents start.
* **How is networking configured?**
Networking—such as port bindings—is autoconfigured unless explicitly defined. DCP resolves conflicts and ensures availability, enabling seamless communication between services.
The orchestration process follows a layered architecture. At its core, the AppHost represents the developer’s desired view of the distributed application’s resources. DCP ensures that this desired state is realized by orchestrating the resources and maintaining consistency.
The [app model](/get-started/app-host/) serves as a blueprint for DCP to orchestrate your application. Under the hood, the AppHost is a .NET console application powered by the [`📦 Aspire.Hosting.AppHost`](https://www.nuget.org/packages/Aspire.Hosting.AppHost) NuGet package. This package includes build targets that register orchestration dependencies, enabling seamless dev-time orchestration.
DCP is a Kubernetes-compatible API server, meaning it uses the same network protocols and conventions as Kubernetes. This compatibility allows the Aspire AppHost to leverage existing Kubernetes libraries for communication. Specifically, the AppHost contains an implementation of the `k8s.KubernetesClient` (from the [📦 KubernetesClient](https://www.nuget.org/packages/KubernetesClient) NuGet package), which is a .NET client for Kubernetes. This client is used to communicate with the DCP API server, enabling the AppHost to delegate orchestration tasks to DCP.
When you run the AppHost, it performs the first step of “lowering” by translating the general-purpose Aspire app model into a DCP-specific model tailored for local execution in run mode. This DCP model is then handed off to DCP, which evaluates it and orchestrates the resources accordingly. This separation ensures that the AppHost focuses on adapting the Aspire app model for local execution, while DCP specializes in executing the tailored model. The following diagram helps to visualize this orchestration process:

### Developer control plane
[Section titled “Developer control plane”](#developer-control-plane)
DCP is at the core of the Aspire AppHost orchestration functionality. It’s responsible for orchestrating all resources defined in your app model, starting the developer dashboard, ensuring that everything is set up correctly for local development and testing. DCP manages the lifecycle of resources, applies network configurations, and resolves dependencies.
DCP is written in Go, aligning with Kubernetes and its ecosystem, which are also Go-based. This choice enables deep, native integration with Kubernetes APIs, efficient concurrency, and access to mature tooling like Kubebuilder. DCP is delivered as two executables:
* `dcp.exe`: API server that exposes a Kubernetes-like API endpoint for the AppHost to communicate with. Additionally, it exposes log streaming to the AppHost, which ultimately streams logs to the developer dashboard.
* `dcpctrl.exe`: Controller that monitors the API server for new objects and changes, ensuring that the real-world environment matches the specified model.
Note
DCP operates on the principle of “eventual consistency,” meaning that changes to the model and the real-world environment are applied asynchronously. While this approach may introduce noticeable delays, DCP is designed to diligently synchronize both states. Unlike a “strongly consistent” system that might fail immediately on encountering issues, DCP persistently retries until the desired state is achieved or an error is conclusively determined, often resulting in a more robust alignment between the model and the real world.
When the AppHost runs, it uses Kubernetes client libraries to communicate with DCP. It translates the app model into a format DCP can process by converting the model’s resources into specifications. Specifically, this involves generating Kubernetes Custom Resource Definitions (CRDs) that represent the application’s desired state.
DCP performs the following tasks:
* Prepares the resources for execution:
* Configures service endpoints.
* Assigns names and ports dynamically, unless explicitly set (DCP ensures that the ports are available and not in use by other processes).
* Initializes container networks.
* Pulls container images based on their applied `ImagePullPolicy`.
* Creates and starts containers.
* Runs executables with the required arguments and environment variables.
* Monitors resources:
* Provides change notifications about objects managed within DCP, including process IDs, running status, and exit codes (the AppHost subscribes to these changes to manage the [application’s lifecycle](/app-host/eventing/) effectively).
* Starts the developer dashboard.
Continuing from the diagram in the previous section, consider the following diagram that helps to visualize the responsibilities of DCP:

DCP logs are streamed back to the AppHost, which then forwards them to the developer dashboard. While the developer dashboard exposes commands such as start, stop, and restart, these commands are not part of DCP itself. Instead, they are implemented by the app model runtime, specifically within its “dashboard service” component. These commands operate by manipulating DCP objects—creating new ones, deleting old ones, or updating their properties. For example, restarting a .NET project involves stopping and deleting the existing `ExecutableResource` representing the project and creating a new one with the same specifications.
## Developer dashboard
[Section titled “Developer dashboard”](#developer-dashboard)
The Aspire developer dashboard is a powerful tool designed to simplify local development and resource management. It also supports a standalone mode and integrates seamlessly when publishing to Azure Container Apps. With its intuitive interface, the dashboard empowers developers to monitor, manage, and interact with application resources effortlessly.
### Monitor and manage resources
[Section titled “Monitor and manage resources”](#monitor-and-manage-resources)
The dashboard provides a user-friendly interface for inspecting resource states, viewing logs, and executing commands. Whether you’re debugging locally or deploying to the cloud, the dashboard ensures you have full visibility into your application’s behavior.
### Built-in and custom commands
[Section titled “Built-in and custom commands”](#built-in-and-custom-commands)
The dashboard provides a set of commands for managing resources, such as start, stop, and restart. While commands appear as intuitive actions in the dashboard UI, under the hood, they operate by manipulating DCP objects. For more information, see *Stop or Start a resource*.
In addition to these built-in commands, you can define custom commands tailored to your application’s needs. These custom commands are registered in the app model and seamlessly integrated into the dashboard, providing enhanced flexibility and control.
### Real-time log streaming
[Section titled “Real-time log streaming”](#real-time-log-streaming)
Stay informed with the dashboard’s real-time log streaming feature. Logs from all resources in your app model are streamed from DCP to the AppHost and displayed in the dashboard. With advanced filtering options—by resource type, severity, and more—you can quickly pinpoint relevant information and troubleshoot effectively.
The developer dashboard is more than just a tool—it’s your command center for building, debugging, and managing Aspire applications with confidence and ease.
# Resource API Patterns
> Discover common API resource patterns in Aspire, including how to add and configure resources, use annotations, and compose hosting and client integrations.
Aspire’s resource model allows you to define and configure resources in a structured way, enabling seamless integration and management of your application’s components. This guide provides details the common patterns for adding and configuring resources in Aspire.
## API patterns
[Section titled “API patterns”](#api-patterns)
Aspire separates **resource data models** from **behavior** using **fluent extension methods**.
* **Resource classes** define only constructors and properties.
* **Extension methods** implement resource creation, configuration, and runtime wiring.
This guide describes each pattern and shows a **verbatim Redis example** at the end. It also covers how to publish manifests via custom resources.
## Adding resources with `AddX(...)`
[Section titled “Adding resources with AddX(...)”](#adding-resources-with-addx)
An `AddX(...)` method executes:
1. **Validate inputs** (`builder`, `name`, required arguments).
2. **Instantiate** the data-only resource (`new TResource(...)`).
3. **Register** it with `builder.AddResource(resource)`.
4. **Optional wiring** of endpoints, health checks, container settings, environment variables, command-line arguments, and event subscriptions.
### Signature pattern
[Section titled “Signature pattern”](#signature-pattern)
* C#
```csharp
public static IResourceBuilder AddX(
this IDistributedApplicationBuilder builder,
[ResourceName] string name,
/* optional parameters */)
{
// 1. Validate inputs
// 2. Instantiate resource
// 3. builder.AddResource(resource)
// 4. Optional wiring:
// .WithEndpoint(...)
// .WithHealthCheck(...)
// .WithImage(...)
// .WithEnvironment(...)
// .WithArgs(...)
// Eventing.Subscribe<...>(...)
}
```
* TypeScript
```typescript
// Resources are added via async builder methods:
const resource = await builder.addRedis("name" /*, optional params */);
// The builder handles validation, instantiation,
// and registration internally. Optional wiring:
// .withEndpoint(...)
// .withHealthCheck(...)
// .withImage(...)
// .withEnvironment(...)
// .withArgs(...)
// builder.addEventingSubscriber(...)
```
### Optional wiring examples
[Section titled “Optional wiring examples”](#optional-wiring-examples)
**Endpoints**:
* C#
```csharp
.WithEndpoint(port: hostPort, targetPort: containerPort, name: endpointName)
```
* TypeScript
```typescript
resource.withEndpoint({ port: hostPort, targetPort: containerPort, name: endpointName });
```
**Health checks**:
* C#
```csharp
.WithHealthCheck(healthCheckKey)
```
* TypeScript
```typescript
resource.withHealthCheck(healthCheckKey);
```
**Container images / registries**:
* C#
```csharp
.WithImage(imageName, imageTag)
.WithImageRegistry(registryUrl)
```
* TypeScript
```typescript
resource.withImage(imageName, imageTag);
resource.withImageRegistry(registryUrl);
```
**Entrypoint and args**:
* C#
```csharp
.WithEntrypoint("/bin/sh")
.WithArgs(context => { /* build args */ return Task.CompletedTask; })
```
* TypeScript
```typescript
resource.withEntrypoint("/bin/sh");
resource.withArgs(["--flag", "value"]);
```
**Environment variables**:
* C#
```csharp
.WithEnvironment(context => new("ENV_VAR", valueProvider))
```
* TypeScript
```typescript
resource.withEnvironment("ENV_VAR", value);
```
**Event subscriptions**:
* C#
```csharp
builder.Eventing.Subscribe(resource, handler);
```
* TypeScript
```typescript
builder.addEventingSubscriber(async (context) => {
context.onBeforeStart(async (event) => {
// Handle event
});
});
```
### Summary table
[Section titled “Summary table”](#summary-table)
| Step | Call/Method | Purpose |
| --------------- | -------------------------------------------------------------------------------------------------------------------------- | ------------------------------------------------------ |
| Validate | `ArgumentNullException.ThrowIfNull(...)` | Ensure non-null builder, name, and args |
| Instantiate | `new TResource(name, …)` | Create data-only instance |
| Register | `builder.AddResource(resource)` | Add resource to the application model |
| Optional wiring | `.WithEndpoint(…)`, `.WithHealthCheck(…)`, `.WithImage(…)`, `.WithEnvironment(…)`, `.WithArgs(…)`, `Eventing.Subscribe(…)` | Configure container details, wiring, and runtime hooks |
## Configuring resources with `WithX(...)`
[Section titled “Configuring resources with WithX(...)”](#configuring-resources-with-withx)
`WithX(...)` methods **attach annotations** to resource builders.
### Signature pattern
[Section titled “Signature pattern”](#signature-pattern-1)
* C#
```csharp
public static IResourceBuilder WithX(
this IResourceBuilder builder,
FooOptions options) =>
builder.WithAnnotation(new FooAnnotation(options));
```
* TypeScript
Note
The TypeScript SDK doesn’t expose `withAnnotation(...)` directly. Configuration methods like `withEndpoint(...)` and `withEnvironment(...)` handle annotation attachment internally.
- **Target**: `IResourceBuilder`.
- **Action**: `WithAnnotation(...)`.
- **Returns**: `IResourceBuilder`.
### Summary table
[Section titled “Summary table”](#summary-table-1)
| Method | Target | Action |
| ------------ | ----------------------------- | ------------------------------------------------------ |
| `WithX(...)` | `IResourceBuilder` | Attaches `XAnnotation` using the `WithAnnotation` API. |
| Returns | `IResourceBuilder` | Enables fluent chaining . |
## Annotations
[Section titled “Annotations”](#annotations)
Annotations are **public** metadata types implementing `IResourceAnnotation`. They can be added or removed dynamically at runtime via hooks or events. Consumers can query annotations using `TryGetLastAnnotation()` when necessary.
### Definition and attachment
[Section titled “Definition and attachment”](#definition-and-attachment)
* C#
```csharp
public sealed record PersistenceAnnotation(
TimeSpan? Interval,
int KeysChangedThreshold) : IResourceAnnotation;
builder.WithAnnotation(new PersistenceAnnotation(
TimeSpan.FromSeconds(60),
100));
```
* TypeScript
Note
The TypeScript SDK doesn’t expose annotations as a user-facing pattern. Resource metadata is managed internally by the SDK’s configuration methods.
### Summary table
[Section titled “Summary table”](#summary-table-2)
| Concept | Pattern | Notes |
| --------------- | ------------------------------------------------------- | ---------------------------------------- |
| Annotation Type | `public record XAnnotation(...) : IResourceAnnotation` | Public to support dynamic runtime use. |
| Attach | `builder.WithAnnotation(new XAnnotation(...))` | Adds metadata to resource builder. |
| Query | `resource.TryGetLastAnnotation(out var a)` | Consumers inspect annotations as needed. |
## Custom value objects
[Section titled “Custom value objects”](#custom-value-objects)
Custom value objects defer evaluation and allow the framework to discover dependencies between resources.
### Core interfaces
[Section titled “Core interfaces”](#core-interfaces)
| Interface | Member | Mode | Purpose |
| ------------------------------- | ----------------------------------------------------------- | ---------------- | ----------------------------------------------------------------------------- |
| `IValueProvider` | `ValueTask GetValueAsync(CancellationToken)` | Run | Resolve live values at runtime |
| `IManifestExpressionProvider` | `string ValueExpression { get; }` | Publish | Emit structured expressions in manifests |
| `IExpressionValue` | Inherits `IValueProvider` and `IManifestExpressionProvider` | Run and publish | Mark a value object as usable wherever an expression-backed value is accepted |
| `IValueWithReferences` *(opt.)* | `IEnumerable