Azure Queue Storage
Bu içerik henüz dilinizde mevcut değil.
Azure Queue Storage is a service for storing large amounts of unstructured data. The Aspire Azure Blob Storage integration enables you to connect to existing Azure Storage instances or create new instances from applications with the mcr.microsoft.com/azure-storage/azurite container image.
Hosting integration
Section titled “Hosting integration”The Aspire Azure Storage hosting integration models the various storage resources as the following types:
AzureStorageResource: Represents an Azure Storage resource.AzureStorageEmulatorResource: Represents an Azure Storage emulator resource (Azurite).AzureQueueStorageQueueResource: Represents an Azure Queue storage resource.
To access these types and APIs for expressing them, add the 📦 Aspire.Hosting.Azure.Storage NuGet package in the AppHost project.
aspire add azure-storageAspire CLI etkileşimlidir; istendiğinde uygun sonucu seçin:
Select an integration to add:
> azure-storage (Aspire.Hosting.Azure.Storage)> Other results listed as selectable options...#:package Aspire.Hosting.Azure.Storage@*<PackageReference Include="Aspire.Hosting.Azure.Storage" Version="*" />Add Azure Queue Storage resource
Section titled “Add Azure Queue Storage resource”In your AppHost project, register the Azure Queue Storage integration by chaining a call to AddQueues on the IResourceBuilder<IAzureStorageResource> instance returned by AddAzureStorage. The following example demonstrates how to add an Azure Queue Storage resource named storage and a queue named queues:
var builder = DistributedApplication.CreateBuilder(args);
var queues = builder.AddAzureStorage("storage")    .AddQueues("queues");
builder.AddProject<Projects.ExampleProject>()    .WithReference(queues)    .WaitFor(queues);
// After adding all resources, run the app...
The preceding code:
- Adds an Azure Storage resource named
storage. - Chains a call to
RunAsEmulatorto configure the storage resource to run locally using an emulator. The emulator in this case is Azurite. - Adds a blob container named
queuesto the storage resource. - Adds the
queuesresource to theExampleProjectand waits for it to be ready before starting the project.
Connect to an existing Azure Storage account
Section titled “Connect to an existing Azure Storage account”You might have an existing Azure Storage account that you want to connect to. You can chain a call to annotate that your AzureStorageResource is an existing resource:
var builder = DistributedApplication.CreateBuilder(args);
var existingStorageName = builder.AddParameter("existingStorageName");var existingStorageResourceGroup = builder.AddParameter("existingStorageResourceGroup");
var storageaccount = builder.AddAzureStorage("storage")    .AsExisting(existingStorageName, existingStorageResourceGroup)    .AddQueues("queues");
builder.AddProject<Projects.ExampleProject>()    .WithReference(storageaccount);
// After adding all resources, run the app...Configure Azurite container
Section titled “Configure Azurite container”There are various configurations available to container resources, for example, you can configure the container’s ports, environment variables, it’s lifetime, and more.
Configure Azurite container ports
Section titled “Configure Azurite container ports”By default, the Azurite container when configured by Aspire, exposes the following endpoints:
| Endpoint | Container port | Host port |
|---|---|---|
blob | 10000 | dynamic |
queue | 10001 | dynamic |
table | 10002 | dynamic |
The port that they’re listening on is dynamic by default. When the container starts, the ports are mapped to a random port on the host machine. To configure the endpoint ports, chain calls on the container resource builder provided by the RunAsEmulator method as shown in the following example:
var builder = DistributedApplication.CreateBuilder(args);
var storage = builder.AddAzureStorage("storage")  .RunAsEmulator(azurite =>  {      azurite.WithBlobPort(27000)            .WithQueuePort(27001)            .WithTablePort(27002);  });
// After adding all resources, run the app...
The preceding code configures the Azurite container’s existing blob, queue, and table endpoints to listen on ports 27000, 27001, and 27002, respectively. The Azurite container’s ports are mapped to the host ports as shown in the following table:
| Endpoint name | Port mapping (container:host) |
|---|---|
blob | 10000:27000 |
queue | 10001:27001 |
table | 10002:27002 |
Configure Azurite container with persistent lifetime
Section titled “Configure Azurite container with persistent lifetime”To configure the Azurite container with a persistent lifetime, call the WithLifetime method on the Azurite container resource and pass ContainerLifetime.Persistent:
var builder = DistributedApplication.CreateBuilder(args);
var storage = builder.AddAzureStorage("storage")    .RunAsEmulator(azurite =>    {        azurite.WithLifetime(ContainerLifetime.Persistent);    });
// After adding all resources, run the app...
Configure Azurite container with data volume
Section titled “Configure Azurite container with data volume”To add a data volume to the Azure Storage emulator resource, call the WithDataVolume method on the Azure Storage emulator resource:
var builder = DistributedApplication.CreateBuilder(args);
var storage = builder.AddAzureStorage("storage")    .RunAsEmulator(azurite =>    {        azurite.WithDataVolume();    });
// After adding all resources, run the app...
The data volume is used to persist the Azurite data outside the lifecycle of its container. The data volume is mounted at the /data path in the Azurite container and when a name parameter isn’t provided, the name is formatted as .azurite/{resource name}. For more information on data volumes and details on why they’re preferred over bind mounts, see Docker docs: Volumes.
Configure Azurite container with data bind mount
Section titled “Configure Azurite container with data bind mount”To add a data bind mount to the Azure Storage emulator resource, call the WithDataBindMount method:
var builder = DistributedApplication.CreateBuilder(args);
var storage = builder.AddAzureStorage("storage")    .RunAsEmulator(azurite =>    {        azurite.WithDataBindMount("../azurite/data");    });
// After adding all resources, run the app...Data bind mounts rely on the host machine’s filesystem to persist the Azurite data across container restarts. The data bind mount is mounted at the ../azurite/data path on the host machine relative to the AppHost directory (IDistributedApplicationBuilder.AppHostDirectory) in the Azurite container. For more information on data bind mounts, see Docker docs: Bind mounts.
Connect to storage resources
Section titled “Connect to storage resources”When the Aspire AppHost runs, the storage resources can be accessed by external tools, such as the Azure Storage Explorer. If your storage resource is running locally using Azurite, it will automatically be picked up by the Azure Storage Explorer.
To connect to the storage resource from Azure Storage Explorer, follow these steps:
-
Run the Aspire AppHost.
-
Open the Azure Storage Explorer.
-
View the Explorer pane.
-
Select the Refresh all link to refresh the list of storage accounts.
-
Expand the Emulator & Attached node.
-
Expand the Storage Accounts node.
-
You should see a storage account with your resource’s name as a prefix:
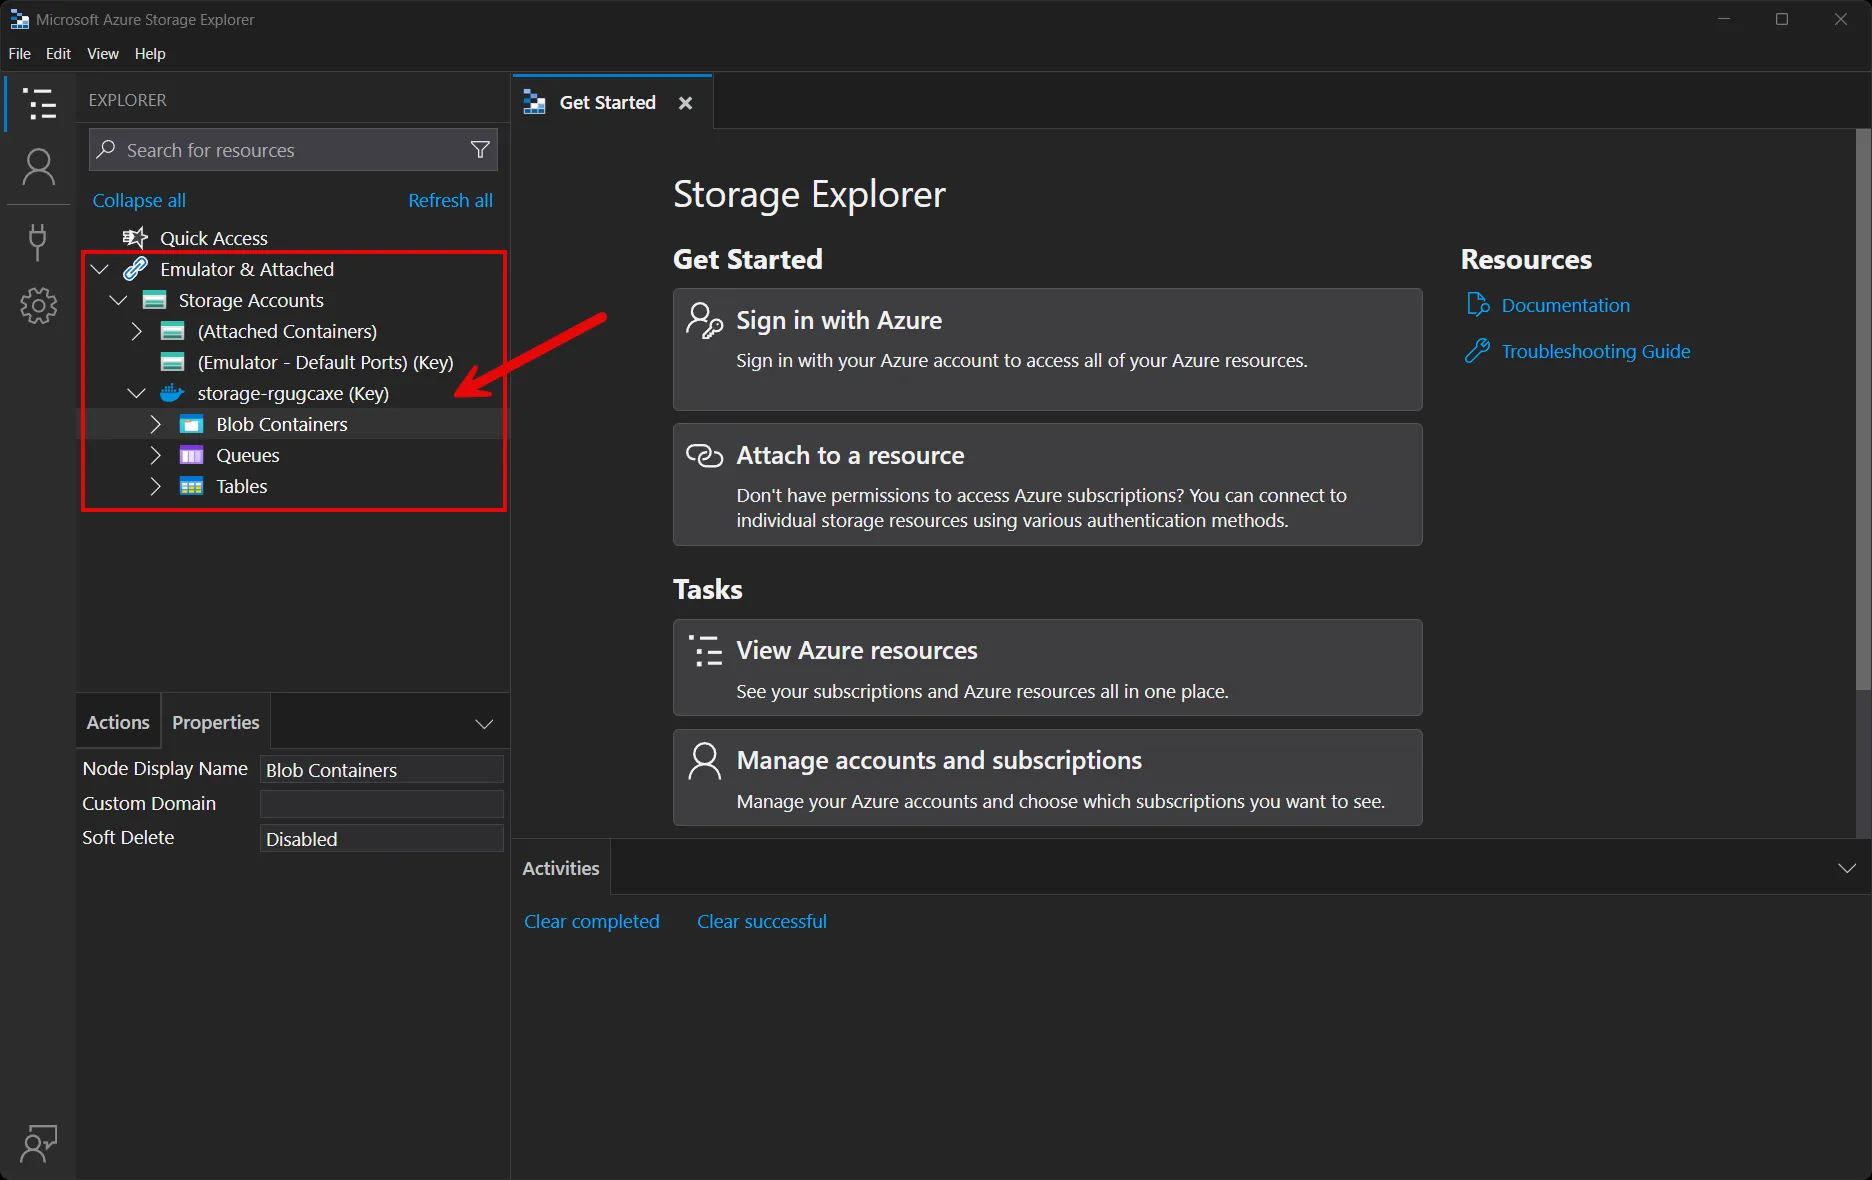
You’re free to explore the storage account and its contents using the Azure Storage Explorer. For more information on using the Azure Storage Explorer, see Get started with Storage Explorer.
Connection properties
Section titled “Connection properties”When you reference Azure Storage resources using WithReference, the following connection properties are made available to the consuming project:
Queue Storage
Section titled “Queue Storage”The Queue Storage resource exposes the following connection properties:
| Property Name | Description |
|---|---|
Uri | The URI of the queue storage service, with the format https://mystorageaccount.queue.core.windows.net/ |
ConnectionString | Emulator only. The connection string for the queue storage service |
The Queue resource inherits all properties from its parent AzureQueueStorageResource and adds:
| Property Name | Description |
|---|---|
QueueName | The name of the queue |
ConnectionString | Emulator only. The connection string for the table storage service |
Client integration
Section titled “Client integration”To get started with the Aspire Azure Queue Storage client integration, install the 📦 Aspire.Azure.Storage.Queues NuGet package:
dotnet add package Aspire.Azure.Storage.Queues#:package Aspire.Azure.Storage.Queues@*<PackageReference Include="Aspire.Azure.Storage.Queues" Version="*" />Add Azure Queue Storage client
Section titled “Add Azure Queue Storage client”In the Program.cs file of your client-consuming project, call the AddAzureQueueClient extension method to register a QueueServiceClient for dependency injection. The method takes a connection name parameter:
builder.AddAzureQueueClient("queues");You can then retrieve the QueueServiceClient instance using dependency injection:
public class ExampleService(QueueServiceClient client){ // Use client...}Configuration
Section titled “Configuration”The Azure Queue Storage integration provides multiple options to configure the QueueServiceClient.
Use a connection string
Section titled “Use a connection string”When using a connection string from the ConnectionStrings configuration section, provide the name when calling AddAzureQueueClient:
builder.AddAzureQueueClient("queues");Two connection formats are supported:
Service URI
Section titled “Service URI”The recommended approach is to use a ServiceUri, which works with the Credential property. If no credential is configured, the DefaultAzureCredential is used:
{ "ConnectionStrings": { "queues": "https://{account_name}.queue.core.windows.net/" }}Connection string
Section titled “Connection string”Alternatively, an Azure Storage connection string can be used:
{ "ConnectionStrings": { "queues": "AccountName=myaccount;AccountKey=myaccountkey" }}Use configuration providers
Section titled “Use configuration providers”The Azure Queue Storage integration supports Microsoft.Extensions.Configuration. It loads the AzureStorageQueuesSettings and QueueClientOptions from configuration using the Aspire:Azure:Storage:Queues key. Example appsettings.json:
{ "Aspire": { "Azure": { "Storage": { "Queues": { "DisableHealthChecks": true, "DisableTracing": false, "ClientOptions": { "Diagnostics": { "ApplicationId": "myapp" } } } } } }}Use named configuration
Section titled “Use named configuration”The Azure Queue Storage integration supports named configuration for multiple instances:
{ "Aspire": { "Azure": { "Storage": { "Queues": { "queue1": { "DisableHealthChecks": true, "ClientOptions": { "Diagnostics": { "ApplicationId": "myapp1" } } }, "queue2": { "DisableTracing": true, "ClientOptions": { "Diagnostics": { "ApplicationId": "myapp2" } } } } } } }}Use the connection names when calling AddAzureQueueClient:
builder.AddAzureQueueClient("queue1");builder.AddAzureQueueClient("queue2");Use inline delegates
Section titled “Use inline delegates”You can also pass the Action<AzureStorageQueuesSettings> delegate to set up options inline:
builder.AddAzureQueueClient( "queues", settings => settings.DisableHealthChecks = true);You can also configure the QueueClientOptions:
builder.AddAzureQueueClient( "queues", configureClientBuilder: clientBuilder => clientBuilder.ConfigureOptions( options => options.Diagnostics.ApplicationId = "myapp"));Client integration health checks
Section titled “Client integration health checks”By default, Aspire integrations enable health checks for all services. The Azure Queue Storage integration:
- Adds the health check when
DisableHealthChecksisfalse, which attempts to connect to the Azure Queue Storage. - Integrates with the
/healthHTTP endpoint, which specifies all registered health checks must pass for app to be considered ready to accept traffic.
Observability and telemetry
Section titled “Observability and telemetry”Logging
Section titled “Logging”The Azure Queue Storage integration uses the following log categories:
Azure.CoreAzure.Identity
Tracing
Section titled “Tracing”The Azure Queue Storage integration emits the following tracing activities using OpenTelemetry:
Azure.Storage.Queues.QueueClient
Metrics
Section titled “Metrics”The Azure Queue Storage integration currently doesn’t support metrics by default due to limitations with the Azure SDK.