Create custom hosting integrations
이 콘텐츠는 아직 번역되지 않았습니다.
Aspire improves the development experience by providing reusable building blocks that can be used to quickly arrange application dependencies and expose them to your own code. One of the key building blocks of an Aspire-based application is the resource.
Consider the code below:
var builder = DistributedApplication.CreateBuilder(args);
var redis = builder.AddRedis("cache");
var db = builder.AddPostgres("pgserver")    .AddDatabase("inventorydb");
builder.AddProject<Projects.InventoryService>("inventoryservice")    .WithReference(redis)    .WithReference(db);
In the preceding code there are four resources represented:
cache: A Redis container.pgserver: A Postgres container.inventorydb: A database hosted onpgserver.inventoryservice: An ASP.NET Core application.
Most Aspire-related code that the average developer writes, centers around adding resources to the app model and creating references between them.
Key elements of a custom resource
Section titled “Key elements of a custom resource”Building a custom resource in Aspire requires the following:
- A custom resource type that implements
IResource - An extension method for
IDistributedApplicationBuildernamedAdd{CustomResource}where{CustomResource}is the name of the custom resource.
When custom resource requires optional configuration, developers may wish to implement With* suffixed extension methods to make these configuration options discoverable using the builder pattern.
A practical example: MailDev
Section titled “A practical example: MailDev”To help understand how to develop custom resources, this article shows an example of how to build a custom resource for MailDev. MailDev is an open-source tool which provides a local mail server designed to allow developers to test e-mail sending behaviors within their app. For more information, see the MailDev GitHub repository.
In this example you create a new Aspire project as a test environment for the MailDev resource that you create. While you can create custom resources in existing Aspire projects it’s a good idea to consider whether the custom resource might be used across multiple Aspire-based solutions and should be developed as a reusable integration.
Set up the starter project
Section titled “Set up the starter project”Create a new Aspire project that is used to test out the new resource that we’re developing.
dotnet new aspire -o MailDevResource- When prompted to select a template, choose the AppHost and service defaults template — use the
Up Arrow ↑ Up Arrow ↑ Up Arrow ↑ andDown Arrow ↓ Down Arrow ↓ Down Arrow ↓ keys to navigate the options. PressReturn Return Enter Enter Enter Enter to select the template. - Enter a project name, in this example use
MailDevResource, then pressReturn Return Enter Enter Enter Enter to continue. - Finally, use the
Up Arrow ↑ Up Arrow ↑ Up Arrow ↑ andDown Arrow ↓ Down Arrow ↓ Down Arrow ↓ keys to navigate to the desired template version. This example uses 13.1.0.
cd MailDevResourceOnce the project is created, you should see a listing containing the following:
MailDevResource.AppHost: The AppHost used to test out the custom resource.MailDevResource.ServiceDefaults: The service defaults project for use in service-related projects.MailDevResource.sln: The solution file referencing both projects.
Verify that the project can build and run successfully by executing the following command:
aspire runThe console output should look similar to the following:
🔍  Finding apphosts...MailDevResource.AppHost\MailDevResource.AppHost.csproj
🗄  Created settings file at '.aspire/settings.json'.
     AppHost:  MailDevResource.AppHost\MailDevResource.AppHost.csproj
   Dashboard:  https://localhost:17099/login?t=11e860924357145f02153fe9eb81f1ab
        Logs:  %USERPROFILE%\.aspire\cli\logs\apphost-24232-2025-12-03-16-34-36.log
               Press CTRL+C to stop the apphost and exit.
Select the dashboard link in the browser to see the Aspire dashboard:
Press
Create library for resource extension
Section titled “Create library for resource extension”Aspire resources are just classes and methods contained within a class library that references the Aspire Hosting library (Aspire.Hosting). By placing the resource in a separate project, you can more easily share it between Aspire-based apps and potentially package and share it on NuGet.
-
Create the class library project named
MailDev.Hosting..NET CLI dotnet new classlib -o MailDev.Hosting -
Add
Aspire.Hostingto the class library as a package reference..NET CLI dotnet add ./MailDev.Hosting/MailDev.Hosting.csproj package Aspire.Hosting --version 13.1.0 -
Add class library reference to the
MailDevResource.AppHostproject..NET CLI dotnet add ./MailDevResource.AppHost/MailDevResource.AppHost.csproj reference ./MailDev.Hosting/MailDev.Hosting.csproj -
Add class library project to the solution file.
.NET CLI dotnet sln ./MailDevResource.sln add ./MailDev.Hosting/MailDev.Hosting.csproj
Once the following steps are performed, update the project reference in the MailDevResource.AppHost.csproj file to include an additional attribute to suppress a warning that appears when launching the AppHost. To tell Aspire that the project reference should be treated as a nonservice project modify the MailDevResource.AppHost.csproj file’s reference to the MailDev.Hosting project to be the following:
<ItemGroup> <!-- The IsAspireProjectResource attribute tells Aspire to treat this reference as a standard project reference and not attempt to generate a metadata file --> <ProjectReference Include="..\MailDev.Hosting\MailDev.Hosting.csproj" IsAspireProjectResource="false" /></ItemGroup>This is because Aspire treats project references in the AppHost as if they’re service projects.
Define the resource types
Section titled “Define the resource types”The MailDev.Hosting class library contains the resource type and extension methods for adding the resource to the AppHost. You should first think about the experience that you want to give developers when using your custom resource. In the case of this custom resource, you would want developers to be able to write code like the following:
var builder = DistributedApplication.CreateBuilder(args);
var maildev = builder.AddMailDev("maildev");
builder.AddProject<Projects.NewsletterService>("newsletterservice")    .WithReference(maildev);
To achieve this, you need a custom resource named MailDevResource which implements IResourceWithConnectionString so that consumers can use it with the WithReference extension to inject the connection details for the MailDev server as a connection string.
MailDev is available as a container resource, so you’ll also want to derive from ContainerResource so that we can make use of various pre-existing container-focused extensions in Aspire.
Replace the contents of the Class1.cs file in the MailDev.Hosting project, and rename the file to MailDevResource.cs with the following code:
// For ease of discovery, resource types should be placed in// the Aspire.Hosting.ApplicationModel namespace. If there is// likelihood of a conflict on the resource name consider using// an alternative namespace.namespace Aspire.Hosting.ApplicationModel;
public sealed class MailDevResource(string name)    : ContainerResource(name), IResourceWithConnectionString{    // Constants used to refer to well known-endpoint names, this is specific    // for each resource type. MailDev exposes an SMTP endpoint and a HTTP    // endpoint.    internal const string SmtpEndpointName = "smtp";    internal const string HttpEndpointName = "http";
    // An EndpointReference is a core Aspire type used for keeping    // track of endpoint details in expressions. Simple literal values cannot    // be used because endpoints are not known until containers are launched.    private EndpointReference? _smtpReference;
    public EndpointReference SmtpEndpoint =>        _smtpReference ??= new(this, SmtpEndpointName);
    // Required property on IResourceWithConnectionString. Represents a connection    // string that applications can use to access the MailDev server. In this case    // the connection string is composed of the SmtpEndpoint endpoint reference.    public ReferenceExpression ConnectionStringExpression =>        ReferenceExpression.Create(            $"smtp://{SmtpEndpoint.Property(EndpointProperty.HostAndPort)}"        );}
In the preceding custom resource, the EndpointReference and ReferenceExpression are examples of several types which implement a collection of interfaces, such as IManifestExpressionProvider, IValueProvider, and IValueWithReferences. For more information about these types and their role in Aspire, see the technical details section.
Define the resource extensions
Section titled “Define the resource extensions”To make it easy for developers to use the custom resource an extension method named AddMailDev needs to be added to the MailDev.Hosting project. The AddMailDev extension method is responsible for configuring the resource so it can start successfully as a container.
Add the following code to a new file named MailDevResourceBuilderExtensions.cs in the MailDev.Hosting project:
using Aspire.Hosting.ApplicationModel;
// Put extensions in the Aspire.Hosting namespace to ease discovery as referencing// the Aspire hosting package automatically adds this namespace.namespace Aspire.Hosting;
public static class MailDevResourceBuilderExtensions{    /// <summary>    /// Adds the <see cref="MailDevResource"/> to the given    /// <paramref name="builder"/> instance. Uses the "2.2.1" tag.    /// </summary>    /// <param name="builder">The <see cref="IDistributedApplicationBuilder"/>.</param>    /// <param name="name">The name of the resource.</param>    /// <param name="httpPort">The HTTP port.</param>    /// <param name="smtpPort">The SMTP port.</param>    /// <returns>    /// An <see cref="IResourceBuilder{MailDevResource}"/> instance that    /// represents the added MailDev resource.    /// </returns>    public static IResourceBuilder<MailDevResource> AddMailDev(        this IDistributedApplicationBuilder builder,        string name,        int? httpPort = null,        int? smtpPort = null)    {        // The AddResource method is a core API within Aspire and is        // used by resource developers to wrap a custom resource in an        // IResourceBuilder<T> instance. Extension methods to customize        // the resource (if any exist) target the builder interface.        var resource = new MailDevResource(name);
        return builder.AddResource(resource)                      .WithImage(MailDevContainerImageTags.Image)                      .WithImageRegistry(MailDevContainerImageTags.Registry)                      .WithImageTag(MailDevContainerImageTags.Tag)                      .WithHttpEndpoint(                          targetPort: 1080,                          port: httpPort,                          name: MailDevResource.HttpEndpointName)                      .WithEndpoint(                          targetPort: 1025,                          port: smtpPort,                          name: MailDevResource.SmtpEndpointName);    }}
// This class just contains constant strings that can be updated periodically// when new versions of the underlying container are released.internal static class MailDevContainerImageTags{    internal const string Registry = "docker.io";
    internal const string Image = "maildev/maildev";
internal const string Tag = "2.2.1";}Validate custom integration inside the AppHost
Section titled “Validate custom integration inside the AppHost”Now that the basic structure for the custom resource is complete it’s time to test it in a real AppHost project. Open the AppHost.cs file in the MailDevResource.AppHost project and update it with the following code:
var builder = DistributedApplication.CreateBuilder(args);
var maildev = builder.AddMailDev("maildev");
builder.Build().Run();
After updating the AppHost.cs file, launch the AppHost project and open the dashboard:
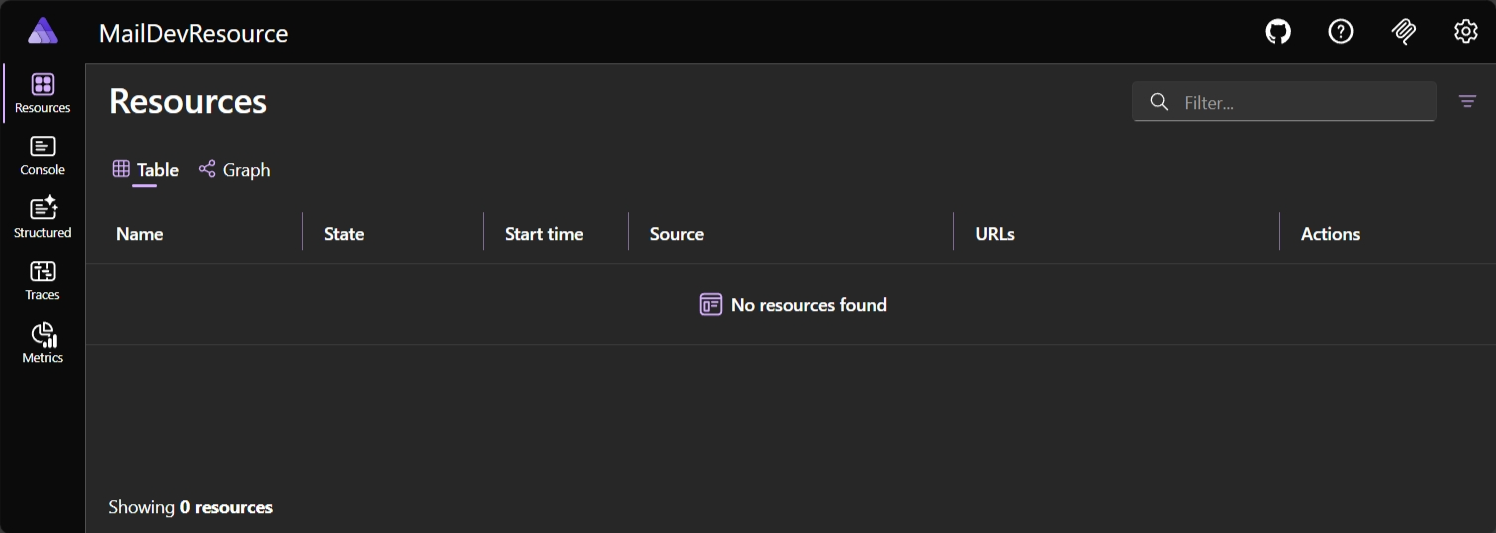
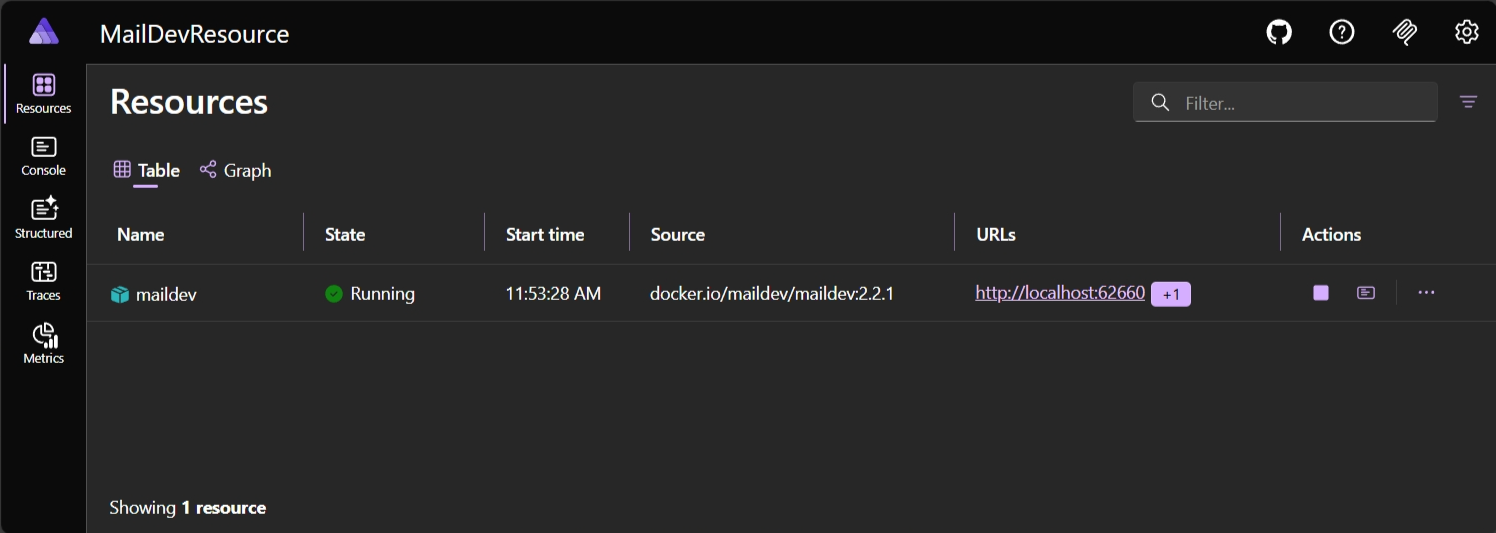
aspire runAfter a few moments the dashboard shows that the maildev resource is running and a hyperlink will be available that navigates to the MailDev web app, which shows the content of each e-mail that your app sends.
The Aspire dashboard should look similar to the following:
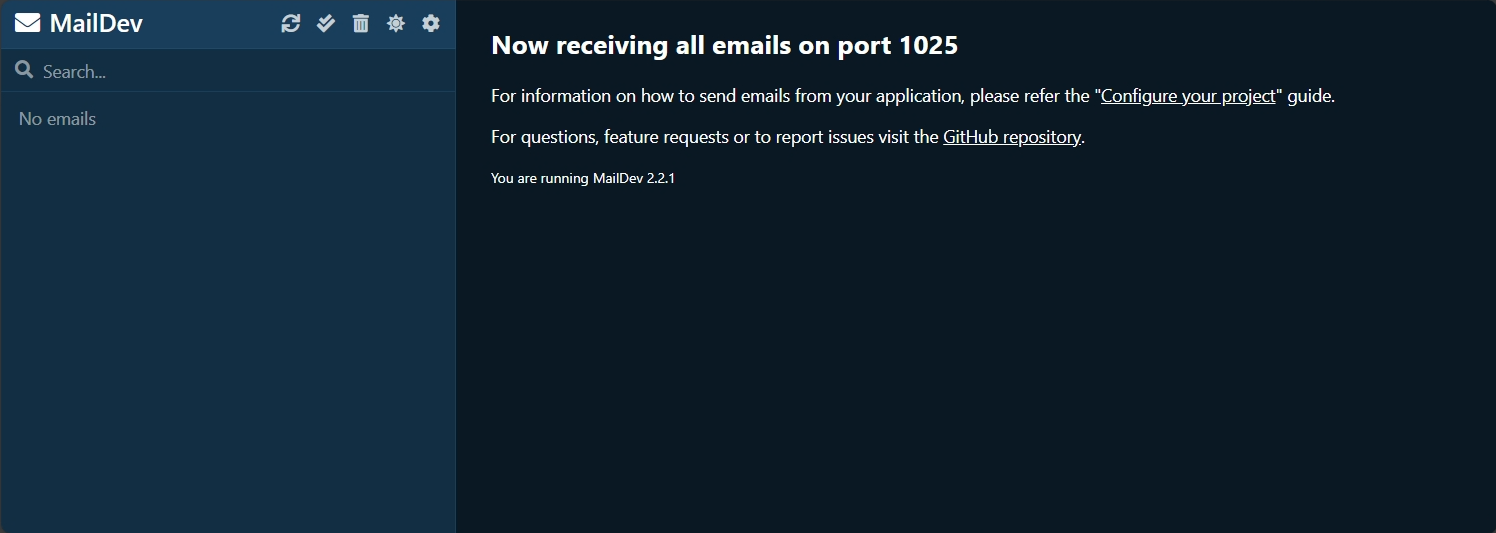
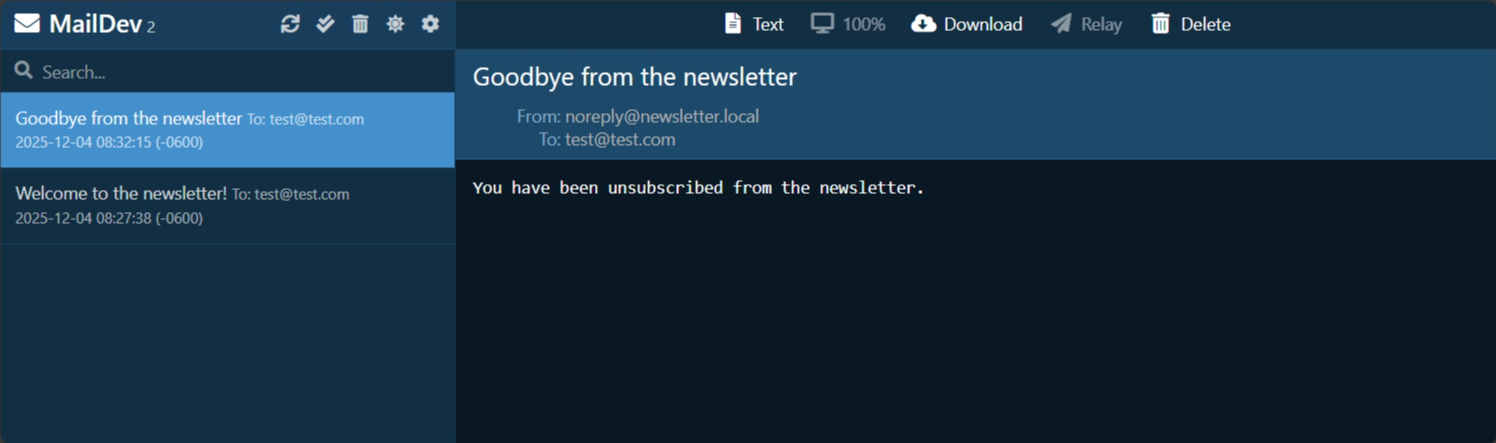
The MailDev web app should look similar to the following:
Add a .NET service project to the AppHost for testing
Section titled “Add a .NET service project to the AppHost for testing”Once Aspire can successfully launch the MailDev integration, it’s time to consume the connection information for MailDev within a .NET project. In Aspire it’s common for there to be a hosting package and one or more component packages. For example consider:
- Hosting package: Used to represent resources within the app model.
Aspire.Hosting.Redis
- Component packages: Used to configure and consume client libraries.
Aspire.StackExchange.RedisAspire.StackExchange.Redis.DistributedCachingAspire.StackExchange.Redis.OutputCaching
In the case of the MailDev resource, the .NET platform already has a simple mail transfer protocol (SMTP) client in the form of SmtpClient. In this example you use this existing API for the sake of simplicity, although other resource types may benefit from custom integration libraries to assist developers.
In order to test the end-to-end scenario, you need a .NET project which we can inject the connection information into for the MailDev resource. Add a Web API project:
-
Create a new .NET project named
MailDevResource.NewsletterService..NET CLI dotnet new webapi --use-minimal-apis -o MailDevResource.NewsletterService -
Add a reference to the
MailDev.Hostingproject..NET CLI dotnet add ./MailDevResource.NewsletterService/MailDevResource.NewsletterService.csproj reference ./MailDev.Hosting/MailDev.Hosting.csproj -
Add a reference to the
MailDevResource.AppHostproject..NET CLI dotnet add ./MailDevResource.AppHost/MailDevResource.AppHost.csproj reference ./MailDevResource.NewsletterService/MailDevResource.NewsletterService.csproj -
Add the new project to the solution file.
.NET CLI dotnet sln ./MailDevResource.sln add ./MailDevResource.NewsletterService/MailDevResource.NewsletterService.csproj
After the project has been added and references have been updated, open the AppHost.cs of the MailDevResource.AppHost.csproj project, and update the source file to look like the following:
var builder = DistributedApplication.CreateBuilder(args);
var maildev = builder.AddMailDev("maildev");
builder.AddProject<Projects.MailDevResource_NewsletterService>("newsletterservice")    .WithReference(maildev);
builder.Build().Run();
After updating the AppHost.cs file, launch the AppHost again. Then verify that the Newsletter Service started and that the environment variable ConnectionStrings__maildev was added to the process. From the Resources page, find the newsletterservice row, and select the … button on the Actions column, then select View details. In the Environment Variables section, you should see the following:
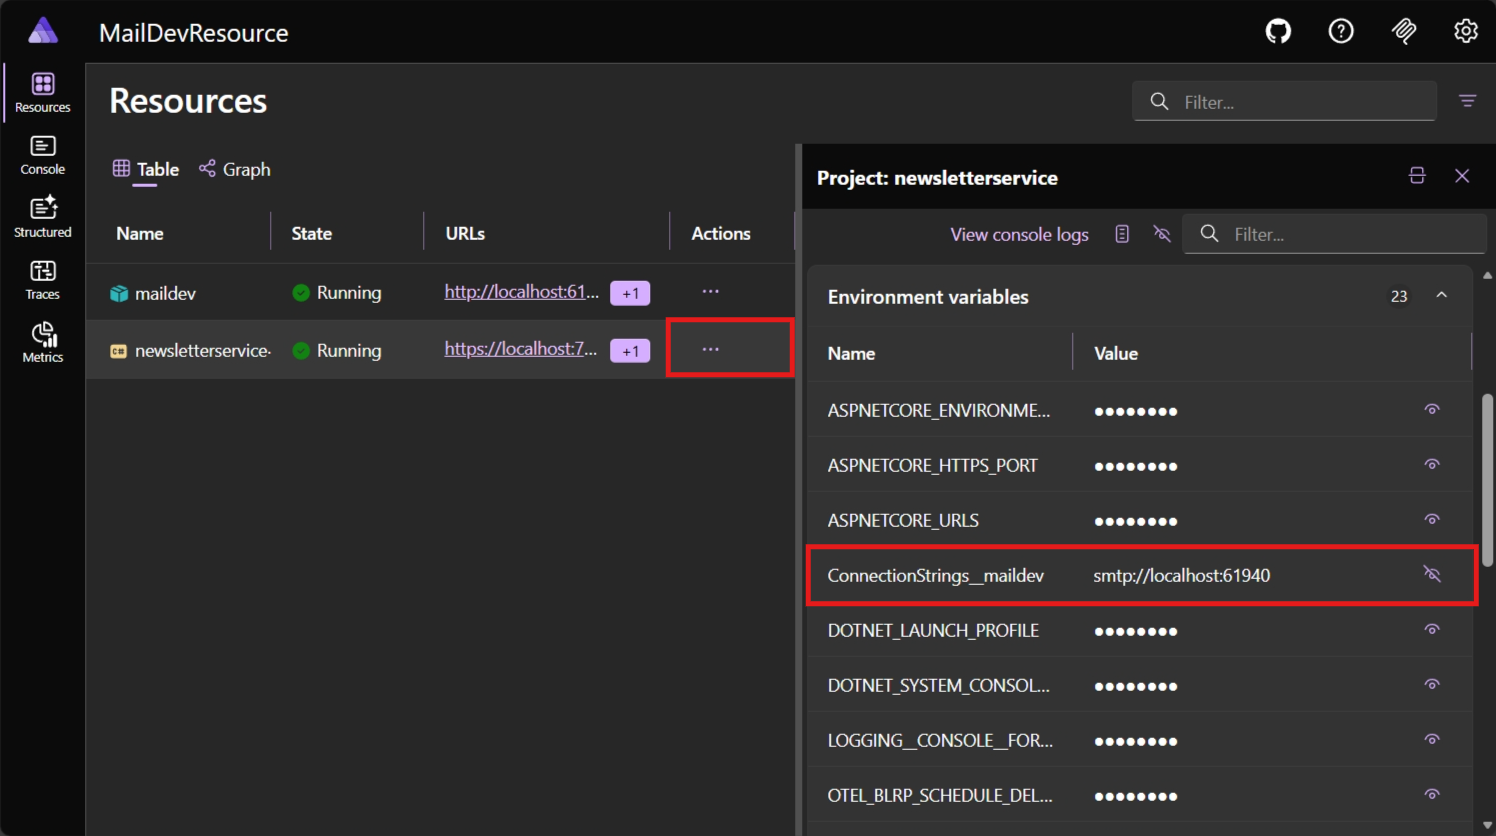
The preceding screenshot shows the environment variables for the newsletterservice project. The ConnectionStrings__maildev environment variable is the connection string that was injected into the project by the maildev resource.
Use connection string to send messages
Section titled “Use connection string to send messages”To use the SMTP connection details that were injected into the newsletter service project, you inject an instance of SmtpClient into the dependency injection container as a singleton. Add the following code to the Program.cs file in the MailDevResource.NewsletterService project to set up the singleton service. In the Program class, immediately following the // Add services to the container comment, add the following code:
builder.Services.AddSingleton<SmtpClient>(serviceProvider =>{    var connectionString = builder.Configuration.GetConnectionString("maildev");    var uri = new Uri(connectionString ?? "smtp://localhost:1025");
return new SmtpClient(uri.Host, uri.Port);});To test the client, add two simple subscribe and unsubscribe POST methods to the newsletter service. Add the following code replacing the “weatherforecast” MapGet call in the Program.cs file of the MailDevResource.NewsletterService project to set up the ASP.NET Core routes:
app.MapPost("/subscribe", async (string email, SmtpClient client) =>{    var message = new MailMessage("noreply@newsletter.local", email)    {        Subject = "Welcome to the newsletter!",        Body = "Welcome! You've subscribed to the newsletter."    };
    await client.SendMailAsync(message);
    return Results.Ok("Subscribed");});
app.MapPost("/unsubscribe", async (string email, SmtpClient client) =>{    var message = new MailMessage("noreply@newsletter.local", email)    {        Subject = "Goodbye from the newsletter",        Body = "You have been unsubscribed from the newsletter."    };
    await client.SendMailAsync(message);
return Results.Ok("Unsubscribed");});Once the Program.cs file is updated, launch the AppHost and use your browser, or curl to hit the following URLs (alternatively if you’re using Visual Studio you can use .http files). The important thing to note, is that you obtain the correct port number from the Aspire dashboard for the newsletterservice resource, for example:
POST /subscribe?email=test@test.com HTTP/1.1Host: localhost:7286Content-Type: application/jsonTo use this API, you can use curl to send the request. The following curl command sends an HTTP POST request to the subscribe endpoint, and it expects an email query string value to subscribe to the newsletter. The Content-Type header is set to application/json to indicate that the request body is in JSON format.
curl -H "Content-Type: application/json" \ --request POST \ https://localhost:7286/subscribe?email=test@test.comcurl -H @{ ContentType = "application/json" } ` -Method POST ` https://localhost:7286/subscribe?email=test@test.comThe next API is the unsubscribe endpoint. This endpoint is used to unsubscribe from the newsletter.
POST /unsubscribe?email=test@test.com HTTP/1.1Host: localhost:7286Content-Type: application/jsonTo unsubscribe from the newsletter, you can use the following curl command, passing an email parameter to the unsubscribe endpoint as a query string:
curl -H "Content-Type: application/json" \ --request POST \ https://localhost:7286/unsubscribe?email=test@test.comcurl -H @{ ContentType = "application/json" } ` -Method POST ` https://localhost:7286/unsubscribe?email=test@test.comIf those API calls return a successful response (HTTP 200, Ok) then you should be able to select on the maildev resource the dashboard and the MailDev UI will show the emails that have been sent to the SMTP endpoint.
Technical details
Section titled “Technical details”In the following sections, various technical details are discussed which are important to understand when developing custom resources for Aspire.
Secure networking
Section titled “Secure networking”In this example, the MailDev resource is a container resource which is exposed to the host machine over HTTP and SMTP. The MailDev resource is a development tool and isn’t intended for production use. To instead use HTTPS, see MailDev: Configure HTTPS.
When developing custom resources that expose network endpoints, it’s important to consider the security implications of the resource. For example, if the resource is a database, it’s important to ensure that the database is secure and that the connection string isn’t exposed to the public internet.
The ReferenceExpression and EndpointReference type
Section titled “The ReferenceExpression and EndpointReference type”In the preceding code, the MailDevResource had two properties:
SmtpEndpoint: AnEndpointReferencetype.ConnectionStringExpression: AReferenceExpressiontype.
These types are among several which are used throughout Aspire to represent configuration data, which isn’t finalized until the Aspire project is either run or published to the cloud via a tool such as Azure Developer CLI.
The fundamental problem that these types help to solve, is deferring resolution of concrete configuration information until all the information is available.
For example, the MailDevResource exposes a property called ConnectionStringExpression as required by the IResourceWithConnectionString interface. The type of the property is ReferenceExpression and is created by passing in an interpolated string to the ReferenceExpression.Create method.
public ReferenceExpression ConnectionStringExpression => ReferenceExpression.Create( $"smtp://{SmtpEndpoint.Property(EndpointProperty.HostAndPort)}" );The signature for the ReferenceExpression.Create method is as follows:
public static ReferenceExpression Create( in ExpressionInterpolatedStringHandler handler)This isn’t a regular string argument. The method makes use of the interpolated string handler pattern, to capture the interpolated string template and the values referenced within it to allow for custom processing. In the case of Aspire, these details are captured in a ReferenceExpression which can be evaluated as each value referenced in the interpolated string becomes available.
Here’s how the flow of execution works:
- A resource which implements
IResourceWithConnectionStringis added to the model (for example,AddMailDev(...)). - The
IResourceBuilder<MailDevResource>is passed to theWithReferencewhich has a special overload for handlingIResourceWithConnectionStringimplementors. - The
WithReferencewraps the resource in aConnectionStringReferenceinstance and the object is captured in anEnvironmentCallbackAnnotationwhich is evaluated after the Aspire project is built and starts running. - As the process that references the connection string starts Aspire starts evaluating the expression. It first gets the
ConnectionStringReferenceand calls itsGetValueAsyncmethod. - The
GetValueAsyncmethod gets the value of theIResourceWithConnectionString.ConnectionStringExpressionproperty to get theReferenceExpressioninstance. - The
ConnectionStringReference.GetValueAsyncmethod then callsReferenceExpression.GetValueAsyncto process the previously captured interpolated string. - Because the interpolated string contains references to other reference types such as
EndpointReferencethey’re also evaluated and real value substituted (which at this time is now available).
Manifest publishing
Section titled “Manifest publishing”The IManifestExpressionProvider interface is designed to solve the problem of sharing connection information between resources at deployment. Similarly to local development, many of the values are necessary to configure the app, yet they can’t be determined until the app is being deployed.
To solve this problem Aspire produces a manifest file which azd and other deployment tools interpret. Rather than specifying concrete values for connection information between resources an expression syntax is used which deployment tools evaluate. Generally the manifest file isn’t visible to developers but it’s possible to generate one for manual inspection. The command below can be used on the AppHost to produce a manifest.
aspire do publish-manifest --output-path aspire-manifest.jsonConsider the following example output:
09:01:18 (pipeline execution) → Starting pipeline execution...09:01:18 (publish-manifest) → Starting publish-manifest...09:01:18 (publish-manifest) i [INF] Published manifest to: ./MailDevResource/aspire-manifest.json09:01:18 (publish-manifest) ✓ publish-manifest completed successfully09:01:18 (pipeline execution) ✓ Completed successfully------------------------------------------------------------✓ 2/2 steps succeeded • Total time: 0.0s
Steps Summary:   0.0 s  ✓ pipeline execution   0.0 s  ✓ publish-manifest
✓ PIPELINE SUCCEEDED------------------------------------------------------------
Navigate to the output file specified in the command to inspect the manifest file. This command produces a manifest file like the following:
{ "$schema": "https://json.schemastore.org/aspire-8.0.json", "resources": { "maildev": { "type": "container.v0", "connectionString": "smtp://{maildev.bindings.smtp.host}:{maildev.bindings.smtp.port}", "image": "docker.io/maildev/maildev:2.2.1", "bindings": { "http": { "scheme": "http", "protocol": "tcp", "transport": "http", "targetPort": 1080 }, "smtp": { "scheme": "tcp", "protocol": "tcp", "transport": "tcp", "targetPort": 1025 } } }, "newsletterservice": { "type": "project.v0", "path": "MailDevResource.NewsletterService/MailDevResource.NewsletterService.csproj", "env": { "OTEL_DOTNET_EXPERIMENTAL_OTLP_EMIT_EXCEPTION_LOG_ATTRIBUTES": "true", "OTEL_DOTNET_EXPERIMENTAL_OTLP_EMIT_EVENT_LOG_ATTRIBUTES": "true", "OTEL_DOTNET_EXPERIMENTAL_OTLP_RETRY": "in_memory", "ASPNETCORE_FORWARDEDHEADERS_ENABLED": "true", "HTTP_PORTS": "{newsletterservice.bindings.http.targetPort}", "ConnectionStrings__maildev": "{maildev.connectionString}" }, "bindings": { "http": { "scheme": "http", "protocol": "tcp", "transport": "http" }, "https": { "scheme": "https", "protocol": "tcp", "transport": "http" } } } }}Because the MailDevResource implements IResourceWithConnectionString the manifest publishing logic in Aspire knows that even though MailDevResource is a container resource, it also needs a connectionString field. The connectionString field references other parts of the maildev resource in the manifest to produce the final string:
{ // ... other content omitted. "connectionString": "smtp://{maildev.bindings.smtp.host}:{maildev.bindings.smtp.port}",}Aspire knows how to form this string because it looks at IResourceWithConnectionString.ConnectionStringExpression and builds up the final string via the IManifestExpressionProvider interface (in much the same way as the IValueProvider interface is used).
The MailDevResource automatically gets included in the manifest because it’s derived from ContainerResource. Resource authors can choose to suppress outputting content to the manifest by using the ExcludeFromManifest extension method on the resource builder.
public static IResourceBuilder<MailDevResource> AddMailDev(    this IDistributedApplicationBuilder builder,    string name,    int? httpPort = null,    int? smtpPort = null){    var resource = new MailDevResource(name);
    return builder.AddResource(resource)                  .WithImage(MailDevContainerImageTags.Image)                  .WithImageRegistry(MailDevContainerImageTags.Registry)                  .WithImageTag(MailDevContainerImageTags.Tag)                  .WithHttpEndpoint(                      targetPort: 1080,                      port: httpPort,                      name: MailDevResource.HttpEndpointName)                  .WithEndpoint(                      targetPort: 1025,                      port: smtpPort,                      name: MailDevResource.SmtpEndpointName)                  .ExcludeFromManifest(); // This line was added}
Careful consideration should be given as to whether the resource should be present in the manifest, or whether it should be suppressed. If the resource is being added to the manifest, it should be configured in such a way that it’s safe and secure to use.
Summary
Section titled “Summary”In this tutorial, you learned how to create a custom Aspire resource which uses an existing containerized application (MailDev). You then used that to improve the local development experience by making it easy to test e-mail capabilities that might be used within an app. These learnings can be applied to building out other custom resources that can be used in Aspire-based applications. This specific example didn’t include any custom integrations, but it’s possible to build out custom integrations to make it easier for developers to use the resource. In this scenario you were able to rely on the existing SmtpClient class in the .NET platform to send e-mails.