Build your first Aspire app
Это содержимое пока не доступно на вашем языке.
In this quickstart, you’ll create and run your first Aspire application using the Aspire CLI. Before you begin, make sure you’ve completed the prerequisites and installed the Aspire CLI. This guide walks you through generating a new Aspire solution from a template, running the application locally with Aspire’s dev-time orchestration, and exploring the Aspire dashboard. After completing this quickstart, consider deploying your apps.
This starter template uses modern C#:
- Minimal APIs for lightweight HTTP APIs
- Blazor for interactive web UIs using C#
- Service defaults for shared configuration of observability and resilience
The following diagram shows the architecture of the sample app you’re creating:
architecture-beta

  service api(logos:dotnet)[API service]
  service frontend(aspire:blazor)[Blazor front end]

  frontend:L --> R:api
This starter template combines a modern Python and JavaScript stack:
- FastAPI for building APIs with Python
- Uv for Python package installation and environment management
- React for building user interfaces with JavaScript
The following diagram shows the architecture of the sample app you’re creating:
architecture-beta
  service api(logos:fastapi)[API service]
  service frontend(logos:react)[React front end]

  frontend:L --> R:api
Create a new app
Section titled “Create a new app”To create your first Aspire application, use the Aspire CLI to generate a new solution from a starter template. These template include multiple projects, such as an API service, a web frontend, and an Aspire AppHost.
-
Create a new Aspire solution from a template:
Create a new aspire solution aspire new aspire-starter -n AspireApp -o AspireAppCreate a new aspire solution aspire new aspire-py-starter -n aspire-app -o aspire-appCreate a new aspire solution aspire new aspire-js-starter -n aspire-app -o aspire-appThe template provides several projects, including an API service, web frontend, and AppHost.
For further CLI reference, see
aspire newcommand information.If prompted for additional selections, use the
Up Arrow ↑ Up Arrow ↑ Up Arrow ↑ andDown Arrow ↓ Down Arrow ↓ Down Arrow ↓ keys to navigate the options. PressReturn Return Enter Enter Enter Enter to confirm your selection.
Review the template code
Section titled “Review the template code”-
Examine the created template structure. The Aspire CLI creates a new folder with the name you provided in the current directory. This folder contains the solution file and several projects, including:
- AspireApp.sln
ДиректорияAspireApp.ApiService mock weather data API
ДиректорияProperties/
- …
- appsettings.Development.json
- appsettings.json
- AspireApp.ApiService.csproj
- Program.cs
ДиректорияAspireApp.AppHost dev-time orchestrator
ДиректорияProperties/
- …
- appsettings.Development.json
- appsettings.json
- AspireApp.AppHost.csproj
- AppHost.cs
ДиректорияAspireApp.ServiceDefaults
- Extensions.cs
- AspireApp.ServiceDefaults.csproj
ДиректорияAspireApp.Web ASP.NET Core Blazor front end
ДиректорияProperties/
- …
Директорияwwwroot/
- …
- appsettings.Development.json
- appsettings.json
- AspireApp.Web.csproj
- Program.cs
- WeatherApiClient.cs
Директорияaspire-app/
Директорияapp/ FastAPI mock weather data API
- .dockerignore
- .python-version
- main.py
- pyproject.toml
- telemetry.py
Директорияfrontend/ Vite + React web front end
- .dockerignore
Директорияpublic/
- Aspire.png
- github.svg
Директорияsrc/
- App.css
- App.tsx
- index.css
- main.tsx
- vite-env.d.ts
- .gitignore
- eslint.config.js
- index.html
- package-lock.json
- package.json
- tsconfig.app.json
- tsconfig.json
- tsconfig.node.json
- vite.config.ts
- apphost.cs dev-time orchestrator
- apphost.run.json
- NuGet.config
This solution structure is based on the Aspire templates. If they’re not installed already, the CLI will install them for you.
-
Explore the AppHost code that orchestrates your app.
The AppHost is the heart of your Aspire application—it defines which services run, how they connect, and in what order they start. Let’s look at the generated code:
C# — AppHost.cs project-based orchestrator var builder = DistributedApplication.CreateBuilder(args);var apiService = builder.AddProject<Projects.AspireApp_ApiService>("apiservice").WithHttpHealthCheck("/health");builder.AddProject<Projects.AspireApp_Web>("webfrontend").WithExternalHttpEndpoints().WithHttpHealthCheck("/health").WithReference(apiService).WaitFor(apiService);builder.Build().Run();What’s happening here?
CreateBuildercreates the distributed application builderAddProjectregisters your API service and web frontendWithReferencecreates a connection between services (the web app can call the API)WaitForensures services start in the correct orderWithHttpHealthCheckmonitors service health
C# — apphost.cs file-based orchestrator #:sdk Aspire.AppHost.Sdk@13.1.0#:package Aspire.Hosting.JavaScript@13.1.0#:package Aspire.Hosting.Python@13.1.0var builder = DistributedApplication.CreateBuilder(args);var app = builder.AddUvicornApp("app", "./app", "main:app").WithUv().WithExternalHttpEndpoints().WithHttpHealthCheck("/health");var frontend = builder.AddViteApp("frontend", "./frontend").WithReference(app).WaitFor(app);app.PublishWithContainerFiles(frontend, "./static");builder.Build().Run();What’s happening here?
AddUvicornAppadds a Uvicorn-based Python appAddUvadds a Uv environment setup task:uv syncAddViteAppregisters your React frontendWithReferenceconnects the frontend to the APIWaitForensures the API starts before the frontendPublishWithContainerFilesbundles the frontend for production deployment
Run the app
Section titled “Run the app”-
Change to the output directory:
Change directories cd ./AspireAppChange directories cd ./aspire-app -
Call
aspire runto start dev-time orchestration:Run dev-time orchestration aspire runWhen you run this command, the Aspire CLI:
- Automatically finds the AppHost
- Builds your solution
- Launches dev-time orchestration
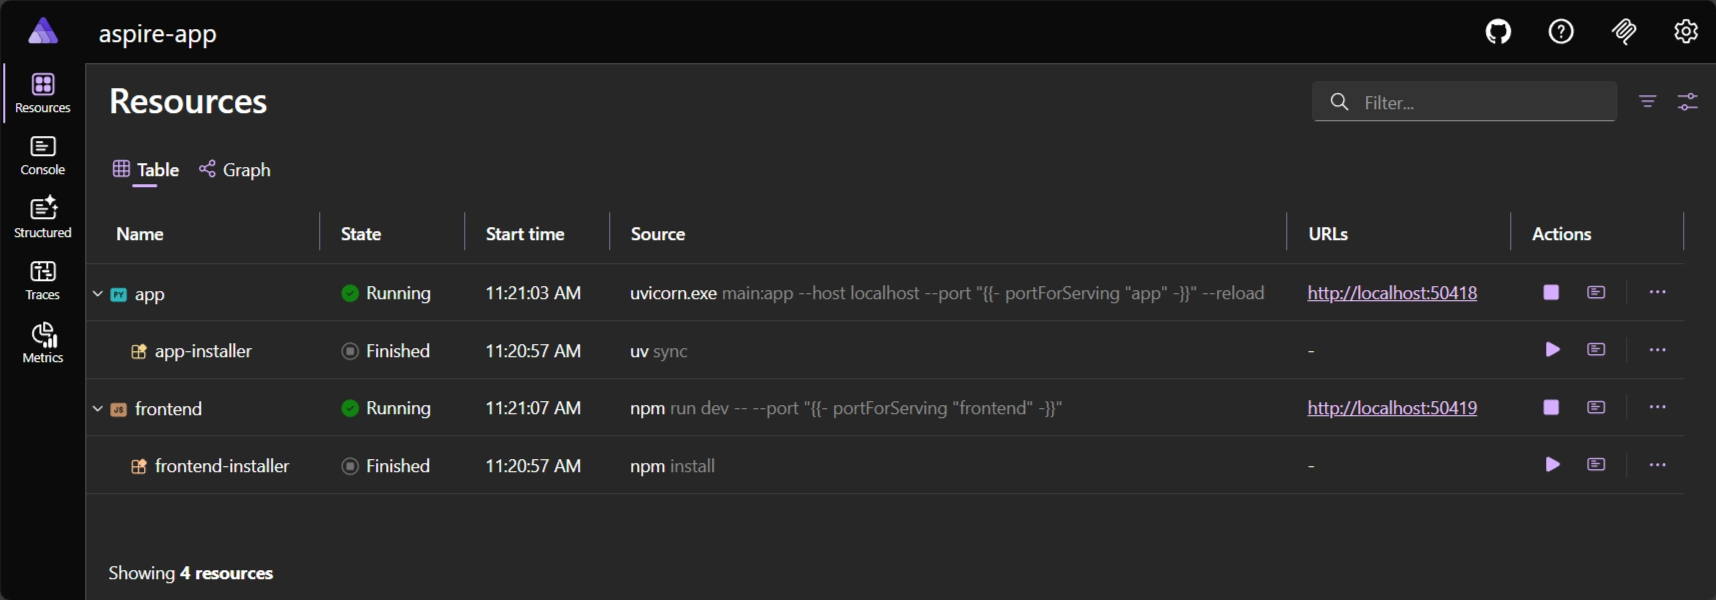
Once the dashboard is ready, its URL (with a login token—highlighted in the example output below) appears in your terminal. The dashboard provides a live, real-time view of your running resources and their current states.
Example output 🔍 Finding apphosts...AspireApp.AppHost/AspireApp.AppHost.csproj🗄 Created settings file at '.aspire/settings.json'.AppHost: AspireApp.AppHost/AspireApp.AppHost.csprojDashboard: https://localhost:17068/login?t=ea559845d54cea66b837dc0ff33c3bd3Logs: %USERPROFILE%/.aspire/cli/logs/apphost-13024-2025-10-31-19-40-58.logPress CTRL+C to stop the apphost and exit.Example output 🔍 Finding apphosts...apphost.cs🗄 Created settings file at '.aspire/settings.json'.AppHost: apphost.csDashboard: https://localhost:17213/login?t=2b4a2ebc362b7fef9b5ccf73e702647bLogs: $HOME/.aspire/cli/logs/apphost-27732-2025-10-31-19-21-27.logPress CTRL+C to stop the apphost and exit.For further CLI reference, see
aspire runcommand information. -
Explore the running distributed application. From the dashboard, open the
HTTPSendpoint from each resource.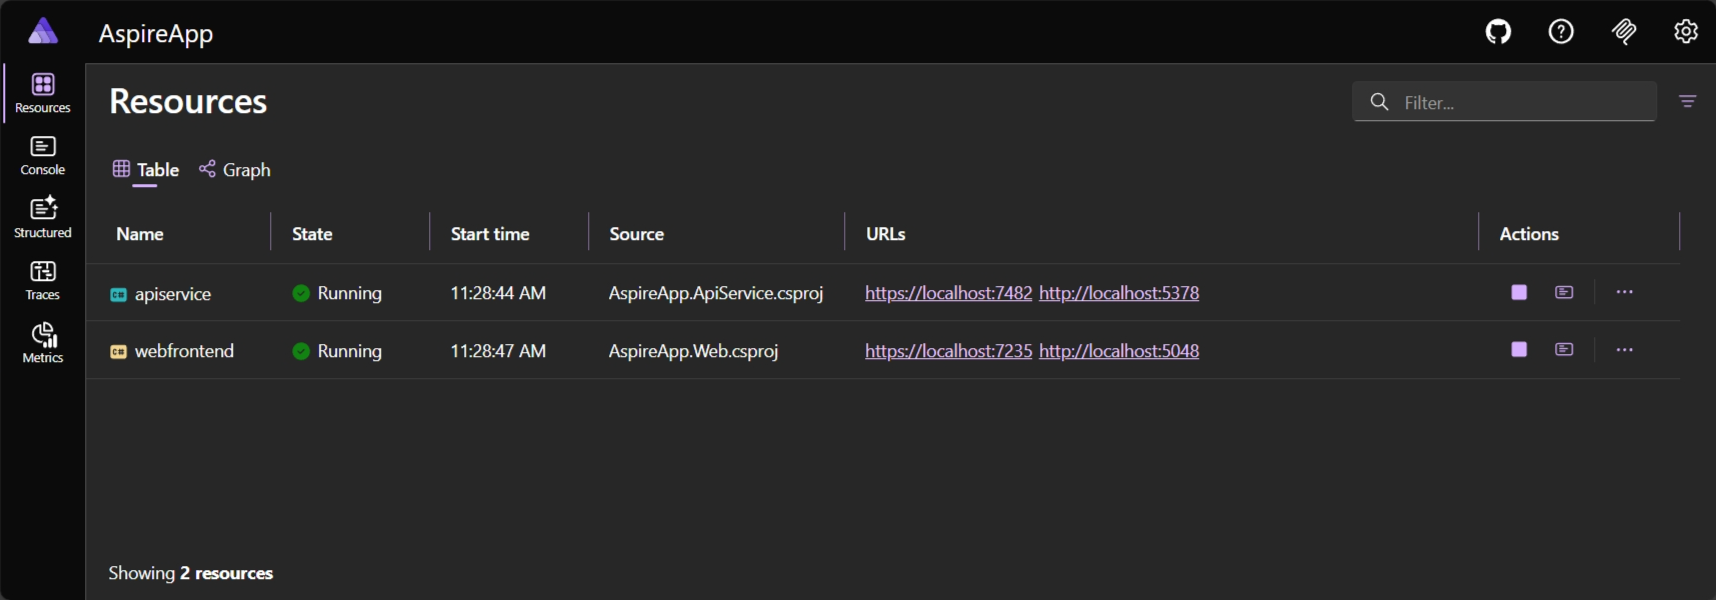
To learn more, see Aspire dashboard overview.
Stop the app
Section titled “Stop the app”-
Stop the AppHost and close the dashboard by pressing
⌘+C ⌘+C Control + C CtrlC Control + C CtrlC in your terminal.Stop dev-time orchestration 🛑 Stopping Aspire.🥳 Congratulations! You’ve created your first Aspire app.
You might be eager to deploy this app next—and we’ll show you how Aspire handles that—but you’re probably also wondering: “How do I test all this?” Great question! Aspire doesn’t just orchestrate locally and deploy, it also helps you test service and resource integrations too. Ready to dive in? Write your first test 💜