

Deploy your first Aspire app
이 콘텐츠는 아직 번역되지 않았습니다.
In this tutorial, you take the app you created in the Build your first Aspire app quickstart and deploy it. This can be broken down into several key steps:
- Add deployment package — Add the hosting package for your target.
- Update your AppHost — Configure the environment API.
- Deploy your app — Deploy using the Aspire CLI.
- Verify your deployment — Ensure your app is running as expected.
- Clean up resources — Remove any deployed resources to avoid incurring costs.
The following diagram shows the architecture of the sample app you’re deploying:
architecture-beta
    group api-docker(logos:docker-icon)[API container]
    group f-docker(logos:docker-icon)[Front end container]

    service api(logos:dotnet)[API service] in api-docker
    service http(iconoir:server-connection)[https]
    service frontend(aspire:blazor)[Blazor front end] in f-docker

    frontend:L --> R:http
    http:L --> R:api
The ASP.NET Core Blazor & Minimal API starter template consists of two resources, each deployed as a separate container.
architecture-beta
  group docker(logos:docker-icon)[Python and static site server container]

  service api(logos:fastapi)[API service] in docker
  service http(iconoir:server-connection)[https] in docker
  service frontend(logos:react)[React front end] in docker

  frontend:L --> R:http
  http:L --> R:api
The React (Vite) & FastAPI starter template consists of two resources that are deployed as a single container. The FastAPI server hosts both the API and the static frontend files generated by React.
architecture-beta
  group docker(logos:docker-icon)[NodeJS and static site server container]

  service api(logos:nodejs-icon)[API service] in docker
  service http(iconoir:server-connection)[https] in docker
  service frontend(logos:react)[React front end] in docker

  frontend:L --> R:http
  http:L --> R:api
The React (Vite) & Express starter template consists of two resources that are deployed as a single container. The Express server hosts both the API and the static frontend files generated by React.
Prerequisites
Section titled “Prerequisites”Depending on where you want to deploy your Aspire app, ensure you have the following prerequisites installed and configured:

- Docker Desktop installed and running.
- Podman (alternative to Docker) installed and running. For more information, see OCI-compatible container runtime.
- An Azure account with an active subscription.
- Azure CLI installed and configured. You should be logged in using
az login.
Add deployment package
Section titled “Add deployment package”In the root directory of your Aspire solution that you created in the previous quickstart, add the appropriate hosting deployment package by running the following command in your terminal:
Docker Compose is a tool for defining and running multi-container Docker applications. It allows you to use a YAML file to configure your application’s services, networks, and volumes, making it easier to manage and deploy complex applications locally or in various environments.
aspire add dockerThe Aspire CLI is interactive, be sure to select the appropriate search result for the 📦 Aspire.Hosting.Docker version you want to add.
aspire add azure-appcontainersThe Aspire CLI is interactive, be sure to select the appropriate search result for the 📦 Aspire.Hosting.Azure.AppContainers version you want to add.
If prompted for additional selections, use the
Learn more about the aspire add command in the reference docs.
Update your AppHost
Section titled “Update your AppHost”In the AppHost, chain a call to the appropriate environment API method to configure the deployment environment for your target.
var builder = DistributedApplication.CreateBuilder(args);
// Add the following line to configure the Docker Compose environmentbuilder.AddDockerComposeEnvironment("env");
var apiService = builder.AddProject<Projects.AspireApp_ApiService>("apiservice")    .WithHttpHealthCheck("/health");
builder.AddProject<Projects.AspireApp_Web>("webfrontend")    .WithExternalHttpEndpoints()    .WithHttpHealthCheck("/health")    .WithReference(apiService)    .WaitFor(apiService);
builder.Build().Run();#:sdk Aspire.AppHost.Sdk@13.1.0#:package Aspire.Hosting.JavaScript@13.1.0#:package Aspire.Hosting.Python@13.1.0#:package Aspire.Hosting.Docker@13.1.0-preview.1.25616.3
var builder = DistributedApplication.CreateBuilder(args);
// Add the following line to configure the Docker Compose environmentbuilder.AddDockerComposeEnvironment("env");
var app = builder.AddUvicornApp("app", "./app", "main:app") .WithUv() .WithExternalHttpEndpoints() .WithHttpHealthCheck("/health");
var frontend = builder.AddViteApp("frontend", "./frontend") .WithReference(app) .WaitFor(app);
app.PublishWithContainerFiles(frontend, "./static");
builder.Build().Run();import { createBuilder } from './.modules/aspire.js';
const builder = await createBuilder();
// Add the following line to configure the Docker Compose environmentawait builder.addDockerComposeEnvironment("env");
const app = await builder .addNodeApp("app", "./api", "src/index.ts") .withHttpEndpoint({ env: "PORT" }) .withExternalHttpEndpoints();
const frontend = await builder .addViteApp("frontend", "./frontend") .withReference(app) .waitFor(app);
await app.publishWithContainerFiles(frontend, "./static");
await builder.build().run();AddDockerComposeEnvironment— Configures the Docker Compose environment for deployment. This call implicitly adds support for containerizing resources in the AppHost as part of deployment.WithExternalHttpEndpoints— Exposes HTTP endpoints for the resource when deployed.
var builder = DistributedApplication.CreateBuilder(args);
// Add the following line to configure the Azure App Container environmentbuilder.AddAzureContainerAppEnvironment("env");
var apiService = builder.AddProject<Projects.AspireApp_ApiService>("apiservice")    .WithHttpHealthCheck("/health");
builder.AddProject<Projects.AspireApp_Web>("webfrontend")    .WithExternalHttpEndpoints()    .WithHttpHealthCheck("/health")    .WithReference(apiService)    .WaitFor(apiService);
builder.Build().Run();#:sdk Aspire.AppHost.Sdk@13.1.0#:package Aspire.Hosting.JavaScript@13.1.0#:package Aspire.Hosting.Python@13.1.0#:package Aspire.Hosting.Azure.AppContainers@13.1.0
var builder = DistributedApplication.CreateBuilder(args);
// Add the following line to configure the Azure App Container environmentbuilder.AddAzureContainerAppEnvironment("env");
var app = builder.AddUvicornApp("app", "./app", "main:app") .WithUv() .WithExternalHttpEndpoints() .WithHttpHealthCheck("/health");
var frontend = builder.AddViteApp("frontend", "./frontend") .WithReference(app) .WaitFor(app);
app.PublishWithContainerFiles(frontend, "./static");
builder.Build().Run();import { createBuilder } from './.modules/aspire.js';
const builder = await createBuilder();
// Add the following line to configure the Azure App Container environmentawait builder.addAzureContainerAppEnvironment("env");
const app = await builder .addNodeApp("app", "./api", "src/index.ts") .withHttpEndpoint({ env: "PORT" }) .withExternalHttpEndpoints();
const frontend = await builder .addViteApp("frontend", "./frontend") .withReference(app) .waitFor(app);
await app.publishWithContainerFiles(frontend, "./static");
await builder.build().run();AddAzureContainerAppEnvironment— Configures the Azure App Container environment for deployment. This call implicitly adds support for containerizing resources in the AppHost as part of deployment.WithExternalHttpEndpoints— Exposes HTTP endpoints for the resource when deployed.
Deploy your app
Section titled “Deploy your app”Now that you’ve added the deployment package and updated your AppHost, you can deploy your Aspire app.
Deploying to Docker Compose builds the container images and starts the services locally using Docker Compose.
aspire deployConsider the following example output:
When deploying to Azure, the aspire deploy command is interactive. To avoid prompts (for example, when running in CI/CD), set the following environment variables:
Azure__SubscriptionId: Target Azure subscription ID.Azure__Location: Azure region (for example, eastus).Azure__ResourceGroup: Resource group name to create or reuse.
Deploying to Azure App Containers builds the container images and deploys the services to Azure App Containers.
aspire deployConsider the following example output:
When you call aspire deploy, the Aspire CLI builds the container images for your resources, pushes them to the target environment (if applicable), and deploys the resources according to the configuration in your AppHost.
Additional information about this command can be found in the aspire deploy reference docs.
Post deployment output
Section titled “Post deployment output”After a deployment, the Aspire CLI writes to the provided output path (or the default output path if none is provided) a set of files based on your deployment target. This may include files such as Docker Compose files, Kubernetes manifests, or cloud provider-specific configuration files.
디렉터리aspire-output
- .env
- .env.Production
- docker-compose.yaml
The aspire-output directory contains the generated environment variables and the Docker Compose configuration. The best part is, these files are opaque to you as a developer—you don’t need to write them yourself!
The .env.Production file contains the name of the app image:
# Container image name for apiserviceAPISERVICE_IMAGE=apiservice:latest
# Default container port for apiserviceAPISERVICE_PORT=8080
# Container image name for webfrontendWEBFRONTEND_IMAGE=webfrontend:latest
# Default container port for webfrontendWEBFRONTEND_PORT=8080
Finally, the docker-compose.yaml file defines the services for both the API and front end:
services: env-dashboard: image: "mcr.microsoft.com/dotnet/nightly/aspire-dashboard:latest" expose: - "18888" - "18889" networks: - "aspire" restart: "always" apiservice: image: "${APISERVICE_IMAGE}" environment: OTEL_DOTNET_EXPERIMENTAL_OTLP_EMIT_EXCEPTION_LOG_ATTRIBUTES: "true" OTEL_DOTNET_EXPERIMENTAL_OTLP_EMIT_EVENT_LOG_ATTRIBUTES: "true" OTEL_DOTNET_EXPERIMENTAL_OTLP_RETRY: "in_memory" ASPNETCORE_FORWARDEDHEADERS_ENABLED: "true" HTTP_PORTS: "${APISERVICE_PORT}" OTEL_EXPORTER_OTLP_ENDPOINT: "http://env-dashboard:18889" OTEL_EXPORTER_OTLP_PROTOCOL: "grpc" OTEL_SERVICE_NAME: "apiservice" expose: - "${APISERVICE_PORT}" networks: - "aspire" webfrontend: image: "${WEBFRONTEND_IMAGE}" environment: OTEL_DOTNET_EXPERIMENTAL_OTLP_EMIT_EXCEPTION_LOG_ATTRIBUTES: "true" OTEL_DOTNET_EXPERIMENTAL_OTLP_EMIT_EVENT_LOG_ATTRIBUTES: "true" OTEL_DOTNET_EXPERIMENTAL_OTLP_RETRY: "in_memory" ASPNETCORE_FORWARDEDHEADERS_ENABLED: "true" HTTP_PORTS: "${WEBFRONTEND_PORT}" APISERVICE_HTTP: "http://apiservice:${APISERVICE_PORT}" services__apiservice__http__0: "http://apiservice:${APISERVICE_PORT}" APISERVICE_HTTPS: "https://apiservice:${APISERVICE_PORT}" OTEL_EXPORTER_OTLP_ENDPOINT: "http://env-dashboard:18889" OTEL_EXPORTER_OTLP_PROTOCOL: "grpc" OTEL_SERVICE_NAME: "webfrontend" ports: - "${WEBFRONTEND_PORT}" depends_on: apiservice: condition: "service_started" networks: - "aspire"networks: aspire: driver: "bridge"디렉터리aspire-output
- .env
- .env.Production
- app.Dockerfile
- docker-compose.yaml
The aspire-output directory contains the generated environment variables, an app.Dockerfile, and the Docker Compose configuration. The best part is, these files are opaque to you as a developer—you don’t need to write them yourself!
The .env.Production file contains the name of the app image:
APP_IMAGE=app:5d592d0c1d2f417b0c14c4c4a9efb4f0760be8e4The app.Dockerfile is generated as a multi-stage Dockerfile to build the Python and also serve the React front end using Uvicorn:
ARG FRONTEND_IMAGENAME=frontend:50f0ed07a5b8f57b3213e99d96b2e8ff68a1d5d7
FROM ghcr.io/astral-sh/uv:python3.13-bookworm-slim AS builder
# Enable bytecode compilation and copy mode for the virtual environmentENV UV_COMPILE_BYTECODE=1ENV UV_LINK_MODE=copy
WORKDIR /app
# Copy pyproject.toml to install dependenciesCOPY pyproject.toml /app/
# Install dependencies and generate lock file# Uses BuildKit cache mount to speed up repeated buildsRUN --mount=type=cache,target=/root/.cache/uv \    uv sync --no-install-project --no-dev
# Copy the rest of the application source and install the projectCOPY . /appRUN --mount=type=cache,target=/root/.cache/uv \    uv sync --no-dev
FROM ${FRONTEND_IMAGENAME} AS frontend_stage
FROM python:3.13-slim-bookworm AS app
COPY --from=frontend_stage /app/dist /app/./static
# ------------------------------# 🚀 Runtime stage# ------------------------------# Create non-root user for securityRUN groupadd --system --gid 999 appuser && useradd --system --gid 999 --uid 999 --create-home appuser
# Copy the application and virtual environment from builderCOPY --from=builder --chown=appuser:appuser /app /app
# Add virtual environment to PATH and set VIRTUAL_ENVENV PATH=/app/.venv/bin:${PATH}ENV VIRTUAL_ENV=/app/.venvENV PYTHONDONTWRITEBYTECODE=1ENV PYTHONUNBUFFERED=1
# Use the non-root user to run the applicationUSER appuser
# Set working directoryWORKDIR /app
# Run the applicationENTRYPOINT ["uvicorn"]
Finally, the docker-compose.yaml file defines the services for both the API and front end:
services: env-dashboard: image: "mcr.microsoft.com/dotnet/nightly/aspire-dashboard:latest" expose: - "18888" - "18889" networks: - "aspire" restart: "always" app: image: "${APP_IMAGE}" command: - "main:app" - "--host" - "0.0.0.0" - "--port" - "8000" environment: OTEL_TRACES_EXPORTER: "otlp" OTEL_LOGS_EXPORTER: "otlp" OTEL_METRICS_EXPORTER: "otlp" OTEL_PYTHON_LOGGING_AUTO_INSTRUMENTATION_ENABLED: "true" PORT: "8000" OTEL_EXPORTER_OTLP_ENDPOINT: "http://env-dashboard:18889" OTEL_EXPORTER_OTLP_PROTOCOL: "grpc" OTEL_SERVICE_NAME: "app" ports: - "8000" networks: - "aspire"networks: aspire: driver: "bridge"디렉터리aspire-output
- .env
- .env.Production
- app.Dockerfile
- docker-compose.yaml
The aspire-output directory contains the generated environment variables, an app.Dockerfile, and the Docker Compose configuration. The best part is, these files are opaque to you as a developer—you don’t need to write them yourself!
The app.Dockerfile is generated as a multi-stage Dockerfile to build the Express API and also serve the React front end:
ARG FRONTEND_IMAGENAME=frontend:latest
FROM node:22-slim AS builder
WORKDIR /app
COPY package*.json ./RUN npm ci --production
COPY . .
FROM ${FRONTEND_IMAGENAME} AS frontend_stage
FROM node:22-slim AS app
COPY --from=frontend_stage /app/dist /app/./staticCOPY --from=builder /app /app
USER nodeWORKDIR /appENTRYPOINT ["node", "--import", "tsx", "src/index.ts"]
Finally, the docker-compose.yaml file defines the service:
services: env-dashboard: image: "mcr.microsoft.com/dotnet/nightly/aspire-dashboard:latest" expose: - "18888" - "18889" networks: - "aspire" restart: "always" app: image: "${APP_IMAGE}" environment: PORT: "8000" OTEL_EXPORTER_OTLP_ENDPOINT: "http://env-dashboard:18889" OTEL_EXPORTER_OTLP_PROTOCOL: "grpc" OTEL_SERVICE_NAME: "app" ports: - "8000" networks: - "aspire"networks: aspire: driver: "bridge"After deploying to Azure App Containers, the Aspire CLI saves the deployment state file to your local machine.
디렉터리%USERPROFILE%
- .aspire/deployments/[AppHost-Sha256]/production.json
디렉터리$HOME
- .aspire/deployments/[AppHost-Sha256]/production.json
디렉터리%USERPROFILE%
- .aspire/deployments/[AppHost-Sha256]/production.json
Verify your deployment
Section titled “Verify your deployment”To verify that your application is running as expected after deployment, follow the instructions for your chosen deployment target below.
When deploying to Docker Compose, the aspire deploy command displays the URLs where your services are running. Look for the print-*-summary steps in the deployment output, which show the localhost URLs for each service that has been configured with WithExternalHttpEndpoints.
In the deployment output, you’ll see lines similar to the following:
14:28:35 (print-env-dashboard-summary) i [INF] Successfully deployed env-dashboard to http://localhost:54633.14:28:35 (print-webfrontend-summary) i [INF] Successfully deployed webfrontend to http://localhost:54463.Open your web browser and navigate to the URL shown for your web frontend (for example, http://localhost:54463) to see your deployed application.
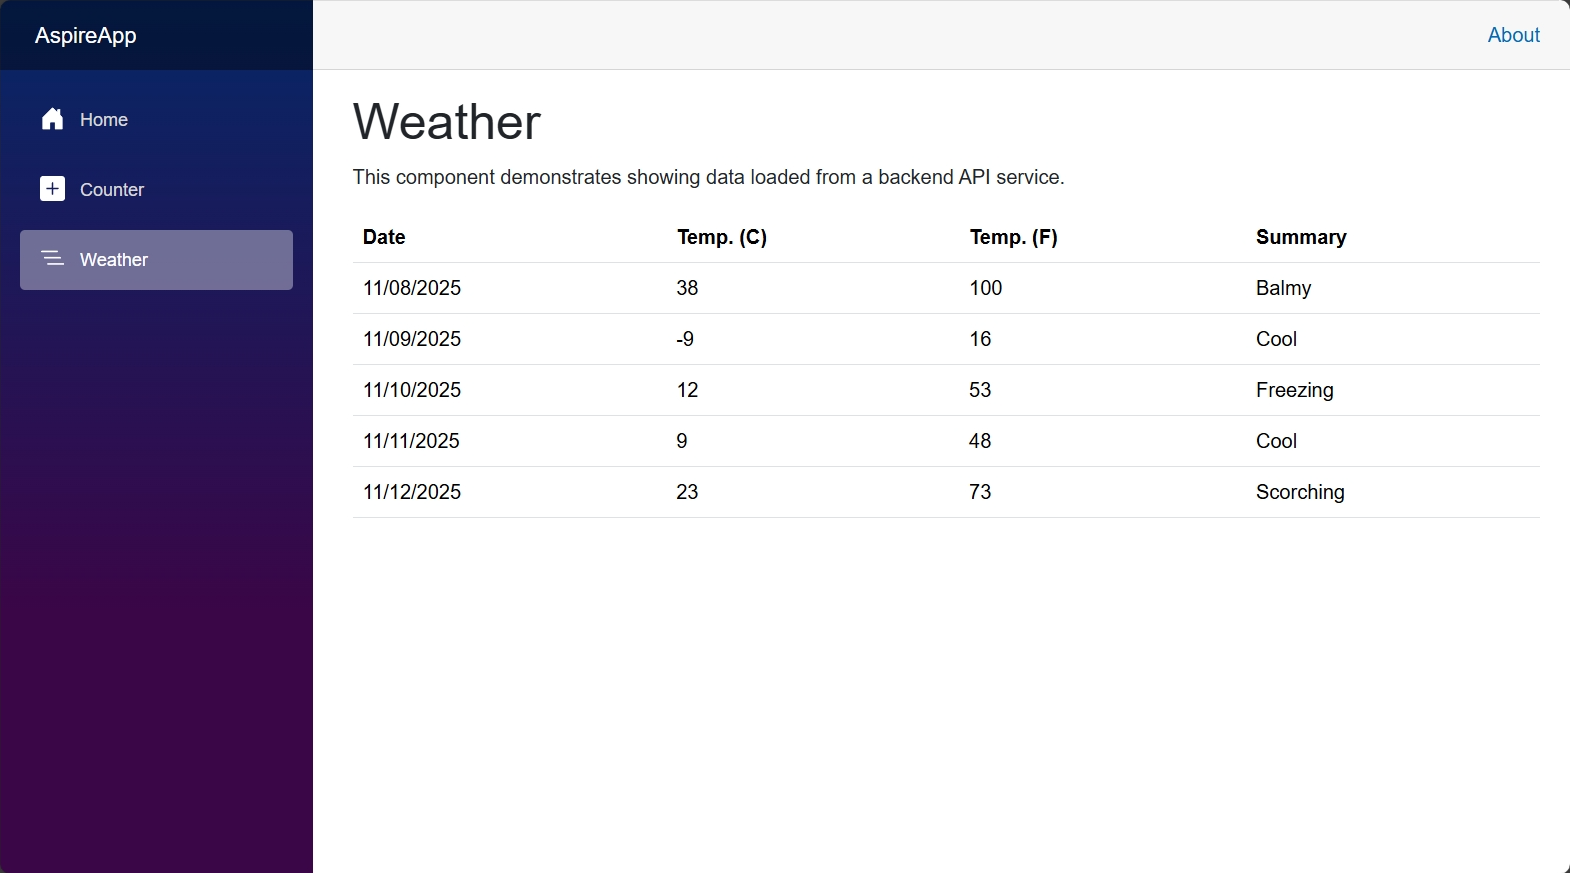
The front end displays the weather forecast data in the ASP.NET Core Blazor application.
In the deployment output, you’ll see lines similar to the following:
13:24:13 (print-env-dashboard-summary) i [INF] Successfully deployed env-dashboard to http://localhost:54633.13:24:13 (print-app-summary) i [INF] Successfully deployed app to http://localhost:54463.Open your web browser and navigate to the URL shown for your app (for example, http://localhost:54463) to see your deployed application.
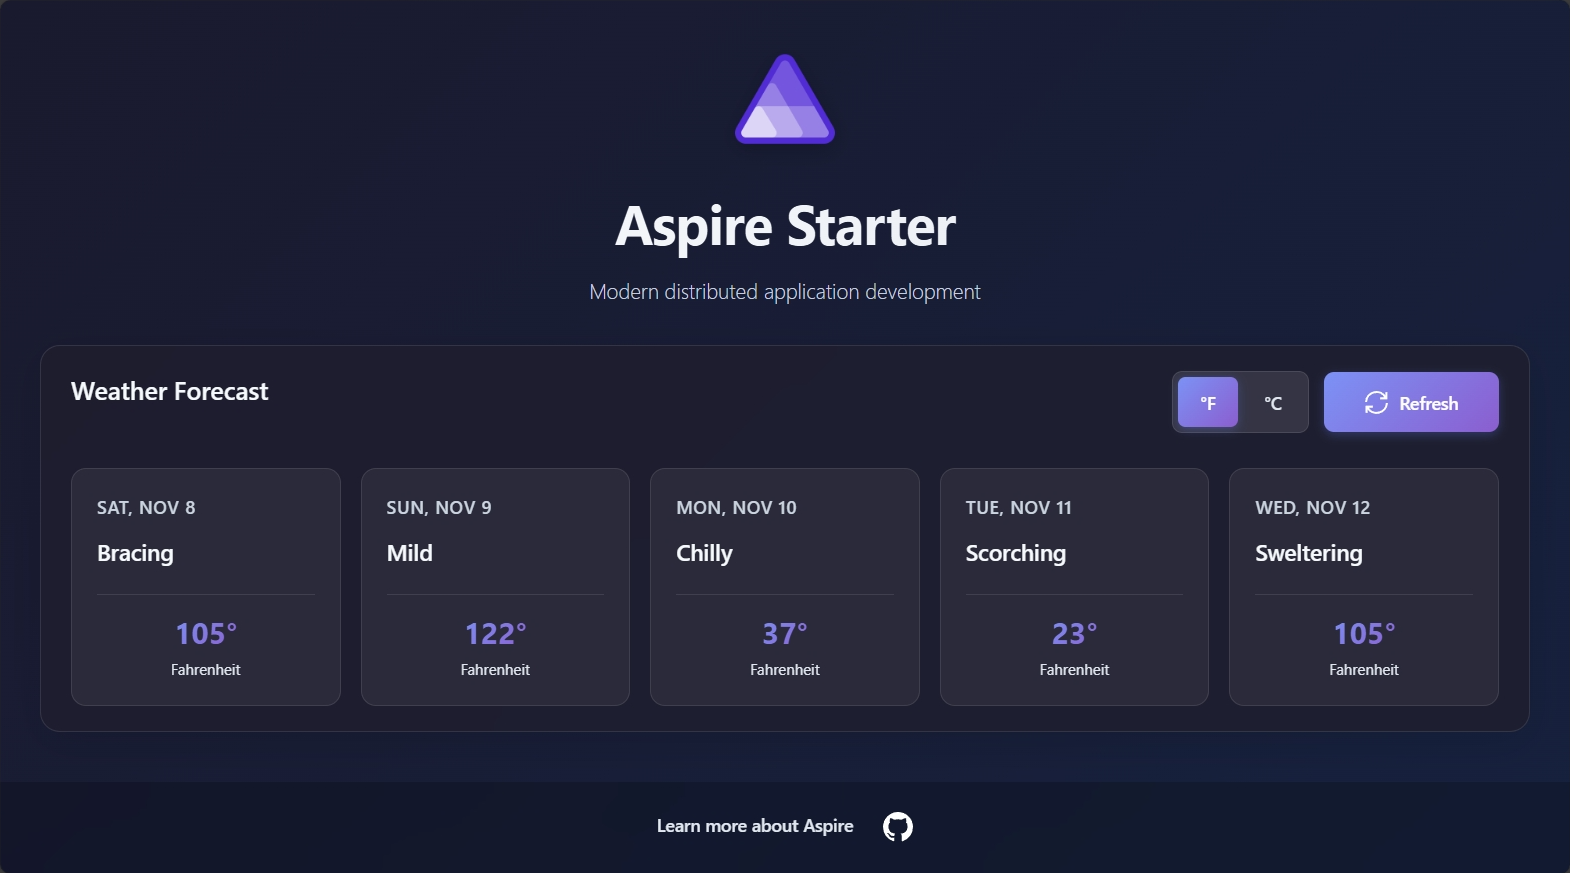
The front end displays the weather forecast data in a stunning React template. In this example, both the API service and the React front end are running within the same Docker container.
In the deployment output, you’ll see lines similar to the following:
13:24:13 (print-env-dashboard-summary) i [INF] Successfully deployed env-dashboard to http://localhost:54633.13:24:13 (print-app-summary) i [INF] Successfully deployed app to http://localhost:54463.Open your web browser and navigate to the URL shown for your app (for example, http://localhost:54463) to see your deployed application.
The front end displays the weather forecast data in a stunning React template. In this example, both the API service and the React front end are running within the same Docker container.
When deploying to Azure App Containers, you can verify that your ASP.NET Core/Blazor application is running by navigating to the URL provided in the deployment output. Look for a line similar to the following in the output:
09:21:44 (print-webfrontend-summary) i [INF] Successfully deployed webfrontend to https://{NAME}.{LOCATION}.azurecontainerapps.ioOpen your web browser and navigate to the provided URL to see your deployed application.
The front end displays the weather forecast data in the ASP.NET Core Blazor application.
when deploying to Azure App Containers, you can verify that your Python/React application is running by navigating to the URL provided in the deployment output. Look for a line similar to the following in the output:
09:25:29 (print-app-summary) i [INF] Successfully deployed app to https://{NAME}.{LOCATION}.azurecontainerapps.ioOpen your web browser and navigate to the provided URL to see your deployed application.
The front end displays the weather forecast data in a stunning React template. In this example, both the API service and the React front end are running within the same Docker container.
When deploying to Azure App Containers, you can verify that your Express/React application is running by navigating to the URL provided in the deployment output. Look for a line similar to the following in the output:
09:25:29 (print-app-summary) i [INF] Successfully deployed app to https://{NAME}.{LOCATION}.azurecontainerapps.ioOpen your web browser and navigate to the provided URL to see your deployed application.
The front end displays the weather forecast data in a stunning React template. In this example, both the API service and the React front end are running within the same Docker container.
Clean up resources
Section titled “Clean up resources”After deploying your application, it’s important to clean up resources to avoid incurring unnecessary costs or consuming local system resources.
To clean up resources after deploying with Docker Compose, you can stop and remove the running containers using the following command:
aspire do docker-compose-down-envTo clean up resources after deploying to Azure, you can use the Azure CLI to delete the resource group that contains your application. This will remove all resources within the resource group.
az group delete --name <RESOURCE_GROUP_NAME> --yes --no-waitFor a deep-dive into the related foundational concepts, see Pipelines and app topology.
You’ve just built your first Aspire app and deployed it to production—congratulations! 🎉 Now you might be wondering: “How do I make sure all these services actually work together correctly?” That’s where integration testing comes in. Aspire makes it easy to test your entire application stack, including service-to-service communication and resource dependencies. Ready to learn how? Write your first test