

Aspire Visual Studio Code extension
The official Aspire extension for Visual Studio Code turns VS Code into a first-class environment for building, debugging, and shipping polyglot Aspire apps.
Press
Install the extension
Section titled “Install the extension”- Open VS Code.
- Open the Extensions view (
Command + Shift + X CommandShiftX Control + Shift + X CtrlShiftX Control + Shift + X CtrlShiftX ). - Search for Aspire and install the extension published by Microsoft, or install it directly from the VS Code Marketplace.
Getting started
Section titled “Getting started”- Open an existing Aspire project in VS Code, or create one with Aspire: New Aspire project from the Command Palette (
Command + Shift + P CommandShiftP Control + Shift + P CtrlShiftP Control + Shift + P CtrlShiftP ). - Run Aspire: Configure launch.json file to set up the debug configuration.
- Press
F5 F5 F5 F5 F5 F5 to start debugging your Aspire app. The extension discovers the AppHost, starts the app, attaches supported debuggers, and opens the dashboard.
Open a repo, let the extension find the AppHost, press
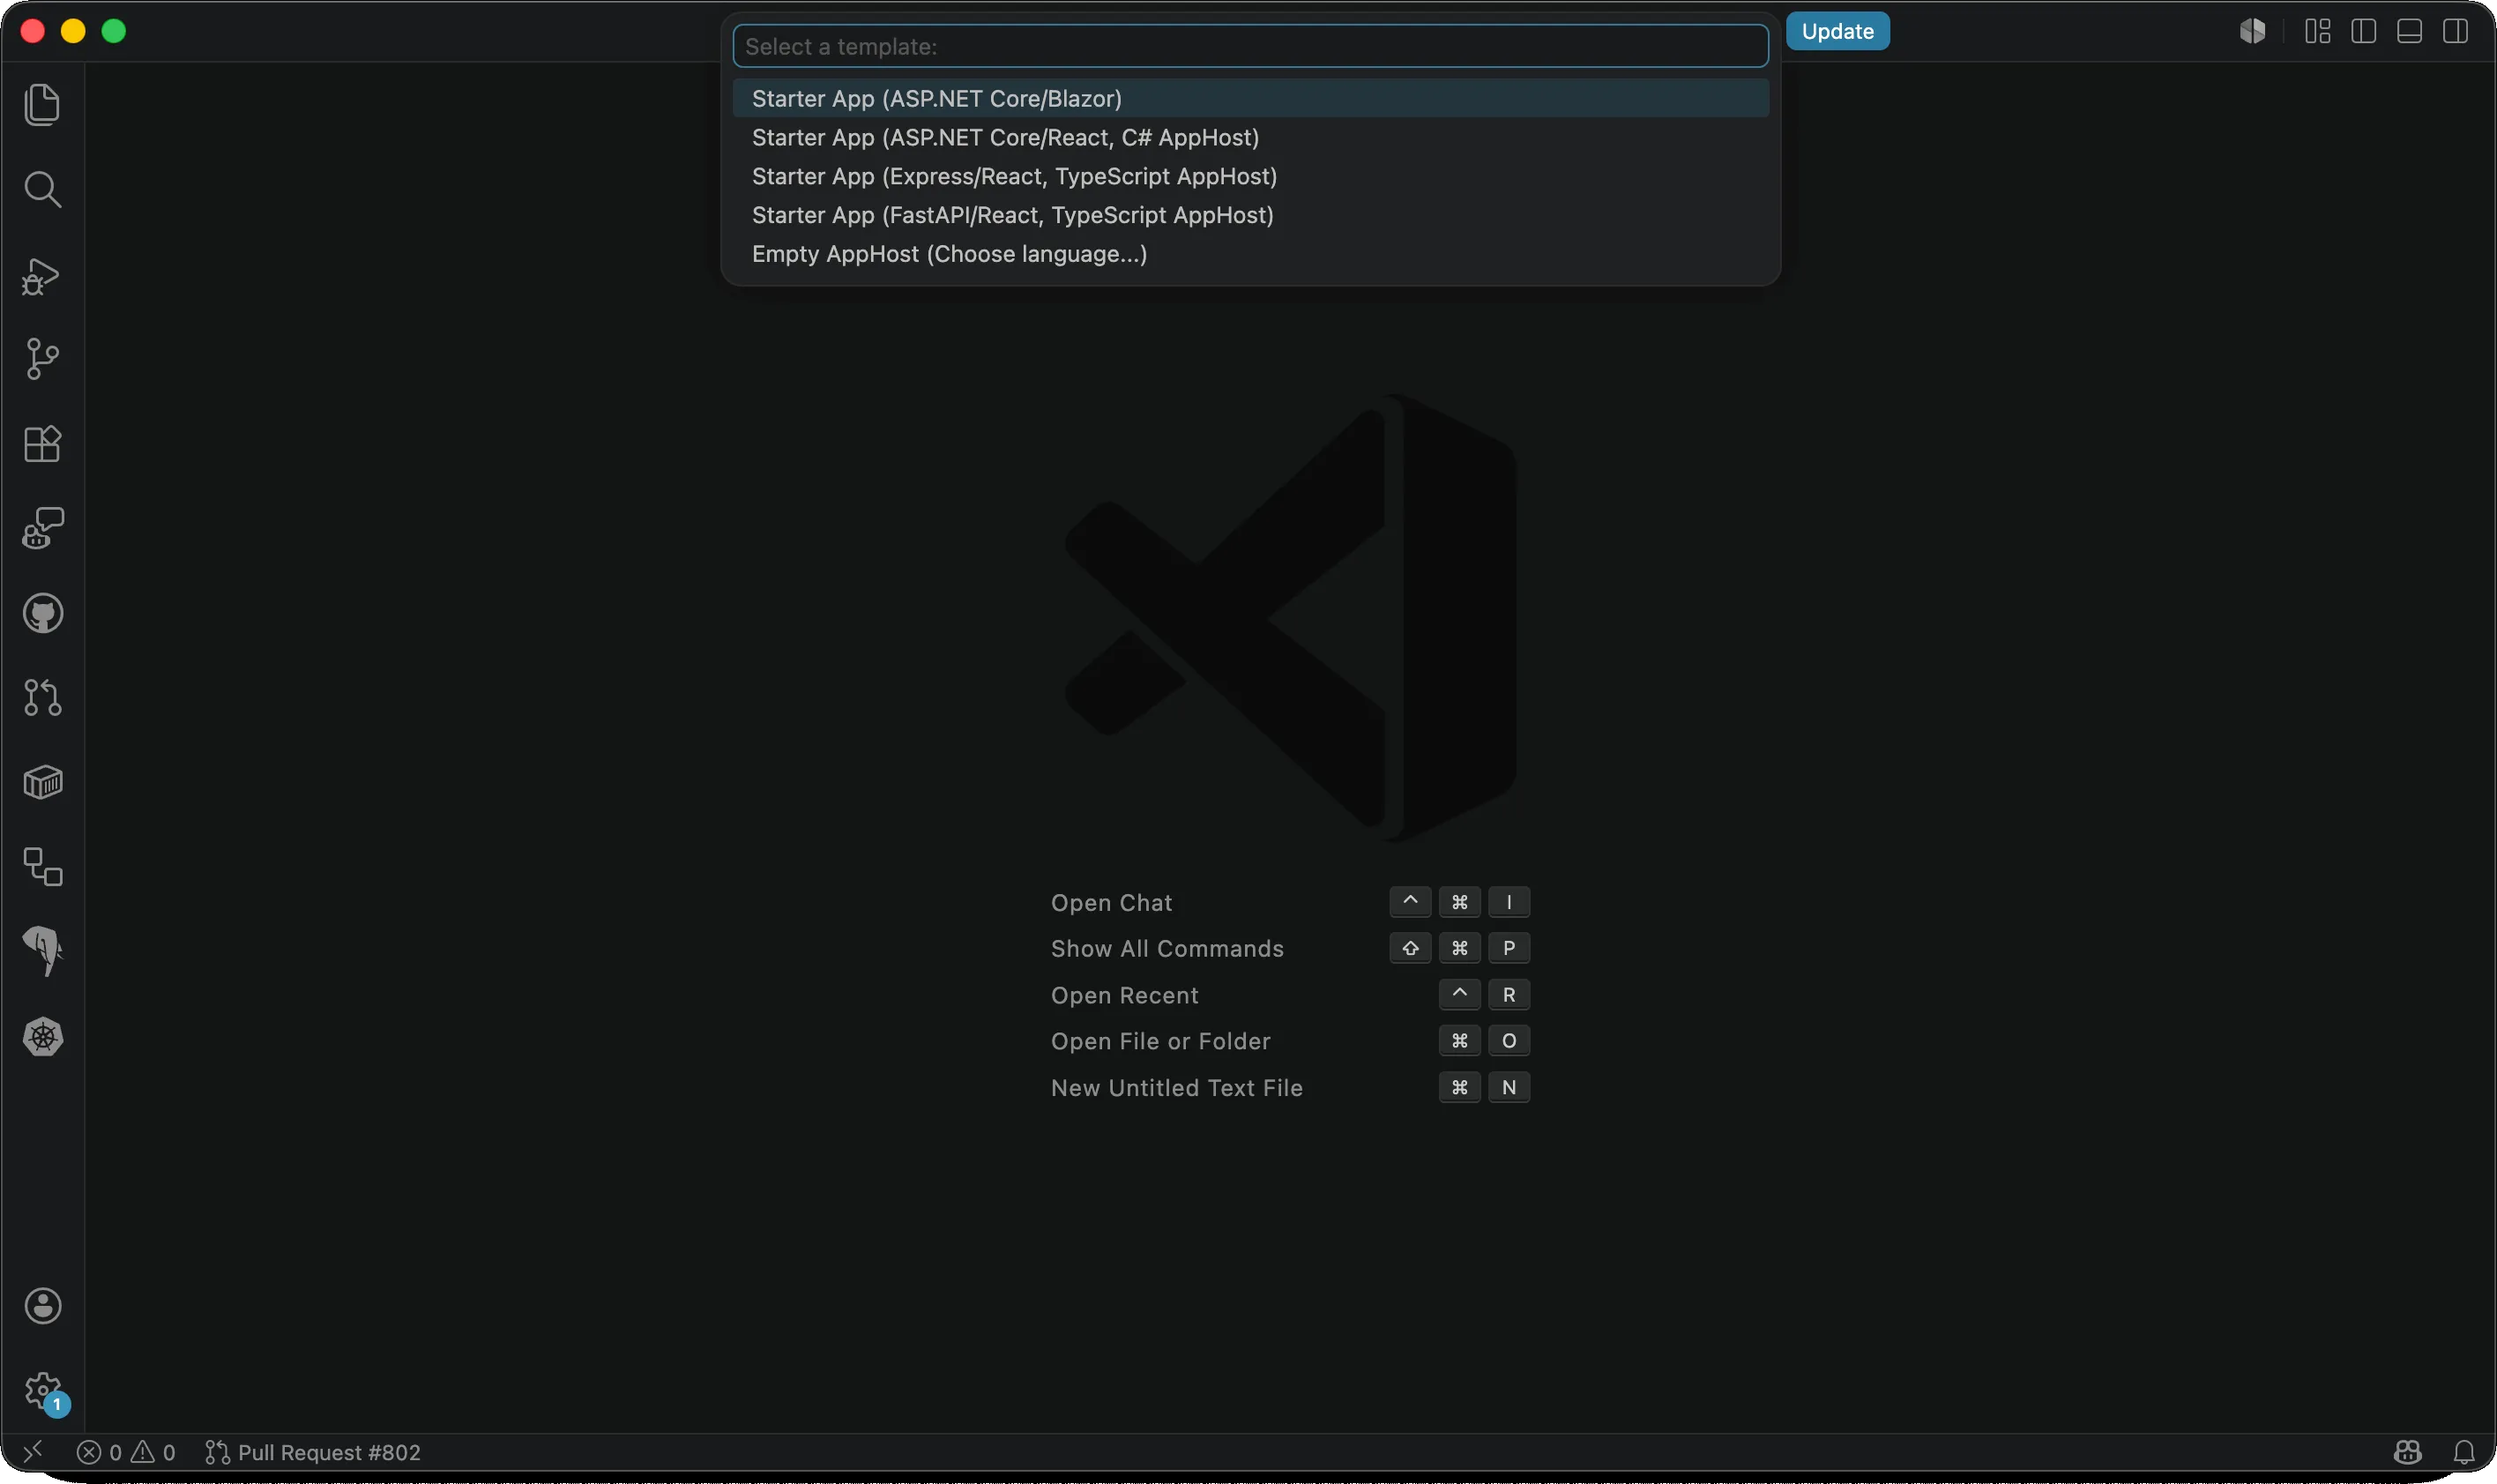
The Aspire: New Aspire project command, showing starter templates for Blazor, React + C#, Express + TypeScript, FastAPI + TypeScript, and an empty AppHost.
The extension discovers your AppHost from aspire.config.json, so both project-based C# AppHosts (*.csproj) and TypeScript AppHosts (apphost.mts) work without extra configuration.
Scaffold and add integrations
Section titled “Scaffold and add integrations”The Command Palette has commands for the most common tasks:
- Aspire: Add an integration offers a selection of hosting integrations (
Aspire.Hosting.*) to add to your AppHost. - Aspire: Initialize Aspire in an existing codebase wires Aspire into a repo that has not yet been Aspirified.
- Aspire: Update integrations updates hosting integrations and the Aspire SDK.
- Aspire: Open Aspire terminal drops you into a terminal with the Aspire CLI already on
PATHfor anything the UI doesn’t cover. - Aspire: Update Aspire CLI and Aspire: Install Aspire CLI let you manage CLI installation.
Live editor integration
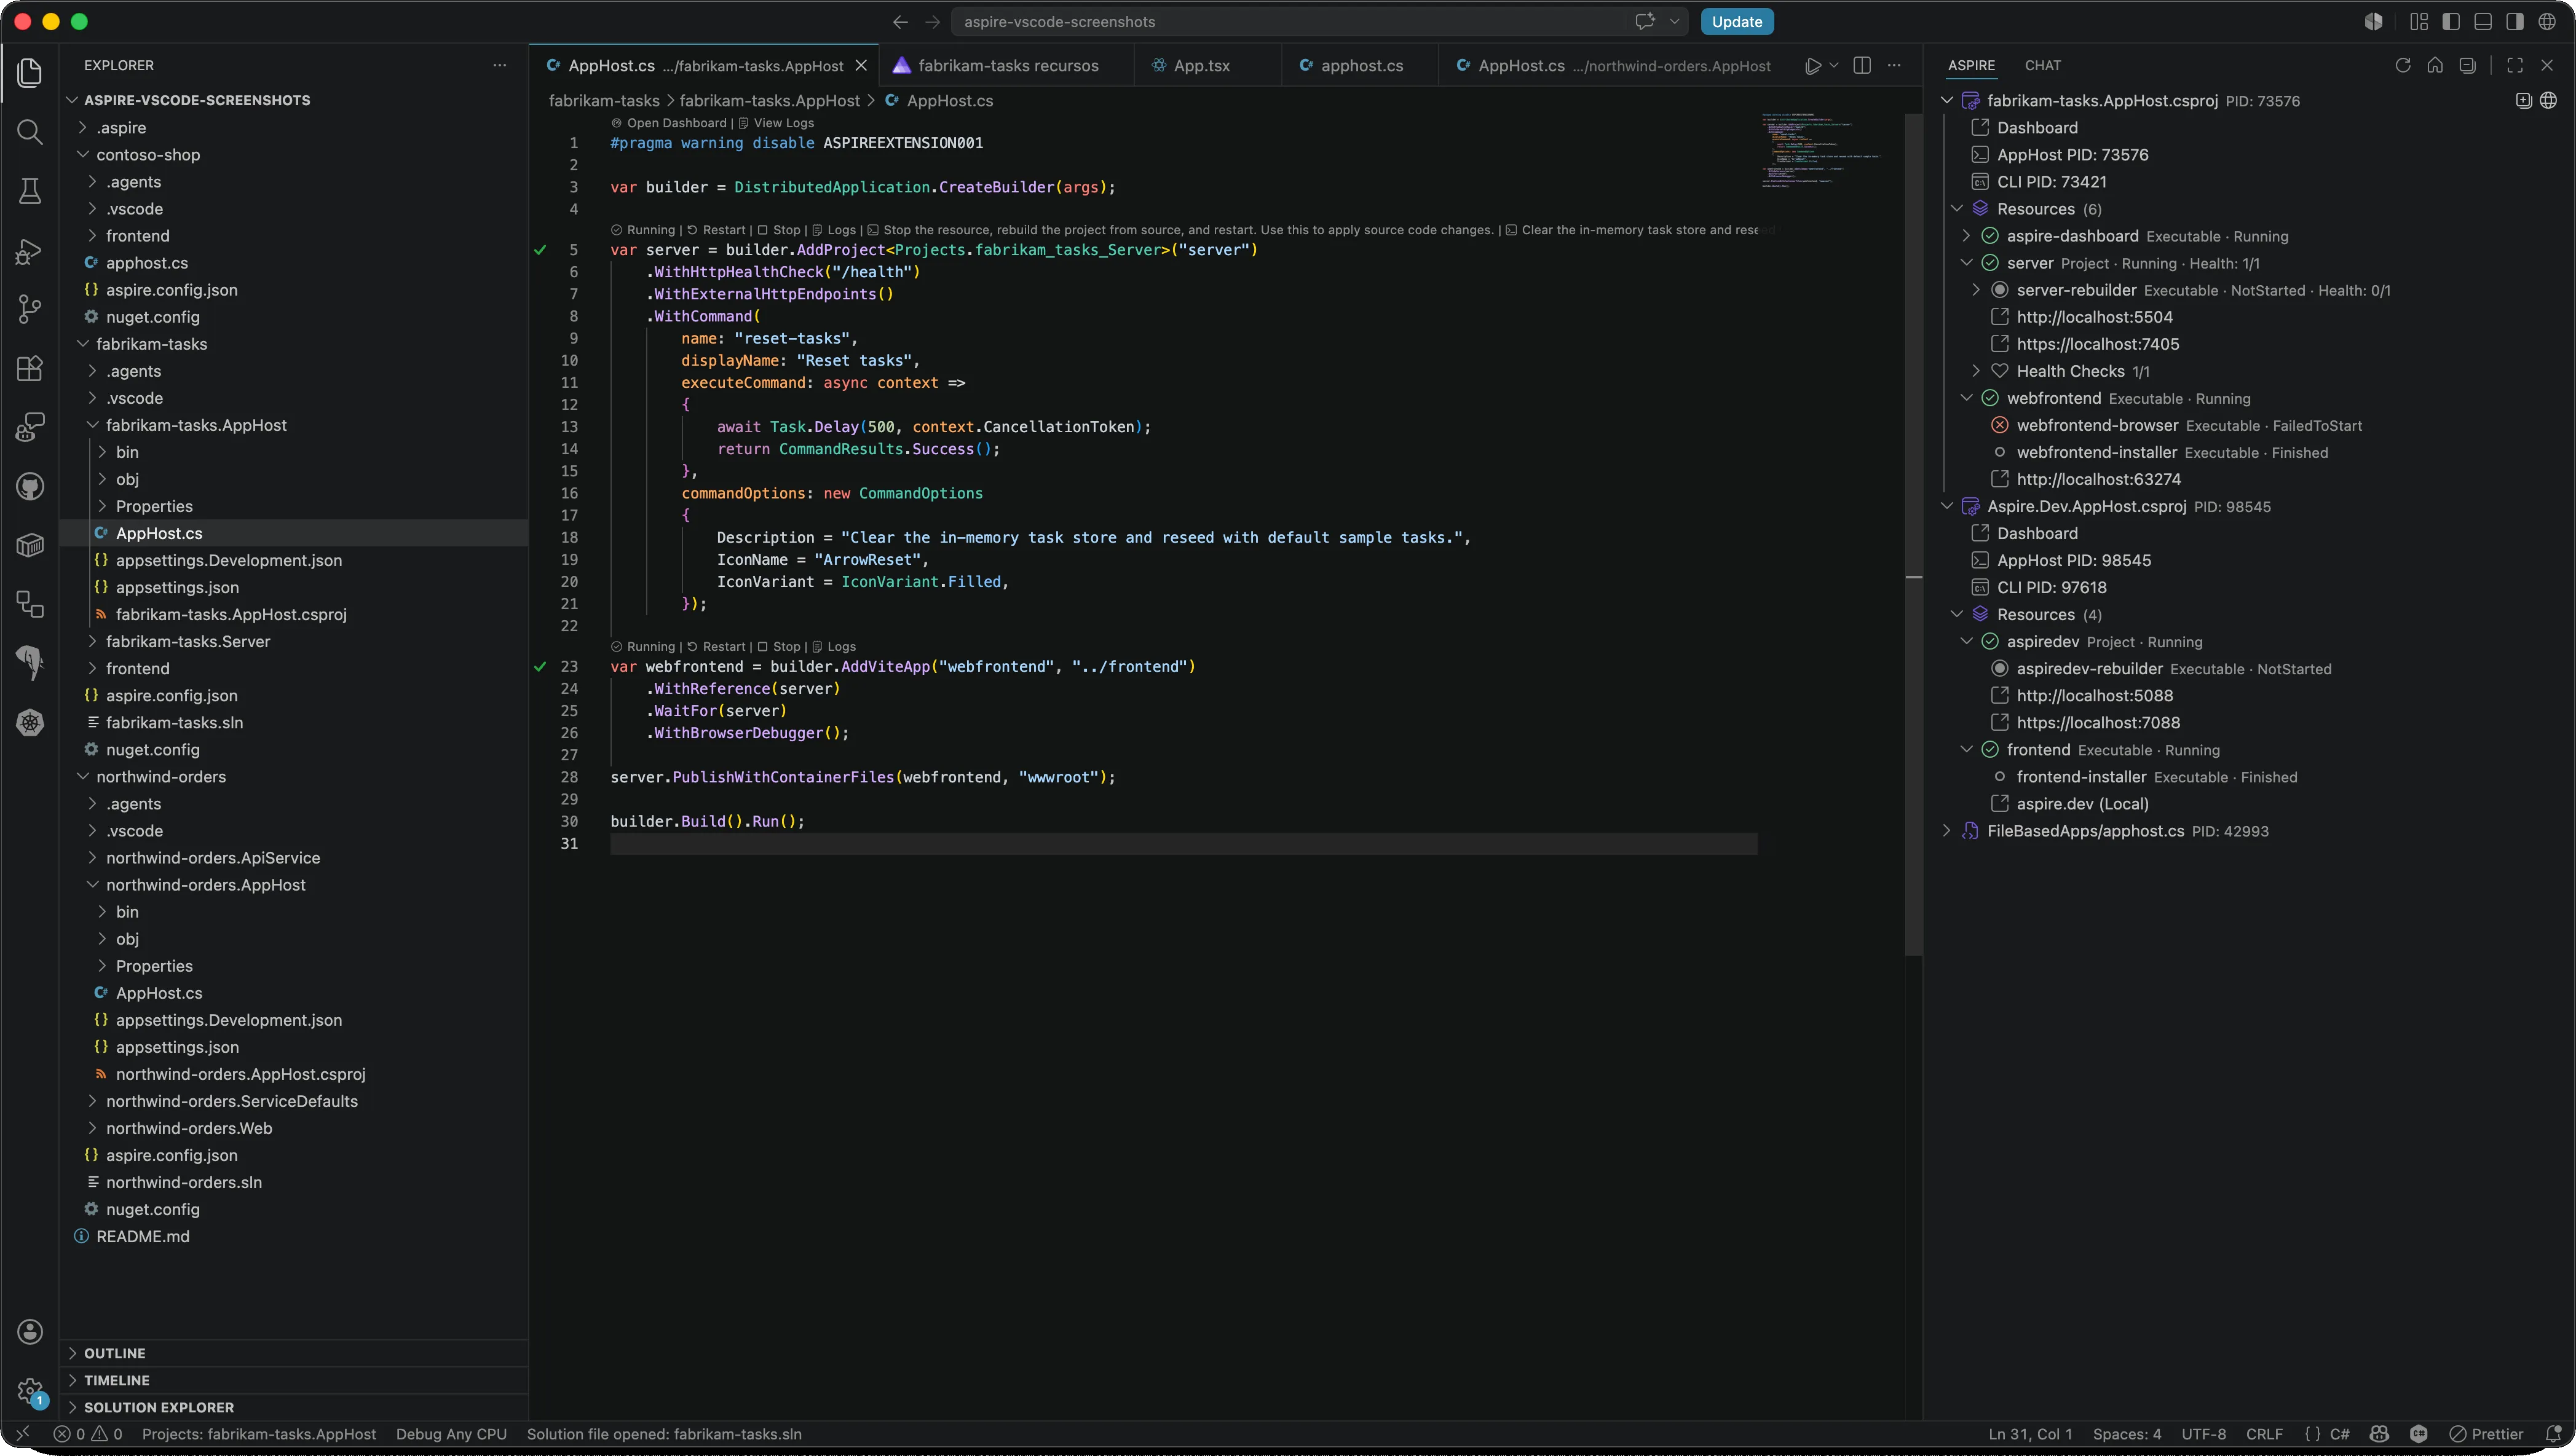
Section titled “Live editor integration”When an AppHost is running, the extension paints live state directly into your editor.
CodeLens appears above each resource definition in C# and TypeScript AppHosts. It shows the current state and health and exposes one-click Start, Stop, Restart, and View Logs actions in addition to any custom commands the resource publishes.
Editor title bar buttons add Run Aspire AppHost and Debug Aspire AppHost actions next to the standard Run/Debug buttons whenever you have an AppHost file open.
Health-aware gutter decorations provide an at-a-glance view of resource health and state without cluttering the editor with text using the following shapes and colors:
| Icon | Meaning |
|---|---|
| ✓ (green checkmark) | Running and healthy |
| ⊙ (grey circle with check) | Completed — exited cleanly (exit code 0) |
⚠ (yellow triangle with !) | Running but unhealthy (health checks failing) |
| ✕ (red X) | Failed to start, exited with a non-zero exit code, or runtime unhealthy |
| ⌛ (blue hourglass) | Starting, stopping, building, or waiting |
| ○ (grey hollow circle) | Not yet started |
The Aspire view
Section titled “The Aspire view”Aspire registers an AppHost view to VS Code. Workspace mode shows the AppHost in your current workspace; toggle to Global in the view header to manage every running AppHost on your machine.
Each resource shows its type, state, health summary, and exit code, plus a health-aware icon and a markdown tooltip listing endpoint URLs. Resources with health checks expose an expandable Health Checks group; use Expand all on the AppHost item to open everything at once. You can right-click a resource to start, stop, or restart it, view its logs, run resource-specific commands, or open the dashboard.
Run, debug, and deploy
Section titled “Run, debug, and deploy”Aspire: Configure launch.json file adds a minimal launch configuration .vscode/launch.json that supports AppHosts written in any language. AppHosts are discovered automatically in the workspace.
To launch a specific AppHost, configure an aspire.config.json with an appHost.path property.
{ "type": "aspire", "request": "launch", "name": "Aspire: Launch AppHost", "program": "${workspaceFolder}"}Four launch commands are supported:
runruns the AppHost (default if command is omitted).deploypushes to deployment targets defined in your AppHost.publishgenerates deployment artifacts like Kubernetes manifests or Bicep files without pushing to targets.doruns a specific pipeline step defined in your AppHost’s deployment pipeline — setstepto the name of the step you want to run.
All of these commands are debuggable; you can step into custom publishers and deployment steps just like application code.

The debuggers property forwards configuration to specific debuggers. Recognized keys are: apphost, project (C#/.NET), node, python, browser, and azure-functions.
Finally, you can specify env and args to set environment variables and command-line arguments for the AppHost process.
{ "type": "aspire", "request": "launch", "name": "Aspire: Deploy AppHost", "program": "${workspaceFolder}", "command": "deploy", "env": { "MY_ENV_VAR": "value" }, "args": [ "--hello", "world" ], "debuggers": { "apphost": { "stopAtEntry": true }, "project": { "console": "integratedTerminal" }, "node": { "skipFiles": ["<node_internals>/**"] }, "python": { "justMyCode": false } }}For more information, see Aspire publishing and deployment overview.
Dashboard from VS Code
Section titled “Dashboard from VS Code”By default, the dashboard opens automatically when the AppHost starts. You can also open it from the Aspire view if you closed the browser tab and want it back.
Language coverage
Section titled “Language coverage”The extension detects each resource’s language and attaches the right debugger:
| Language | Debugger | Required VS Code extension |
|---|---|---|
| Node.js / Browser apps | js-debug | None (built into VS Code) |
| Python | debugpy | Python |
| C# / .NET | coreclr | C# Dev Kit (recommended) or C# |
| Azure Functions | Per language | Azure Functions plus the language extension for your function app (C#, JavaScript/TypeScript, or Python) |
Feedback and issues
Section titled “Feedback and issues”Found a bug or have an idea? File it on the microsoft/aspire repo: