Este conteúdo não está disponível em sua língua ainda.
The Aspire dashboard can display interactive terminal applications as well as logs. A terminal lets you type into a running process, respond to its prompts, and use a terminal user interface (TUI) without leaving the dashboard.
Aspire has two kinds of terminals: those attached to resources in your app model, and ephemeral terminals created for a specific task.
Kind
Purpose
Where it appears
Resource terminal
Interact with a resource’s own process, such as a TUI or shell, configured with WithTerminal().
The resource’s Terminal view on the Console logs page.
Ephemeral terminal
Run a purpose-specific tool, such as a database REPL opened with WithRepl(). The AppHost owns this separate process.
The terminal dock.
Ephemeral terminals aren’t resources in the app model. They can remain available for a task or session; their lifetime is controlled by the AppHost code that creates them or by closing their dock tab. Opening a resource or dock terminal in a separate window changes only its presentation, not its kind or process.
The terminal samples demonstrate both kinds in a complete application: a REST client runs as an interactive resource, while a Redis command opens a separate client in the dock. The samples also cover custom dock commands and programmatic terminal automation.
Add an interactive process to your app model with WithTerminal(). This example runs Python’s interactive prompt. Install Python on the AppHost machine and ensure python3 is on PATH; use python instead if that’s your installation’s command.
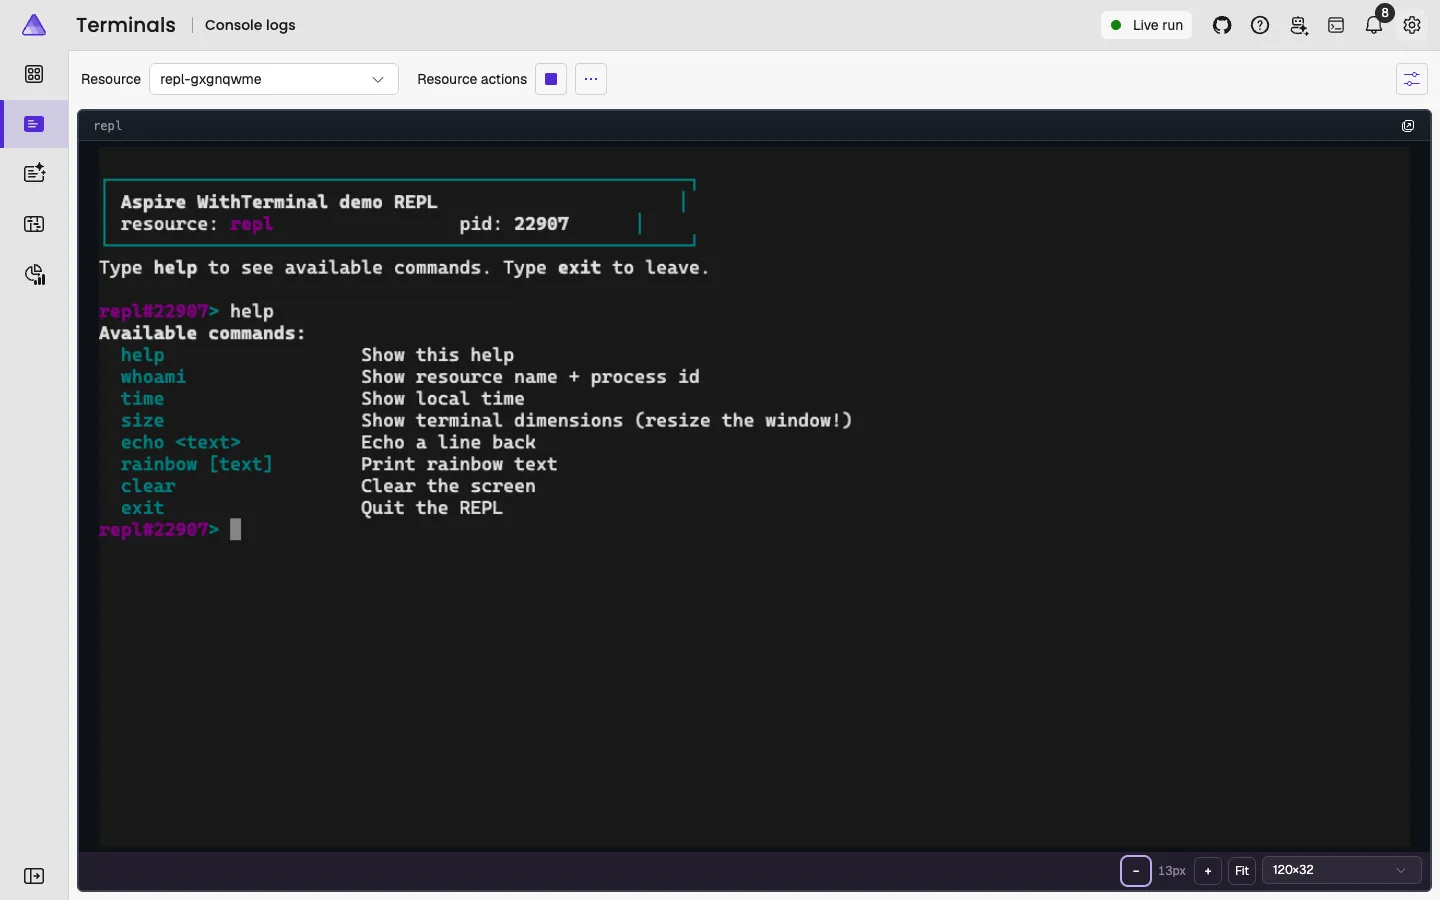
Open Console logs in the dashboard and select repl.
If the log view is displayed, select Settings in the page toolbar, then select Terminal.
At the Python prompt, enter print("Hello from Aspire") to see the response.
Selecting a running terminal-enabled resource initially shows Terminal. A resource that is waiting, starting, or has exited initially shows Console logs, so startup and exit messages are available. After that initial selection, state changes don’t switch the view for you.
Use that toolbar menu to switch between Terminal and Console logs. Switching views doesn’t stop the resource or its console-log capture.
For a complete application example, try the TypeScript or C# terminal basics sample. It uses WithTerminal() to run Slumber, a REST client, as a container resource. Select a saved request and press Enter to call the sample’s notes API; Aspire supplies the API endpoint to the client.
Dashboard commands can open ephemeral terminals in the terminal dock for specific tasks. For example, adding WithRepl() to a Redis resource adds a REPL command to the dashboard. Selecting that command launches redis-cli inside the Redis container and displays its interactive session in the dock, with connection details and credentials already configured.
var builder =DistributedApplication.CreateBuilder(args);
builder.AddRedis("cache").WithRepl();
builder.Build().Run();
With a supported container runtime running:
Start your AppHost with aspire run and wait for cache to be running.
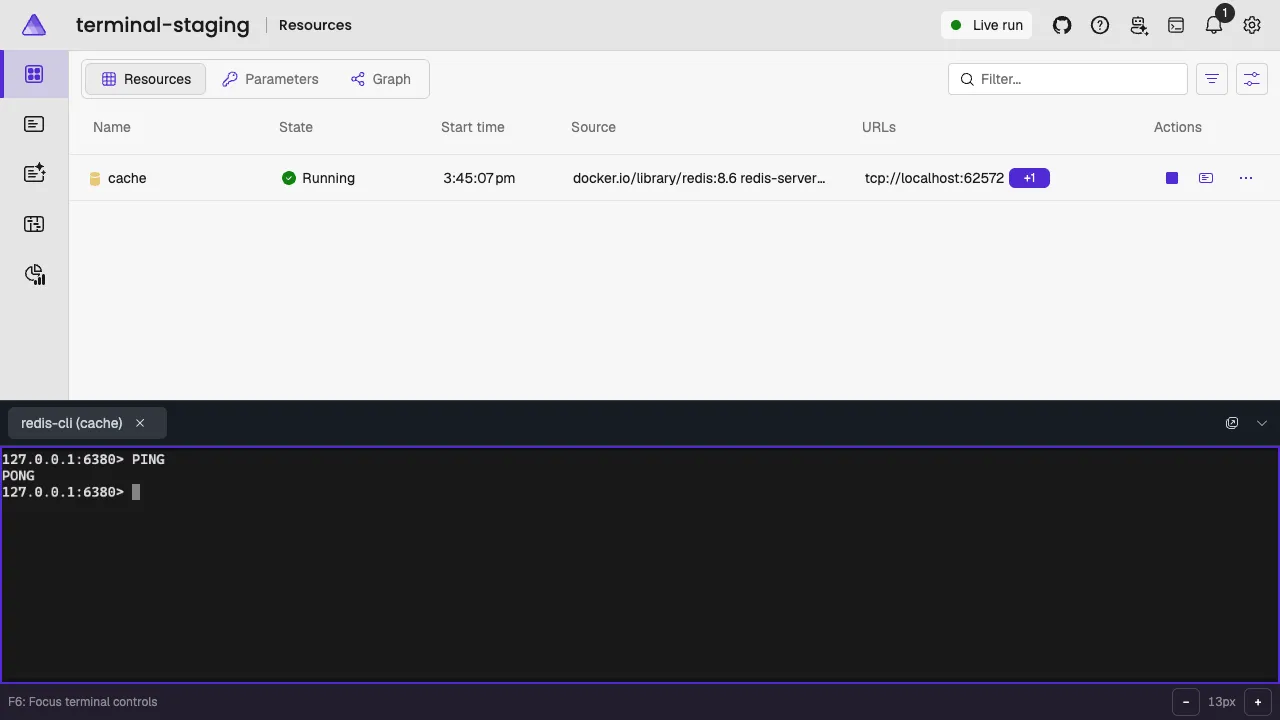
On the dashboard’s Resources page, open the Actions menu for cache and select REPL. The dock opens with a redis-cli tab.
Type PING and press Enter. Redis responds with PONG.
When you’re finished, type quit and press Enter, then close the tab.
The client runs inside the Redis container, so you don’t need to install redis-cli locally. The integration guides show how to enable a REPL for Redis, PostgreSQL, Valkey, MongoDB, MySQL, and SQL Server.
The terminal basics samples connect these two experiences: create a note through the REST client’s resource terminal, edit its stored value through Redis’s docked REPL, then send another API request to read the changed value. The terminal APIs aren’t specific to either client.
Keep the REPL open while you browse logs, traces, or other dashboard pages. You can open multiple sessions and switch between their tabs. To show or hide the dock, press the backtick key (Backtick`Backtick`Backtick`) when you’re not typing in a terminal or text field. Drag the dock’s top edge to resize it.
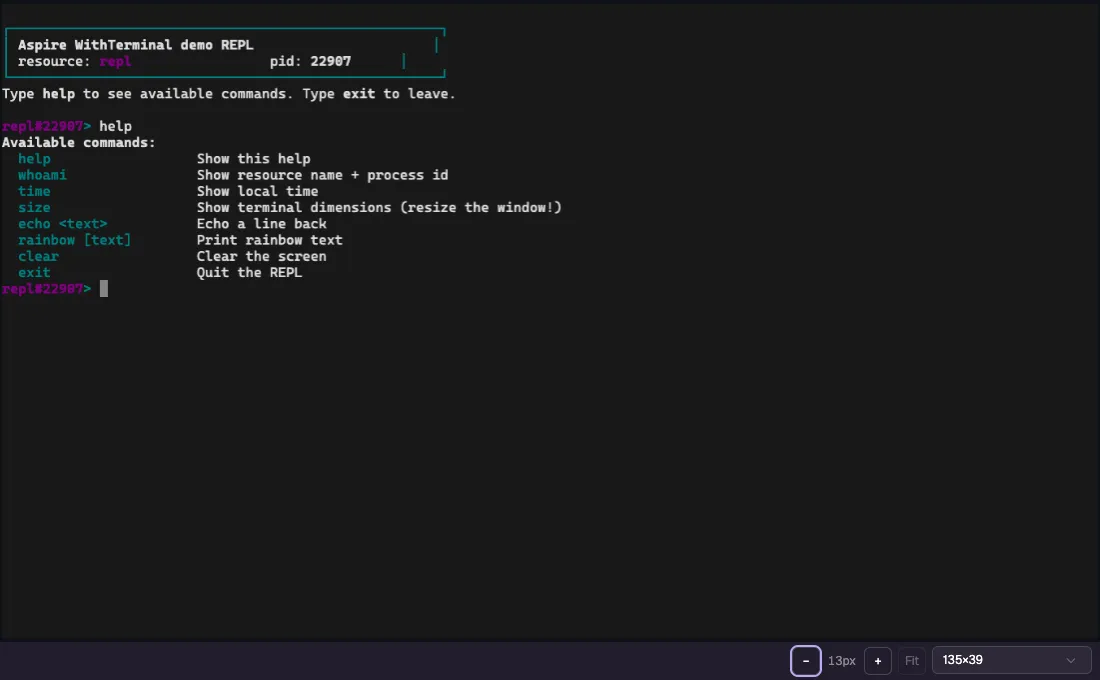
For a resource terminal, use Open in new window in the terminal title bar, not the page toolbar’s Settings menu. For a dock terminal, select its tab and use Open terminal in a new window in the dock’s tab strip.
The dashboard opens or reuses a window for that terminal instead of starting another process:
A resource terminal keeps its inline viewer available while the separate window is open.
A dock terminal shows a placeholder in the dock while detached. Select Focus window to reach the existing window, or Return to panel to bring its viewer back into the dock.
Closing the detached browser window releases that viewer; it doesn’t stop the terminal process. If its originating dock is still open, the terminal returns there. Closing the originating dashboard browser tab also doesn’t stop an AppHost-owned process or its independent window.
If the browser blocks the new window, the dashboard displays feedback. Allow pop-ups for your trusted dashboard origin and retry the terminal’s launch button.
Use the minus and plus buttons in a terminal’s footer to adjust its font size. The resource Terminal view and detached windows also provide a dimensions selector and a fit-to-container control. Dock panes fit their available space rather than offering fixed-dimension presets.
A detached window starts with the originating viewer’s selected font size, then manages its font preference independently. Resizing the dock or window changes the terminal’s rows and columns without changing the selected font size.
Multiple viewers can share a terminal, but only one is the primary viewer that controls the process’s grid dimensions. Opening a detached window requests that role. Revealing or returning to an active dock pane also requests sizing control. Explicit sizing actions can request control; ordinary typing and pasting don’t. A viewer that loses control doesn’t continuously reclaim it from another viewer.
Use the CLI attachment experience if you prefer to interact through your own terminal. The browser terminal’s graphical rendering isn’t a guarantee that every TUI is accessible to every assistive technology; console logs remain a separate text view.
A viewer is a browser view or CLI connection. The producer is the process running the terminal application. Disconnecting a viewer is different from stopping the producer.
Action
Effect on the process
Hide the dock, switch tabs, switch to Console logs, or close a detached window
The process keeps running.
Close an AppHost-owned dock terminal tab
Disposes the terminal and stops its local AppHost-owned workload.
Dispose an AppHost-owned terminal in code
Stops its local AppHost-owned workload and removes the terminal.
Release a handle to a resource terminal
Leaves the resource workload running. Use resource lifecycle controls to stop the resource.
Shut down the AppHost
Cleans up its AppHost-owned terminals. Resource shutdown follows the app’s resource lifecycle.
Stopping a local docker exec subprocess doesn’t guarantee that the program it launched inside the container stops. Exit the shell or client normally before closing its tab; see Docker exec process cleanup.
AppHost connection: These experiences need a live, writable AppHost resource-service connection. An OTEL-only standalone dashboard has telemetry, not terminal producers; it doesn’t show the dock. Historical read-only runs don’t provide live resource terminals or a terminal dock.
Installed tools: A terminal doesn’t install its executable. Host shells and tools must exist on the AppHost machine; a container exec command also needs a running container and an appropriate container CLI.
Browser support: Terminal rendering needs a browser with module workers and OffscreenCanvas. The renderer prefers WebGPU and can fall back to WebGL2. WebGPU requires HTTPS or localhost; clipboard access remains subject to browser permissions and secure-context rules.
Shared input: Browser viewers, CLI attachments, and automation share the same process. Coordinate their input; a terminal isn’t an isolated session for each viewer.
Sensitive operations: Commands run with the host or container process’s permissions. Output, copied text, and recordings can contain secrets. Only share access with trusted users.



 Aspire