

最初のアプリをデプロイする
このチュートリアルでは、 最初のアプリを作成する のクイックスタートで作成したアプリをデプロイします。この作業は、いくつかの重要なステップに分けて進めることができます。:
- デプロイパッケージを追加する — 対象環境向けのホスティングパッケージを追加します。
- AppHost を更新する — 環境 API を構成します。
- アプリをデプロイする — Aspire CLI を使ってアプリをデプロイします。
- デプロイを検証する — アプリが期待どおりに動作していることを確認します。
- リソースをクリーンアップする — コストが発生しないよう、デプロイ済みリソースを削除します。
次の図は、これからデプロイするサンプルアプリのアーキテクチャを示しています:
architecture-beta
    group api-docker(logos:docker-icon)[API container]
    group f-docker(logos:docker-icon)[Front end container]

    service api(logos:dotnet)[API service] in api-docker
    service http(iconoir:server-connection)[https]
    service frontend(aspire:blazor)[Blazor front end] in f-docker

    frontend:L --> R:http
    http:L --> R:api
ASP.NET Core Blazor & Minimal API のスターターテンプレートは、2 つのリソースで構成されており、それぞれが個別のコンテナーとしてデプロイされます。
architecture-beta
  group docker(logos:docker-icon)[Python and static site server container]

  service api(logos:fastapi)[API service] in docker
  service http(iconoir:server-connection)[https] in docker
  service frontend(logos:react)[React front end] in docker

  frontend:L --> R:http
  http:L --> R:api
React(Vite)と FastAPI のスターターテンプレートは、2 つのリソースで構成されていますが、1 つのコンテナーとしてデプロイされます。FastAPI サーバーが、API と React によって生成された静的フロントエンドファイルの双方をホストします。
Aspire アプリをデプロイする場所に応じて、次の前提条件がインストールされ、設定されていることを確認してください:

- Docker Desktop がインストールされ、起動していること。
- Podman (alternative to Docker) がインストールされ、起動していること。詳細については、OCI 準拠のコンテナーランタイムをインストールをご覧ください。
- 有効なサブスクリプションを持つ Azure アカウント。
- Azure CLI がインストールされ、設定されていること。
az loginを使用してログインしている必要があります。
デプロイ パッケージを追加する
Section titled “デプロイ パッケージを追加する”前のクイックスタートで作成した Aspire ソリューションの ルートディレクトリ で、次のコマンドをターミナルで実行し、対象環境に応じたホスティング用デプロイパッケージを追加してください:
Docker Compose は、複数のコンテナーで構成される Docker アプリケーションを定義し、実行するためのツールです。YAML ファイルを使用して、アプリケーションの サービス、ネットワーク、ボリューム を構成できるため、複雑なアプリケーションをローカルやさまざまな環境で管理・デプロイしやすくなります。
aspire add dockerAspire CLI は対話形式のため、 📦 Aspire.Hosting.Docker の追加したいバージョンに対応する検索結果を正しく選択してください。
aspire add azure-appcontainersAspire CLI は対話形式のため、 📦 Aspire.Hosting.Azure.AppContainers の追加したいバージョンに対応する検索結果を正しく選択してください。
追加の選択肢が表示された場合は、
aspire add コマンドの詳細については、 リファレンス ドキュメントをご覧ください。
AppHost を更新する
Section titled “AppHost を更新する”AppHost では、ターゲットに合わせてデプロイ環境を構成するために、適切な環境 API メソッド呼び出しをチェーンしてください。
var builder = DistributedApplication.CreateBuilder(args);
// Add the following line to configure the Docker Compose environmentbuilder.AddDockerComposeEnvironment("env");
var apiService = builder.AddProject<Projects.AspireApp_ApiService>("apiservice")    .WithHttpHealthCheck("/health");
builder.AddProject<Projects.AspireApp_Web>("webfrontend")    .WithExternalHttpEndpoints()    .WithHttpHealthCheck("/health")    .WithReference(apiService)    .WaitFor(apiService);
builder.Build().Run();#:sdk Aspire.AppHost.Sdk@13.0.0#:package Aspire.Hosting.JavaScript@13.0.0#:package Aspire.Hosting.Python@13.0.0#:package Aspire.Hosting.Docker@13.0.0
var builder = DistributedApplication.CreateBuilder(args);
// Add the following line to configure the Docker Compose environmentbuilder.AddDockerComposeEnvironment("env");
var app = builder.AddUvicornApp("app", "./app", "main:app") .WithUv() .WithExternalHttpEndpoints() .WithHttpHealthCheck("/health");
var frontend = builder.AddViteApp("frontend", "./frontend") .WithReference(app) .WaitFor(app);
app.PublishWithContainerFiles(frontend, "./static");
builder.Build().Run();AddDockerComposeEnvironment— デプロイ用の Docker Compose 環境を構成します。この呼び出しにより、AppHost 内のリソースをデプロイ時にコンテナ化するためのサポートが暗黙的に追加されます。WithExternalHttpEndpoints— デプロイ時に、リソースの HTTP エンドポイントを外部へ公開します。
var builder = DistributedApplication.CreateBuilder(args);
// Add the following line to configure the Azure App Container environmentbuilder.AddAzureContainerAppEnvironment("env");
var apiService = builder.AddProject<Projects.AspireApp_ApiService>("apiservice")    .WithHttpHealthCheck("/health");
builder.AddProject<Projects.AspireApp_Web>("webfrontend")    .WithExternalHttpEndpoints()    .WithHttpHealthCheck("/health")    .WithReference(apiService)    .WaitFor(apiService);
builder.Build().Run();#:sdk Aspire.AppHost.Sdk@13.0.0#:package Aspire.Hosting.JavaScript@13.0.0#:package Aspire.Hosting.Python@13.0.0#:package Aspire.Hosting.Azure.AppContainers@13.0.0
var builder = DistributedApplication.CreateBuilder(args);
// Add the following line to configure the Azure App Container environmentbuilder.AddAzureContainerAppEnvironment("env");
var app = builder.AddUvicornApp("app", "./app", "main:app") .WithUv() .WithExternalHttpEndpoints() .WithHttpHealthCheck("/health");
var frontend = builder.AddViteApp("frontend", "./frontend") .WithReference(app) .WaitFor(app);
app.PublishWithContainerFiles(frontend, "./static");
builder.Build().Run();AddAzureContainerAppEnvironment— デプロイ用の Azure Container Apps 環境を構成します。この呼び出しにより、AppHost 内のリソースをデプロイ時にコンテナ化するためのサポートが暗黙的に追加されます。WithExternalHttpEndpoints— デプロイ時に、リソースの HTTP エンドポイントを外部に公開します。
アプリをデプロイする
Section titled “アプリをデプロイする”デプロイ パッケージを追加し、AppHost の更新も完了したら、いよいよ Aspire アプリをデプロイできます。
Docker Compose へのデプロイでは、コンテナー イメージをビルドし、Docker Compose を使用してローカルでサービスを起動します。
aspire deploy次の出力例を確認してください:
Azure へのデプロイ時、 aspire deploy コマンドは対話形式で実行されます。プロンプトを回避したい場合(例:CI/CD で実行する場合)は、次の環境変数を設定してください:
Azure__SubscriptionId: ターゲットの Azure サブスクリプション ID。Azure__Location: Azure リージョン(例:eastus)。Azure__ResourceGroup: 作成または再利用するリソースグループ名。
Azure Container Apps へのデプロイでは、コンテナーイメージがビルドされ、サービスが Azure Container Apps にデプロイされます。
aspire deploy次の出力例をご覧ください:
aspire deploy を呼び出すと、Aspire CLI は各リソースのコンテナー イメージをビルドし(必要に応じて)ターゲット環境へプッシュしたうえで、AppHost に定義された構成に従ってリソースをデプロイします。
このコマンドに関する追加情報は、 aspire deploy のリファレンスドキュメントで確認できます。
デプロイ後の出力
Section titled “デプロイ後の出力”デプロイ後、Aspire CLI は指定された出力パス(指定がない場合は既定の出力パス)に、デプロイ対象に応じた一連のファイルを書き出します。これには、Docker Compose ファイル、Kubernetes マニフェスト、クラウドプロバイダー固有の構成ファイルなどが含まれる場合があります。
ディレクトリaspire-output
- .env
- .env.Production
- docker-compose.yaml
aspire-output ディレクトリには、生成された環境変数と Docker Compose の構成が含まれています。いちばん良い点は、開発者であるあなたがこれらのファイルを書いたり理解したりする必要がないことです!
.env.Production ファイルには、アプリのイメージ名が記載されています:
# Container image name for apiserviceAPISERVICE_IMAGE=apiservice:latest
# Default container port for apiserviceAPISERVICE_PORT=8080
# Container image name for webfrontendWEBFRONTEND_IMAGE=webfrontend:latest
# Default container port for webfrontendWEBFRONTEND_PORT=8080最後に、docker-compose.yaml ファイルには、API とフロントエンドの両方のサービスが定義されています:
services: env-dashboard: image: "mcr.microsoft.com/dotnet/nightly/aspire-dashboard:latest" expose: - "18888" - "18889" networks: - "aspire" restart: "always" apiservice: image: "${APISERVICE_IMAGE}" environment: OTEL_DOTNET_EXPERIMENTAL_OTLP_EMIT_EXCEPTION_LOG_ATTRIBUTES: "true" OTEL_DOTNET_EXPERIMENTAL_OTLP_EMIT_EVENT_LOG_ATTRIBUTES: "true" OTEL_DOTNET_EXPERIMENTAL_OTLP_RETRY: "in_memory" ASPNETCORE_FORWARDEDHEADERS_ENABLED: "true" HTTP_PORTS: "${APISERVICE_PORT}" OTEL_EXPORTER_OTLP_ENDPOINT: "http://env-dashboard:18889" OTEL_EXPORTER_OTLP_PROTOCOL: "grpc" OTEL_SERVICE_NAME: "apiservice" expose: - "${APISERVICE_PORT}" networks: - "aspire" webfrontend: image: "${WEBFRONTEND_IMAGE}" environment: OTEL_DOTNET_EXPERIMENTAL_OTLP_EMIT_EXCEPTION_LOG_ATTRIBUTES: "true" OTEL_DOTNET_EXPERIMENTAL_OTLP_EMIT_EVENT_LOG_ATTRIBUTES: "true" OTEL_DOTNET_EXPERIMENTAL_OTLP_RETRY: "in_memory" ASPNETCORE_FORWARDEDHEADERS_ENABLED: "true" HTTP_PORTS: "${WEBFRONTEND_PORT}" APISERVICE_HTTP: "http://apiservice:${APISERVICE_PORT}" services__apiservice__http__0: "http://apiservice:${APISERVICE_PORT}" APISERVICE_HTTPS: "https://apiservice:${APISERVICE_PORT}" OTEL_EXPORTER_OTLP_ENDPOINT: "http://env-dashboard:18889" OTEL_EXPORTER_OTLP_PROTOCOL: "grpc" OTEL_SERVICE_NAME: "webfrontend" ports: - "${WEBFRONTEND_PORT}" depends_on: apiservice: condition: "service_started" networks: - "aspire"networks: aspire: driver: "bridge"ディレクトリaspire-output
- .env
- .env.Production
- app.Dockerfile
- docker-compose.yaml
aspire-output ディレクトリには、生成された環境変数、app.Dockerfile、および Docker Compose の構成が含まれています。いちばん良い点は、開発者であるあなたがこれらのファイルを自分で作成する必要がないことです!
.env.Production ファイルには、アプリのイメージ名が記載されています。:
APP_IMAGE=app:5d592d0c1d2f417b0c14c4c4a9efb4f0760be8e4app.Dockerfile は、Python をビルドし、さらに Uvicorn を使って React フロントエンドを提供するためのマルチステージ Dockerfile として生成されます:
ARG FRONTEND_IMAGENAME=frontend:50f0ed07a5b8f57b3213e99d96b2e8ff68a1d5d7
FROM ghcr.io/astral-sh/uv:python3.13-bookworm-slim AS builder
# Enable bytecode compilation and copy mode for the virtual environmentENV UV_COMPILE_BYTECODE=1ENV UV_LINK_MODE=copy
WORKDIR /app
# Copy pyproject.toml to install dependenciesCOPY pyproject.toml /app/
# Install dependencies and generate lock file# Uses BuildKit cache mount to speed up repeated buildsRUN --mount=type=cache,target=/root/.cache/uv \    uv sync --no-install-project --no-dev
# Copy the rest of the application source and install the projectCOPY . /appRUN --mount=type=cache,target=/root/.cache/uv \    uv sync --no-dev
FROM ${FRONTEND_IMAGENAME} AS frontend_stage
FROM python:3.13-slim-bookworm AS app
COPY --from=frontend_stage /app/dist /app/./static
# ------------------------------# 🚀 Runtime stage# ------------------------------# Create non-root user for securityRUN groupadd --system --gid 999 appuser && useradd --system --gid 999 --uid 999 --create-home appuser
# Copy the application and virtual environment from builderCOPY --from=builder --chown=appuser:appuser /app /app
# Add virtual environment to PATH and set VIRTUAL_ENVENV PATH=/app/.venv/bin:${PATH}ENV VIRTUAL_ENV=/app/.venvENV PYTHONDONTWRITEBYTECODE=1ENV PYTHONUNBUFFERED=1
# Use the non-root user to run the applicationUSER appuser
# Set working directoryWORKDIR /app
# Run the applicationENTRYPOINT ["uvicorn"]最後に、docker-compose.yamlファイルには、API とフロントエンドの両方のサービスが定義されています:
services: env-dashboard: image: "mcr.microsoft.com/dotnet/nightly/aspire-dashboard:latest" expose: - "18888" - "18889" networks: - "aspire" restart: "always" app: image: "${APP_IMAGE}" command: - "main:app" - "--host" - "0.0.0.0" - "--port" - "8000" environment: OTEL_TRACES_EXPORTER: "otlp" OTEL_LOGS_EXPORTER: "otlp" OTEL_METRICS_EXPORTER: "otlp" OTEL_PYTHON_LOGGING_AUTO_INSTRUMENTATION_ENABLED: "true" PORT: "8000" OTEL_EXPORTER_OTLP_ENDPOINT: "http://env-dashboard:18889" OTEL_EXPORTER_OTLP_PROTOCOL: "grpc" OTEL_SERVICE_NAME: "app" ports: - "8000" networks: - "aspire"networks: aspire: driver: "bridge"Azure Container Apps へデプロイした後、Aspire CLI はデプロイ状態ファイルをローカルマシンに保存します。
ディレクトリ%USERPROFILE%
- .aspire/deployments/[AppHost-Sha256]/production.json
ディレクトリ$HOME
- .aspire/deployments/[AppHost-Sha256]/production.json
デプロイを検証する
Section titled “デプロイを検証する”デプロイ後にアプリケーションが期待どおりに動作していることを確認するには、デプロイ先に応じた以下の手順に従ってください。
Docker Compose にデプロイすると、aspire deploy コマンドは各サービスが実行されている URL を表示します。デプロイ出力内の print-*-summary ステップを確認してください。ここには、WithExternalHttpEndpoints が構成されている各サービスの localhost URL が表示されます。
デプロイ出力には、次のような行が表示されます:
14:28:35 (print-env-dashboard-summary) i [INF] Successfully deployed env-dashboard to http://localhost:54633.14:28:35 (print-webfrontend-summary) i [INF] Successfully deployed webfrontend to http://localhost:54463.Web ブラウザーを開き、Web フロントエンドとして表示されている URL(例: http://localhost:54463)にアクセスすると、デプロイされたアプリケーションを確認できます。
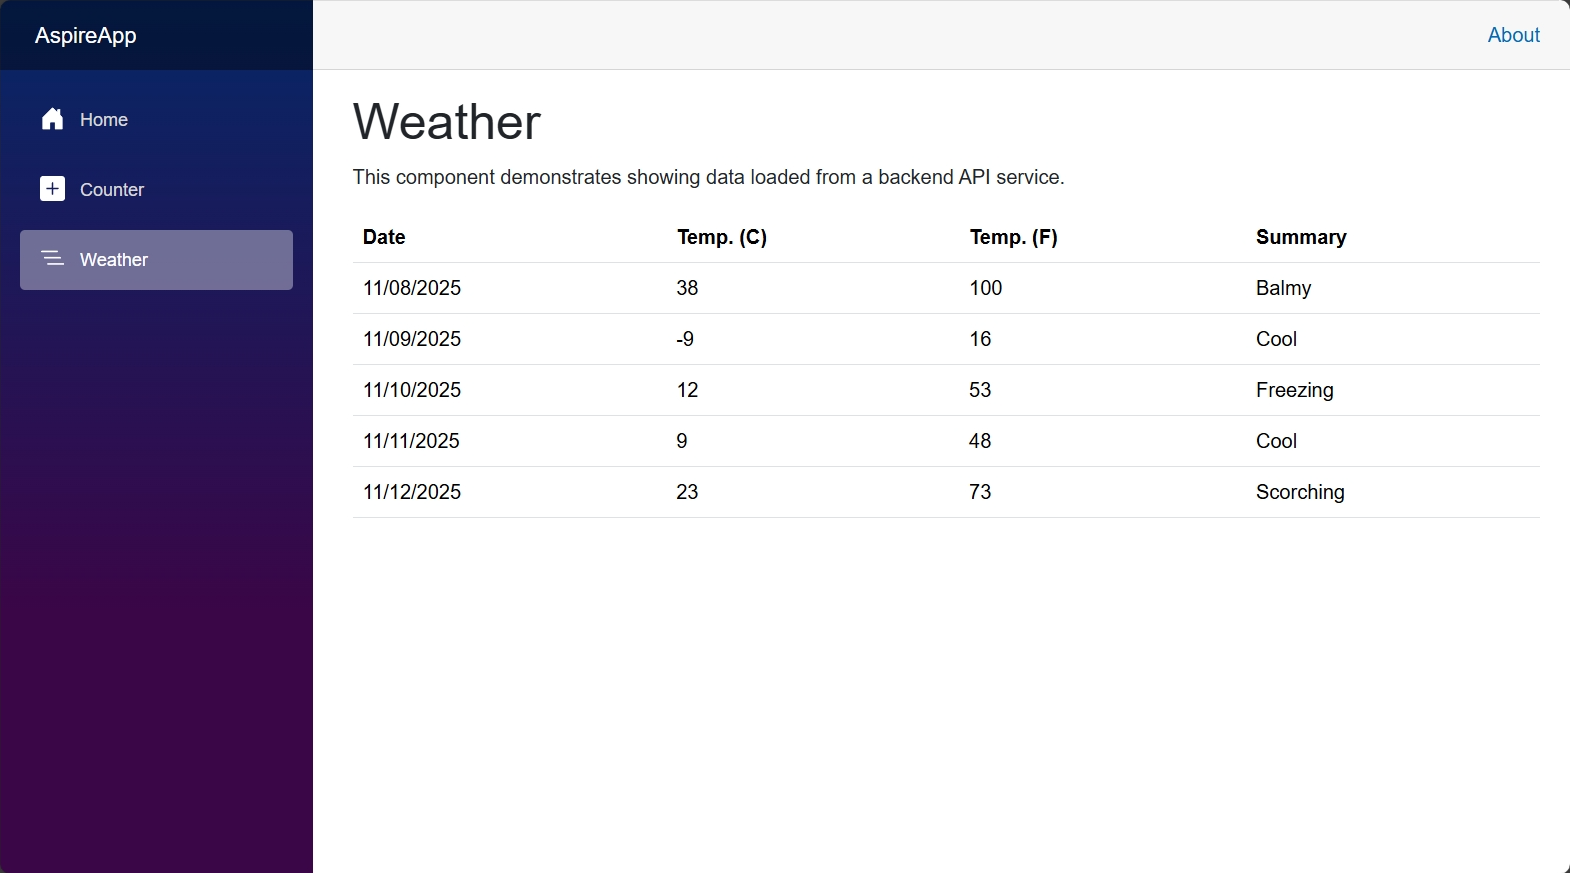
フロントエンドには、ASP.NET Core Blazor アプリケーションの天気予報データが表示されます。
デプロイ出力には、次のような行が表示されます:
13:24:13 (print-env-dashboard-summary) i [INF] Successfully deployed env-dashboard to http://localhost:54633.13:24:13 (print-app-summary) i [INF] Successfully deployed app to http://localhost:54463.Web ブラウザーを開き、アプリとして表示されている URL(例: http://localhost:54463)にアクセスすると、デプロイされたアプリケーションを確認できます。
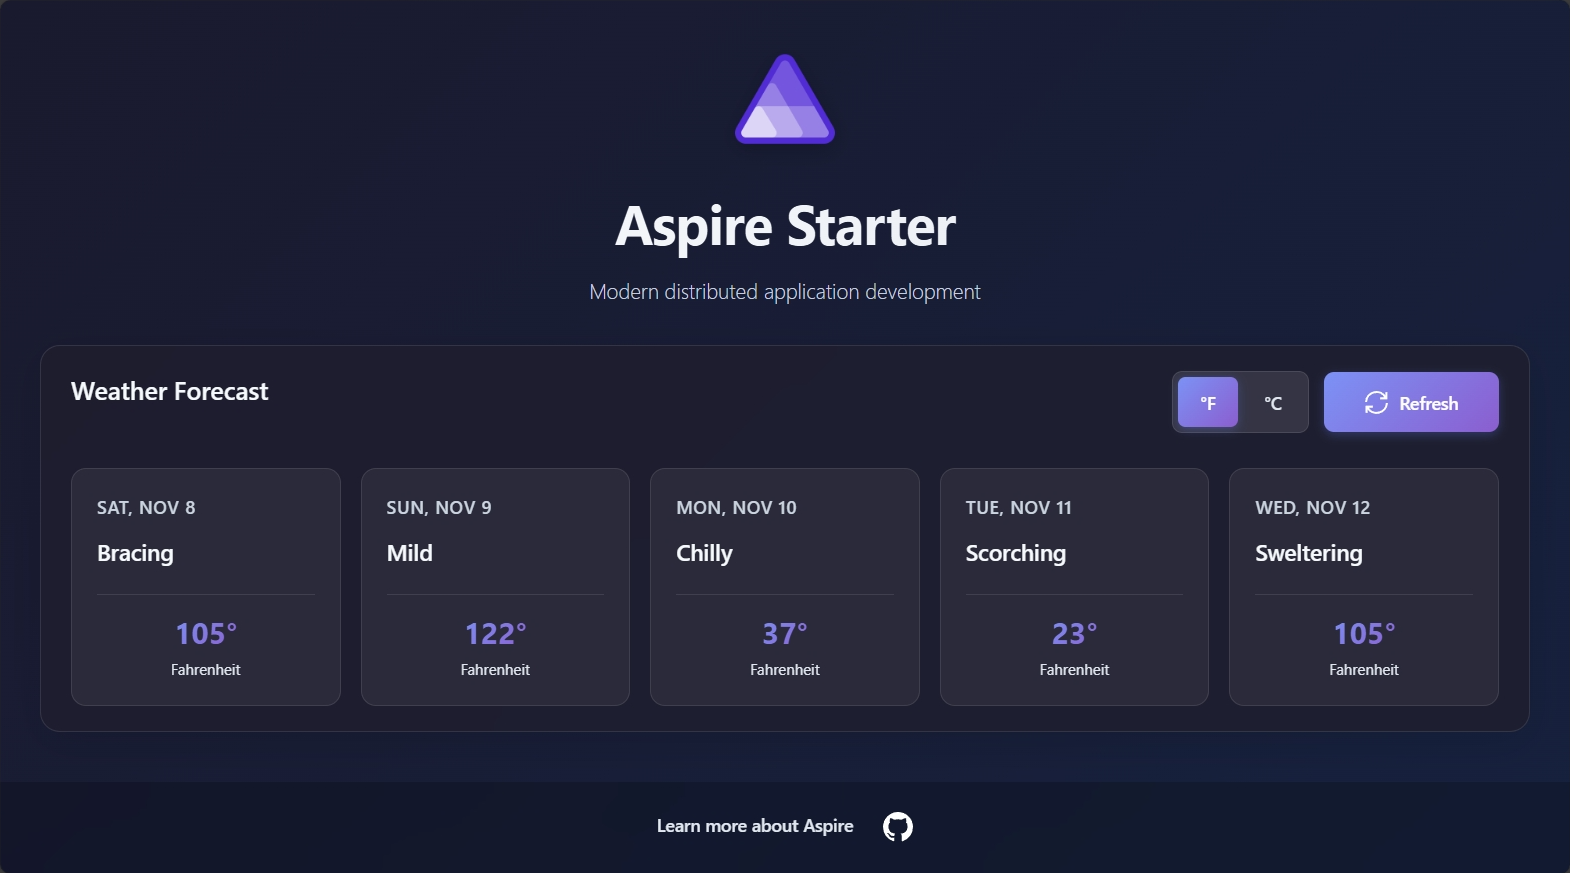
フロントエンドには、美しい React テンプレートで天気予報データが表示されます。この例では、API サービスと React フロントエンドの両方が同じ Docker コンテナー内で実行されています。
Azure Container Apps へデプロイした際は、デプロイ出力に表示される URL にアクセスすることで、ASP.NET Core/Blazor アプリケーションが動作しているか確認できます。出力の中に次のような行が含まれているはずです:
09:21:44 (print-webfrontend-summary) i [INF] Successfully deployed webfrontend to https://{NAME}.{LOCATION}.azurecontainerapps.ioWeb ブラウザを開き、表示された URL にアクセスしてデプロイされたアプリケーションをご確認ください。
フロントエンドには、ASP.NET Core Blazor アプリケーションの天気予報データが表示されます。
Azure Container Apps へデプロイした際は、デプロイ出力に表示される URL にアクセスすることで、Python/React アプリケーションが動作しているか確認できます。出力の中に次のような行が含まれているはずです:
09:25:29 (print-app-summary) i [INF] Successfully deployed app to https://{NAME}.{LOCATION}.azurecontainerapps.ioWeb ブラウザを開き、表示された URL にアクセスしてデプロイされたアプリケーションをご確認ください。
フロントエンドには、美しい React テンプレートで天気予報データが表示されます。この例では、API サービスと React フロントエンドの両方が同じ Docker コンテナー内で実行されています。
リソースをクリーンアップする
Section titled “リソースをクリーンアップする”After deploying your application, it’s important to clean up resources to avoid incurring unnecessary costs or consuming local system resources.
Docker Compose でデプロイした後のリソースをクリーンアップするには、次のコマンドを使用して実行中のコンテナーを停止・削除できます:
aspire do docker-compose-down-envAzure へデプロイした後のリソースをクリーンアップするには、Azure CLI を使用してアプリケーションを含むリソースグループを削除します。これにより、そのリソースグループ内のすべてのリソースが削除されます。
az group delete --name <RESOURCE_GROUP_NAME> --yes --no-wait関連する基礎概念を詳しく知るには、Pipelines and app topologyをご覧ください。
初めての Aspire アプリを構築し、本番環境へデプロイしました。おめでとうございます! 🎉 次に思うのはきっとこうでしょう: 「これらすべてのサービスが本当に正しく連携して動くことを、どうやって確認するの?」 そこで登場するのが 統合テスト です。Aspire なら、サービス間通信やリソース依存関係を含むアプリケーション全体のスタックを簡単にテストできます。さっそく始めてみませんか? 最初のテストを書く