


Dev Containers in Visual Studio Code
Это содержимое пока не доступно на вашем языке.
The Dev Containers Visual Studio Code extension lets your team define SDKs, command-line tools, editor extensions, and supporting services as part of a repository.
The maintained Aspire template starts from Ubuntu and installs Aspire, Docker-in-Docker, Node.js, Python and uv, .NET, and PowerShell as peer Dev Container Features. The template is intentionally broad, so you can remove or replace any runtime your app doesn’t need.
Aspire also configures forwarded ports so the dashboard and resource endpoints are easier to open from Visual Studio Code.
Dev Containers vs. GitHub Codespaces
Section titled “Dev Containers vs. GitHub Codespaces”Using Dev Containers in Visual Studio Code is similar to using GitHub Codespaces. Although the experiences are similar, there are some differences. For more information on using Aspire with GitHub Codespaces, see Aspire and GitHub Codespaces.
Quick start using template repository
Section titled “Quick start using template repository”To configure Dev Containers in Visual Studio Code, use the .devcontainer/devcontainer.json file in your repository. The simplest way to get started is by creating a new repository from the Aspire Dev Container template. Follow these steps:
-
Create a new repository using our template.
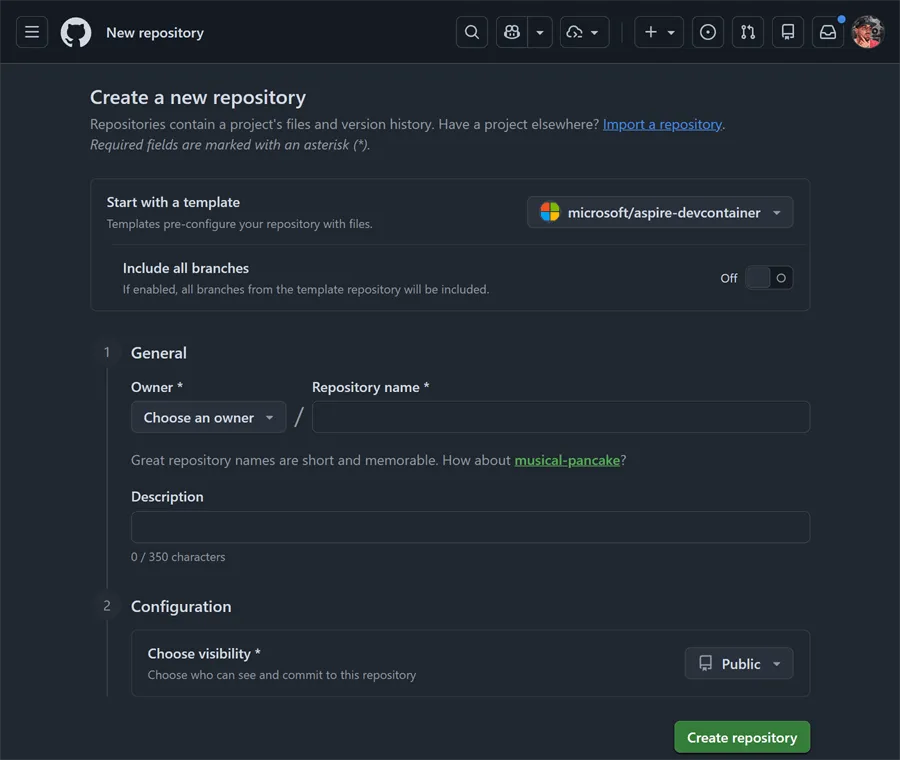
Once you provide the details and select Create repository, the repository is created and shown in GitHub.
-
Clone the repository to your local developer workstation using the following command:
Clone the repository git clone https://github.com/<org>/<repository>.gitcd <repository> -
Open the repository in Visual Studio Code. After a few moments, Visual Studio Code detects the
.devcontainer/devcontainer.jsonfile and prompts to open the repository inside a container. Select whichever option is most appropriate for your workflow.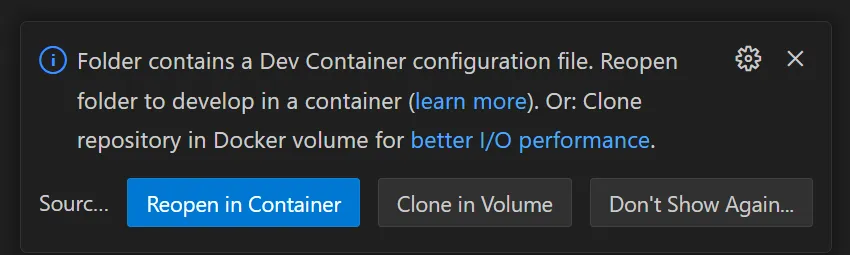
After a few moments, the files become visible and the Dev Container finishes setting up. The template installs the Aspire CLI and several language runtimes, but it doesn’t choose an application language or restore app-specific dependencies for you.
-
Open a terminal in Visual Studio Code and start the interactive project creator:
Choose an Aspire starter aspire newChoose the TypeScript, Python, C#, or mixed-language starter that fits your app, then provide a name when prompted. For this walkthrough, use
aspire-appas the output directory. -
Change to the generated app directory and start dev-time orchestration:
Run the Aspire app cd ./aspire-appaspire runThe Aspire CLI finds the AppHost, starts its resources, and prints a dashboard URL. Open that URL from the terminal to inspect your running app.
Visual Studio Code forwards the dashboard and resource ports from processes and nested containers. Links in the dashboard open the corresponding forwarded endpoints on your host.
The template runs
aspire certs trust --non-interactivewhen the container starts and adds the .NET development certificate trust directory (~/.aspnet/dev-certs/trust) toSSL_CERT_DIRfor OpenSSL-based tools inside the container. Your host browser has a separate trust store, so it might display a certificate warning the first time you open a forwarded HTTPS endpoint.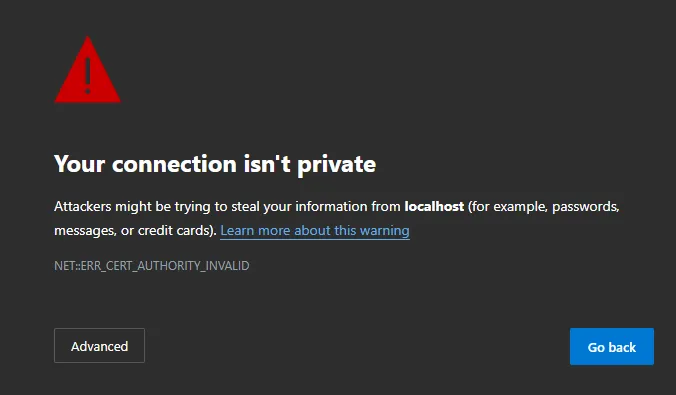
Confirm that the URL belongs to the local forwarded endpoint before you continue past the warning.
-
Commit changes to the GitHub repository.
After successfully creating the Aspire project and verifying that it launches and you can access the dashboard, it’s a good idea to commit the changes to the repository.
Use Aspire in an existing Dev Container
Section titled “Use Aspire in an existing Dev Container”If your repository already exists, add a devcontainer.json file to its .devcontainer folder:
Директория.devcontainer
- devcontainer.json
Use the maintained Aspire template configuration as your starting point. Linking to the source file keeps your setup aligned with the tested template as its feature versions and lifecycle settings change.
The template keeps Aspire and each language runtime separate:
| Tooling | Purpose |
|---|---|
| Aspire CLI and VS Code extension | Create, run, debug, and observe distributed apps |
| Docker-in-Docker | Run container resources such as databases, caches, and message brokers |
| Node.js LTS | Develop JavaScript and TypeScript apps |
| Python and uv | Develop Python apps and manage packages and virtual environments |
| .NET SDK and C# Dev Kit | Develop .NET apps |
| PowerShell | Run cross-platform automation |
Remove language features and matching editor extensions that your repository doesn’t need, or change their versions to match your app. The Aspire Dev Container Feature installs the Aspire CLI and shared editor and port-forwarding settings; language SDKs remain a choice made by the consuming configuration.
Customize the environment
Section titled “Customize the environment”Choose language tooling
Section titled “Choose language tooling”Treat the template as a polyglot preset rather than a required tool list. Keep only the runtimes, package managers, and editor extensions used by your repository. You can also add Dev Container Features for Java, Go, Rust, or other ecosystems that your Aspire app orchestrates.
Aspire’s orchestration model doesn’t require every resource to use the same language as the AppHost. A TypeScript AppHost can coordinate Python, JavaScript, .NET, executable, and container resources in one app.
Run container resources
Section titled “Run container resources”Keep Docker-in-Docker when your AppHost starts container resources. It gives Aspire an isolated Docker daemon inside the Dev Container, which avoids depending on host-specific socket mounting but requires additional CPU, memory, storage, and privileges.
The maintained template requests 8 CPUs, 32 GB of memory, and 64 GB of storage because it includes several language toolchains and supports nested containers. Reduce those values only after testing the resources your app starts.
For advanced networking or IPv6 requirements, add the necessary runArgs to your copy of the template and verify them with the container runtime used by your team.
Configure HTTPS certificates
Section titled “Configure HTTPS certificates”The template trusts Aspire’s development certificate every time the container starts:
aspire certs trust --non-interactiveIt also adds the .NET development certificate trust directory (~/.aspnet/dev-certs/trust) to SSL_CERT_DIR, so OpenSSL-based tools such as curl can verify HTTPS endpoints inside the container. This trust doesn’t automatically extend to browsers or tools running on the host.
Add scenario-specific tools
Section titled “Add scenario-specific tools”Add only the tools required by your workflow. For example, a Dapr-based app can add the Dapr CLI feature and initialize Dapr during container creation. For Aspire-specific setup, see Aspire Dapr integration.
Common considerations
Section titled “Common considerations”When using Dev Containers with Aspire, keep the following considerations in mind:
Resource requirements
- Apps that run only host processes need fewer resources than apps that start nested containers.
- Multi-language repositories need enough storage for every selected runtime and package cache.
- Dapr, Kubernetes, and larger container topologies might require more resources than the template defaults.
Networking
- Aspire and Visual Studio Code automatically forward dashboard and resource ports.
- Nested container networking depends on the Docker-in-Docker configuration.
- IPv6 and external service access might require additional container runtime settings.
Performance
- Docker-in-Docker adds startup and I/O overhead.
- Codespaces prebuilds can reduce environment creation time for cloud-hosted development.
- Remove unused runtimes and extensions to reduce image size and rebuild time.
Security
- Dev Containers run with elevated privileges when using Docker-in-Docker.
- Certificate trust inside the container doesn’t automatically trust the same endpoint on the host.
- Consider security implications when exposing ports in cloud environments.
 Aspire