SQL Server Hosting integration reference
To get started with the Aspire SQL Server integrations, follow the Get started with SQL Server integrations guide. If you want to use SQL Server with Entity Framework Core (EF Core) in your Aspire client project, see Get started with the SQL Server EF Core integrations.
This article includes full details about the Aspire SQL Server Hosting integration, which models the server as the SqlServerServerResource type and the database as the SqlServerDatabaseResource type. To access these types and APIs, you need to install the SQL Server Hosting integration in your AppHost project.
Installation
Section titled “Installation”To get started with the Aspire SQL Server hosting integration, install the 📦 Aspire.Hosting.SqlServer NuGet package in your AppHost project:
aspire add sqlserverThe Aspire CLI is interactive, be sure to select the appropriate search result when prompted:
Select an integration to add:
> sqlserver (Aspire.Hosting.SqlServer)> Other results listed as selectable options...#:package Aspire.Hosting.SqlServer@*<PackageReference Include="Aspire.Hosting.SqlServer" Version="*" />Add SQL Server resource and database resource
Section titled “Add SQL Server resource and database resource”In your AppHost project, call AddSqlServer to add and return a SQL Server resource builder. Chain a call to the returned resource builder to AddDatabase, to add SQL Server database resource.
var builder = DistributedApplication.CreateBuilder(args);
var sql = builder.AddSqlServer("sql")                 .WithLifetime(ContainerLifetime.Persistent);
var db = sql.AddDatabase("database");
builder.AddProject<Projects.ExampleProject>("exampleproject")       .WithReference(db)       .WaitFor(db);
// After adding all resources, run the app...
builder.Build().Run();When Aspire adds a container image to the AppHost, as shown in the preceding example with the mcr.microsoft.com/mssql/server image, it creates a new SQL Server instance on your local machine. A reference to your SQL Server resource builder (the sql variable) is used to add a database. The database is named database and then added to the ExampleProject.
When adding a database resource to the app model, the database is created if it doesn’t already exist. The creation of the database relies on the AppHost eventing APIs, specifically ResourceReadyEvent. In other words, when the sql resource is ready, the event is raised and the database resource is created.
The SQL Server resource includes default credentials with a username of sa and a random password generated using the CreateDefaultPasswordParameter method.
When the AppHost runs, the password is stored in the AppHost’s secret store. It’s added to the Parameters section, for example:
{ "Parameters:sql-password": "<THE_GENERATED_PASSWORD>"}The name of the parameter is sql-password, but really it’s just formatting the resource name with a -password suffix. For more information, see Safe storage of app secrets in development in ASP.NET Core and Add SQL Server resource with parameters.
The WithReference method configures a connection in the ExampleProject named database.
Add SQL Server resource with database scripts
Section titled “Add SQL Server resource with database scripts”By default, when you add a SqlServerDatabaseResource, it relies on the following SQL script to create the database:
IF( NOT EXISTS ( SELECT 1 FROM sys.databases WHERE name = @DatabaseName ))CREATE DATABASE [<QUOTED_DATABASE_NAME>];To alter the default script, chain a call to the WithCreationScript method on the database resource builder:
var builder = DistributedApplication.CreateBuilder(args);
var sql = builder.AddSqlServer("sql")                 .WithLifetime(ContainerLifetime.Persistent);
var databaseName = "app-db";var creationScript = $$"""    IF DB_ID('{{databaseName}}') IS NULL        CREATE DATABASE [{{databaseName}}];    GO
    -- Use the database    USE [{{databaseName}}];    GO
    -- Create the todos table    CREATE TABLE todos (        id INT PRIMARY KEY IDENTITY(1,1),        -- Unique ID for each todo        title VARCHAR(255) NOT NULL,             -- Short description of the task        description TEXT,                        -- Optional detailed description        is_completed BIT DEFAULT 0,              -- Completion status        due_date DATE,                           -- Optional due date        created_at DATETIME DEFAULT GETDATE()    -- Creation timestamp    );    GO
    """;
var db = sql.AddDatabase(databaseName)            .WithCreationScript(creationScript);
builder.AddProject<Projects.AspireApp_ExampleProject>("exampleproject")       .WithReference(db)       .WaitFor(db);
// After adding all resources, run the app...
builder.Build().Run();
The preceding example creates a database named app-db with a single todos table. The SQL script is executed when the database resource is created. The script is passed as a string to the WithCreationScript method, which is then executed in the context of the SQL Server resource.
Add SQL Server resource with data volume
Section titled “Add SQL Server resource with data volume”To add a data volume to the SQL Server resource, call the WithDataVolume method on the SQL Server resource:
var builder = DistributedApplication.CreateBuilder(args);
var sql = builder.AddSqlServer("sql")                 .WithDataVolume();
var db = sql.AddDatabase("database");
builder.AddProject<Projects.AspireApp_ExampleProject>("exampleproject")       .WithReference(db)       .WaitFor(db);
// After adding all resources, run the app...
builder.Build().Run();
The data volume is used to persist the SQL Server data outside the lifecycle of its container. The data volume is mounted at the /var/opt/mssql path in the SQL Server container and when a name parameter isn’t provided, the name is generated at random. For more information on data volumes and details on why they’re preferred over bind mounts, see Docker docs: Volumes.
Add SQL Server resource with data bind mount
Section titled “Add SQL Server resource with data bind mount”To add a data bind mount to the SQL Server resource, call the WithDataBindMount method:
var builder = DistributedApplication.CreateBuilder(args);
var sql = builder.AddSqlServer("sql")                 .WithDataBindMount(source: @"C:\SqlServer\Data");
var db = sql.AddDatabase("database");
builder.AddProject<Projects.AspireApp_ExampleProject>("exampleproject")       .WithReference(db)       .WaitFor(db);
// After adding all resources, run the app...
builder.Build().Run();Data bind mounts rely on the host machine’s filesystem to persist the SQL Server data across container restarts. The data bind mount is mounted at the C:\SqlServer\Data on Windows (or /SqlServer/Data on Unix) path on the host machine in the SQL Server container. For more information on data bind mounts, see Docker docs: Bind mounts.
Add SQL Server resource with parameters
Section titled “Add SQL Server resource with parameters”When you want to explicitly provide the password used by the container image, you can provide these credentials as parameters. Consider the following alternative example:
var builder = DistributedApplication.CreateBuilder(args);
var password = builder.AddParameter("password", secret: true);
var sql = builder.AddSqlServer("sql", password);var db = sql.AddDatabase("database");
builder.AddProject<Projects.AspireApp_ExampleProject>("exampleproject")       .WithReference(db)       .WaitFor(db);
// After adding all resources, run the app...
builder.Build().Run();
For more information on providing parameters, see External parameters.
Use a specific SQL Server container image tag
Section titled “Use a specific SQL Server container image tag”If you want to use a specific tag for the SQL Server container image, you can call the WithImageTag method to override the default tag. This is useful when you need to test against a specific version of SQL Server:
var builder = DistributedApplication.CreateBuilder(args);
var sql = builder.AddSqlServer("sql")                 .WithImageTag("2025-RTM-ubuntu-24.04-preview");
var db = sql.AddDatabase("database");
builder.AddProject<Projects.AspireApp_ExampleProject>("exampleproject")       .WithReference(db)       .WaitFor(db);
// After adding all resources, run the app...
builder.Build().Run();
The preceding code uses the 2025-RTM-ubuntu-24.04-preview tag for the SQL Server container image. For a list of available tags, see SQL Server container image tags.
Connect to database resources
Section titled “Connect to database resources”When the Aspire AppHost runs, the server’s database resources can be accessed from external tools, such as SQL Server Management Studio (SSMS) or MSSQL for Visual Studio Code. The connection string for the database resource is available in the dependent resources environment variables and is accessed using the Aspire dashboard: Resource details pane. The environment variable is named ConnectionStrings__{name} where {name} is the name of the database resource, in this example it’s database. Use the connection string to connect to the database resource from external tools. Imagine that you have a database named todos with a single dbo.Todos table.
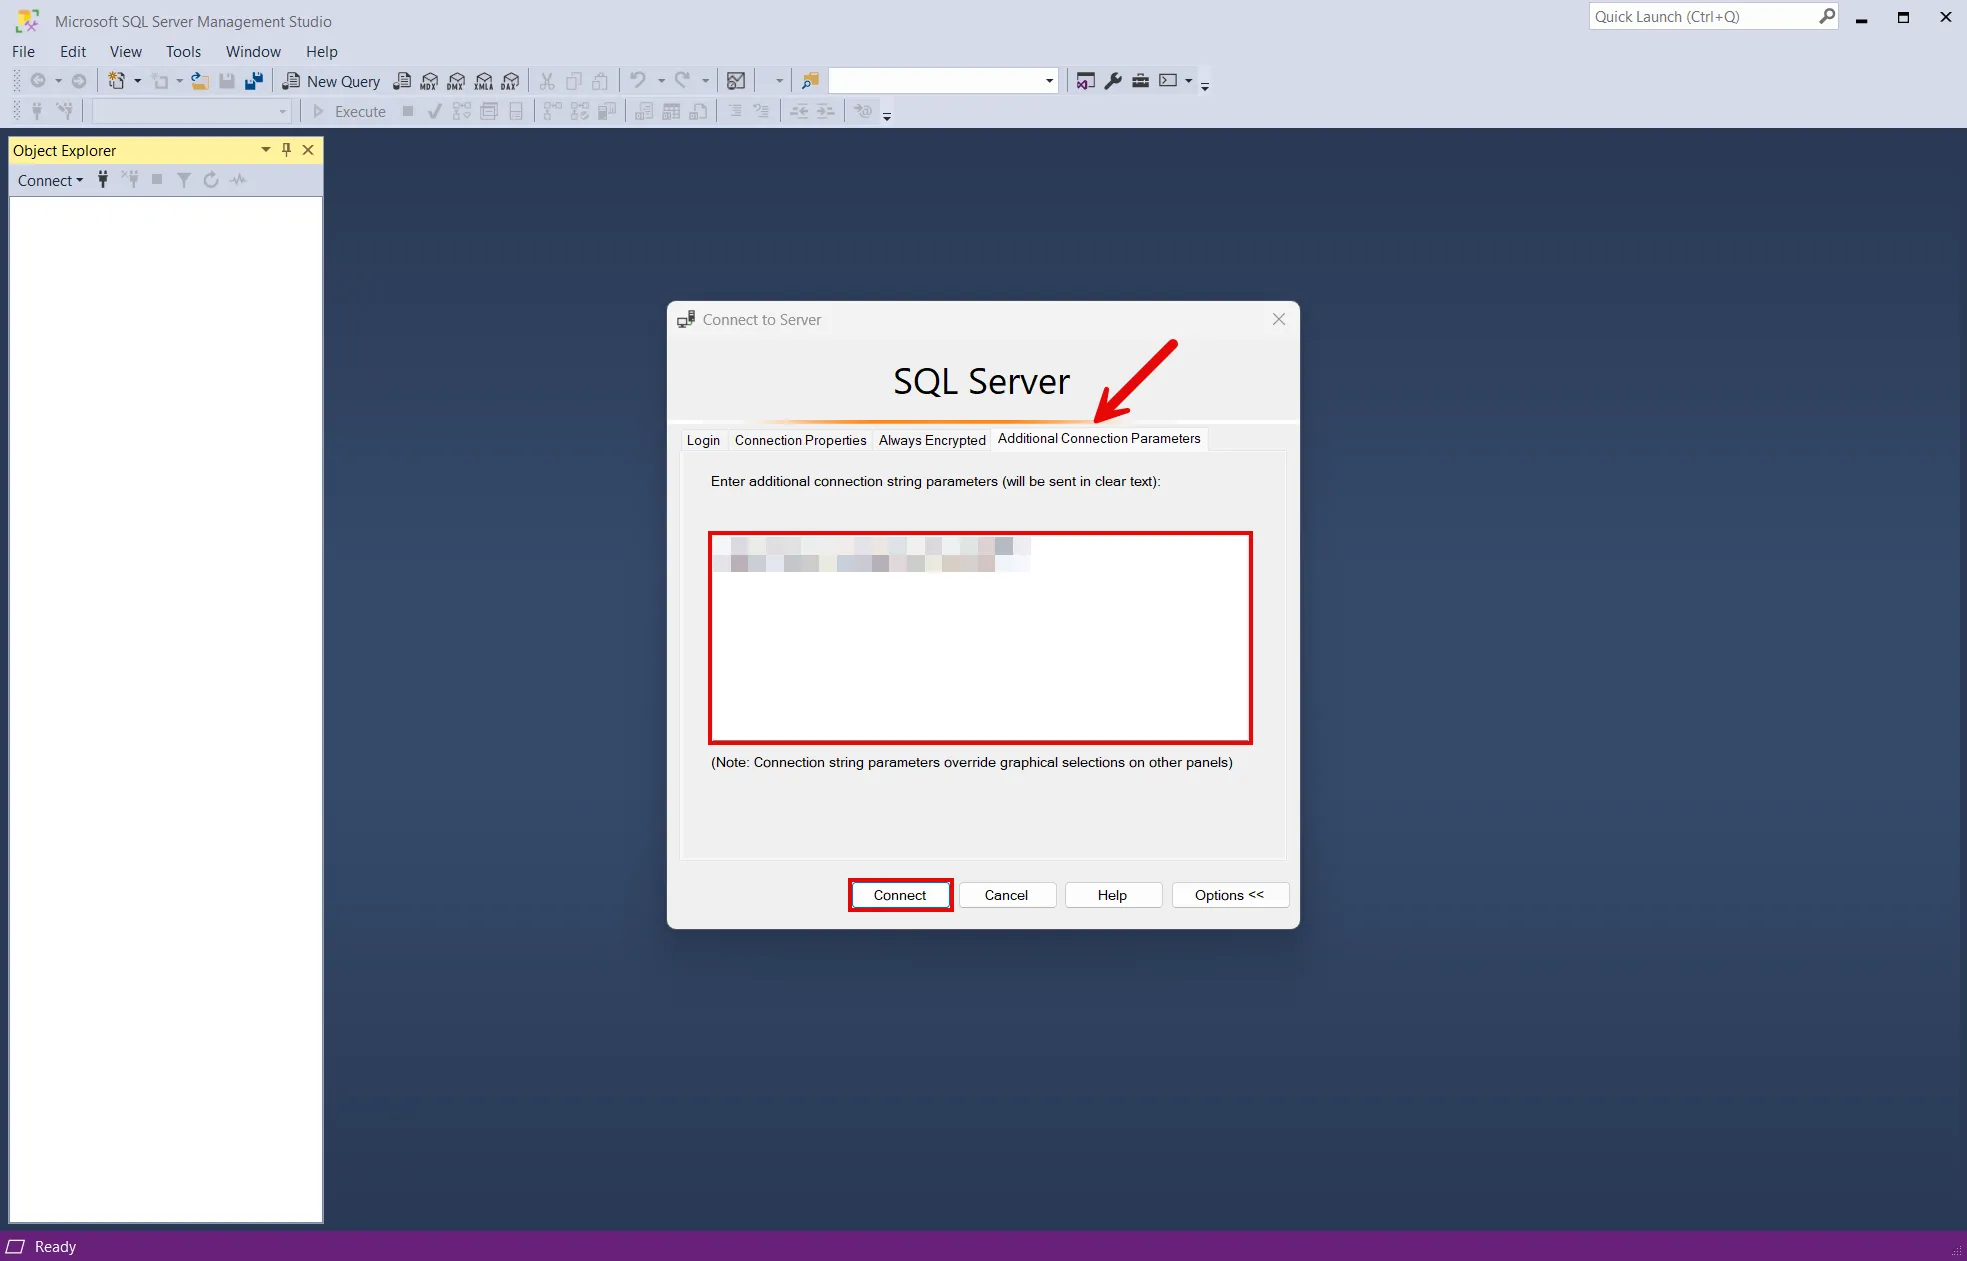
To connect to the database resource from SQL Server Management Studio, follow these steps:
-
Open SSMS.
-
In the Connect to Server dialog, select the Additional Connection Parameters tab.
-
Paste the connection string into the Additional Connection Parameters field and select Connect.
-
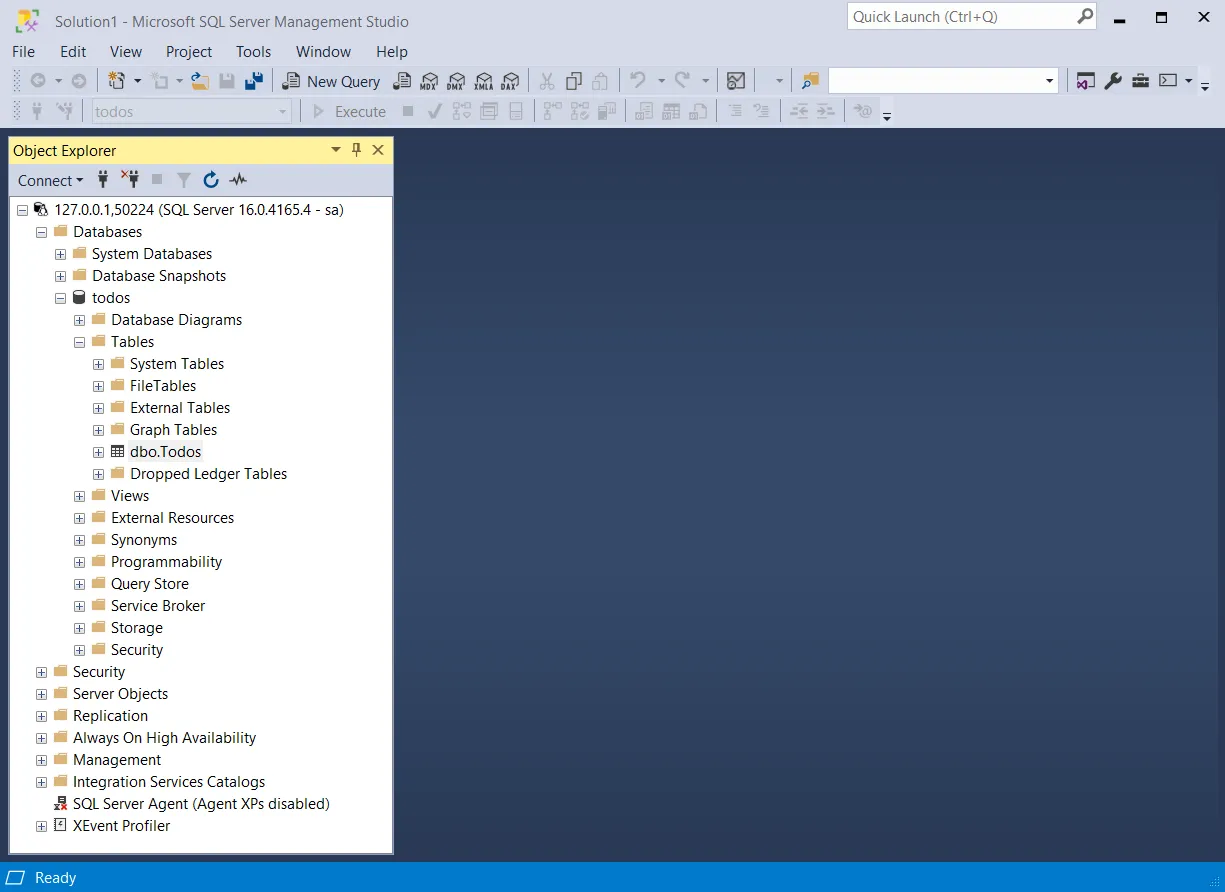
If you’re connected, you can see the database resource in the Object Explorer:
For more information, see SQL Server Management Studio: Connect to a server.
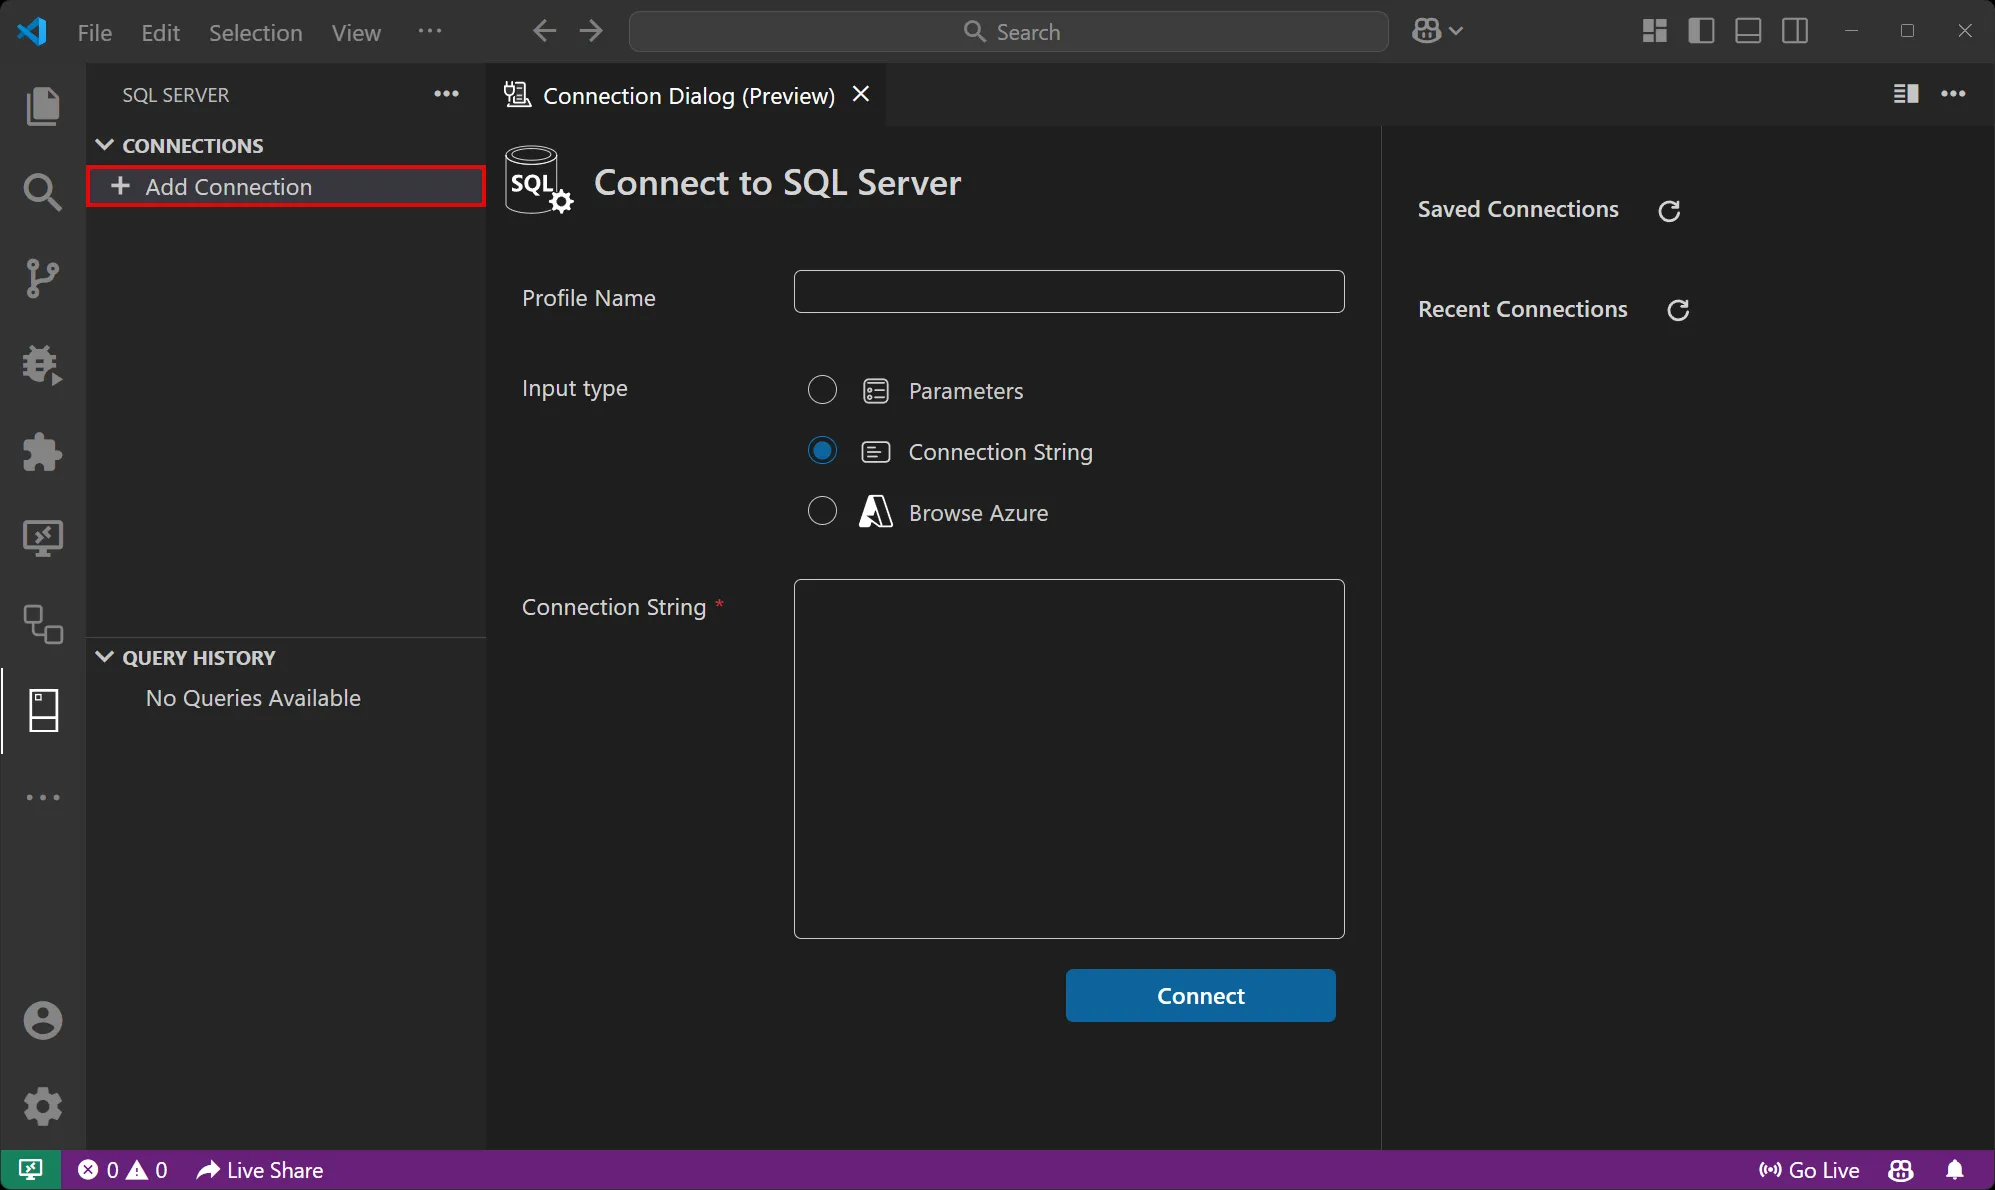
To connect to the database resource from MSSQL for Visual Studio Code, follow these steps:
-
Open the SQL SERVER extension.
-
Select the Add Connection option under CONNECTIONS.
-
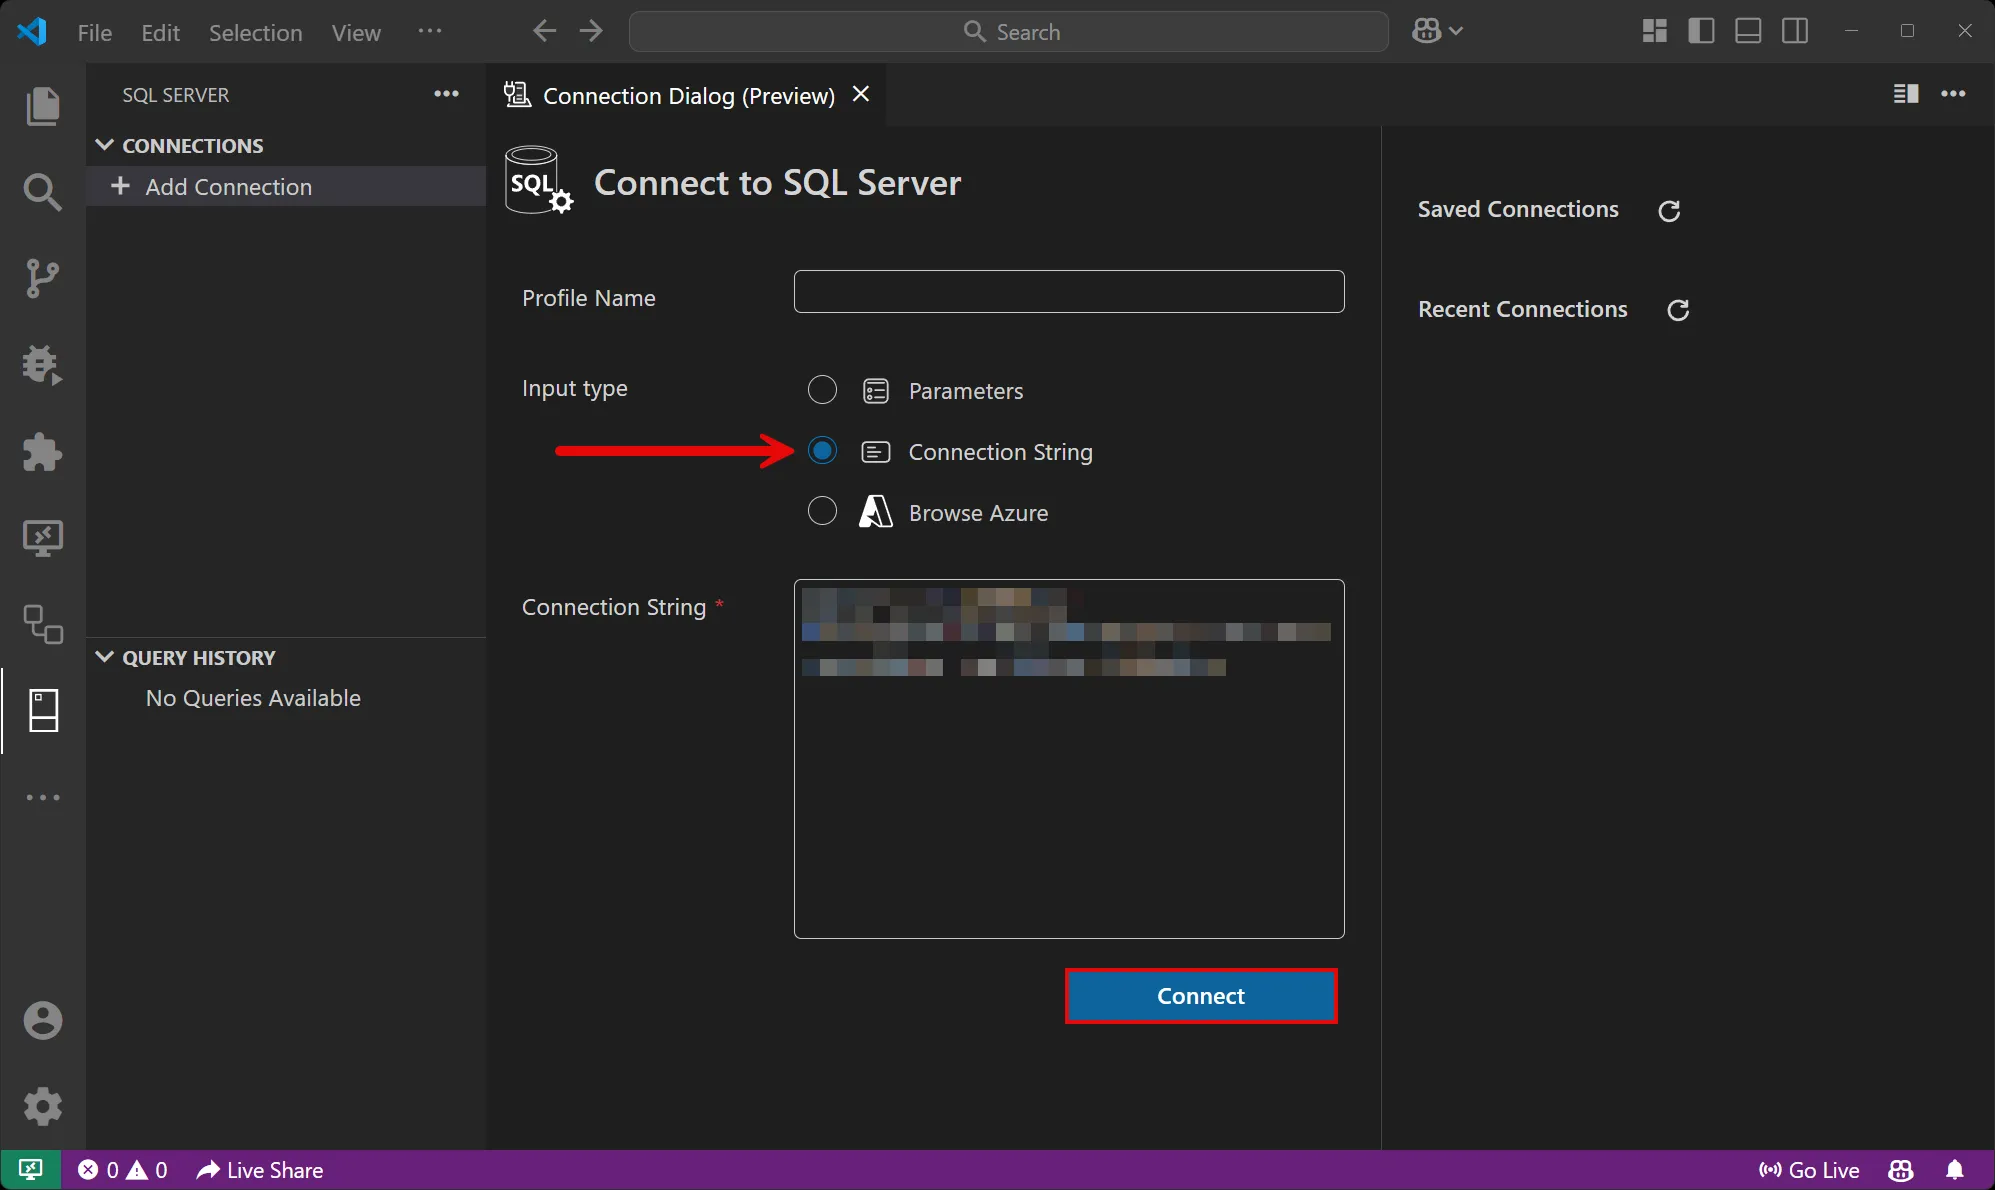
Change the Input type to Connection string and paste the connection string into the Connection string field.
-
Select Connect.
-
Once you’re connected, you can see the database resource in the active tab and run queries against it:

For more information, see MSSQL for Visual Studio Code.
Hosting integration health checks
Section titled “Hosting integration health checks”The SQL Server hosting integration automatically adds a health check for the SQL Server resource. The health check verifies that the SQL Server is running and that a connection can be established to it.
The hosting integration relies on the 📦 AspNetCore.HealthChecks.SqlServer NuGet package.
Using with non-.NET applications
Section titled “Using with non-.NET applications”When you use the WithReference method to pass a SQL Server database resource to a non-.NET application (such as Python or JavaScript), Aspire automatically injects environment variables that describe the connection information. These environment variables follow the naming convention [RESOURCE]_[PROPERTY], where RESOURCE is the uppercase name of the resource and PROPERTY is the name of the connection property.
For example, if you reference a SQL Server database resource named sqldb:
var sqldb = sql.AddDatabase("sqldb");
var pythonApp = builder.AddUvicornApp("api", "./api", "main:app")    .WithReference(sqldb);
The following environment variables are available in the Python application:
SQLDB_HOST- The hostname or IP addressSQLDB_PORT- The port numberSQLDB_USERNAME- The username for authenticationSQLDB_PASSWORD- The password for authenticationSQLDB_DATABASE- The database nameSQLDB_URI- The full connection URISQLDB_JDBCCONNECTIONSTRING- JDBC-format connection string
You can access these environment variables in your application code:
import osimport pyodbc
sql_host = os.getenv("SQLDB_HOST")sql_port = os.getenv("SQLDB_PORT", "1433")sql_user = os.getenv("SQLDB_USERNAME")sql_password = os.getenv("SQLDB_PASSWORD")sql_database = os.getenv("SQLDB_DATABASE")
connection_string = (    f"DRIVER={{ODBC Driver 18 for SQL Server}};"    f"SERVER={sql_host},{sql_port};"    f"DATABASE={sql_database};"    f"UID={sql_user};"    f"PWD={sql_password};")
connection = pyodbc.connect(connection_string)import sql from 'mssql';
const config = { server: process.env.SQLDB_HOST, port: parseInt(process.env.SQLDB_PORT), user: process.env.SQLDB_USERNAME, password: process.env.SQLDB_PASSWORD, database: process.env.SQLDB_DATABASE};
const pool = await sql.connect(config);For the complete list of properties available, see Properties of the SQL Server resources.
Client integration
Section titled “Client integration”To learn how to connect to and interact with SQL Server databases from your consuming projects, see SQL Server Client integration.